Leaderboard
Popular Content
Showing content with the highest reputation on 15/09/16 in all areas
-
16 points
-
Eventually this one will find it's way into a diorama, it's my Mirror models Diamond T wrecker with a few mods to represent a post war civilian truck... essentially built from the box with the exception of adding the larger wheels from the Tamiya Dragon Wagon after finding a photo of the real vehicle similarly converted... was a bit of fun getting it all to fit but here it is...10 points
-
In 1946, the Air Ministry and the Admiralty issued the specifications F.44/46 and N.40/46 for a twin-engined, two-seat long range fighter. De Havilland responded with their de Havilland 110, and Gloster with their GA.5. The RAF expressed an interest in the de Havilland project, and a number of prototypes were ordered. The Navy rejected both proposals, and opted for an enhanced Sea Venom. Gloster lobbied successfully, and prototypes of their tailed delta design were also ordered, even though the de Havilland design seemed more promising. By 1951, the dH 110 was well into its test programme, regularly flying supersonically, while the GA.5 (Javelin) was plagued by flutter and other aerodynamic problems. Then, at the Farnborough Air Show on 6th September 1952, the dH 110 prototype WG236 broke up in transonic flight, with the engines and forward fuselage ploughing into the crowd, killing the crew and 29 spectators, and severely injuring more than 60 others. The RAF switched its attentions to the Javelin, and four years later, the Navy accepted a navalised dH 110 as the Sea Vixen. But what if . . . If John Derry had flown his display without incident, the Air Ministry’s choice may well have alighted on the de Havilland design. It was aerodynamically superior to the Javelin, which was thick-winged and draggy, with inadequate pitch control and engines buried so deeply in the fuselage that power losses in the intakes and exhausts emasculated them. The Vixen, on the other hand, was aerodynamically cleaner, with a relatively thin wing, and offered potential advantages in range, speed and acceleration. It was also cleared for use of the Firestreak and Red Top Missile much earlier than was the Javelin. If the RAF had gone with the Vixen, by 1970 they might have ended up with this: de Havilland Vixen F(AW).5, 11 Sqn, RAF, Geilenkirchen, 1970. Enjoy! Ian10 points
-
Well, that seemed to work so press on. (I heard a bloop noise and a notification popped up saying Keith did something... must read these and find out where they go... there it was again!) Aha! Notification when someone replies as you're typing... Thanks Keith and Giorgio (and now I've used multi-quote, crikey...) Two more saved posts to go... with a Typhoon in Last time we looked I was pondering the canopy. Luckily I remembered the seat transfers. Oh, and the pilot’s arms: This part is a puzzle, until you realise that the lug on the bottom needs to come off, and then the canopy sits down OK: Until you look closely: It did sort of click on and I think its got pinched together. Oh well, we can sort that out. I used the BlueFixx for the first time on a canopy and I must say the gel is great - it goes into gaps and fills nicely, can be smoothed / cleaned off while wet, and then the ‘hardening’ light lets you see and gaps that you can go back and fill straight away. Bit hard to see where the black canopy meets the black fuselage but not too bad. Then it was on with the last bits, these tiny, tiny thingies. There’s a seam there and the second shot shows it after a quick attack with the ninja scraper: A quick trip around the seams, easily dealt with using PPP. Just don’t fill in the hole mid-root on the port side: Now for the canopy again. When I looked to mask it I noticed that it’s not quite even around the join between the parts, the back is sticking up on one side (??!!) and the front is a bit rough. I brushed some primer on to highlight the problems: Now, we all know that fortune favours the brave (and punishes the stupid) so I got out the sanders and did this: Don’t panic! After varying grades of Micromesh I had this: Remembering that Micromesh likes a ‘polishing pressure' - press to hard and it doesn’t work as well. Then some polishing liquid: and a coat of Aqua Gloss (still a bit wet here): Back to the pretty rubbish quality that was there before. I’ll get the canopy masked, some paint on and then I can look forward to all these stencils: Alex has already noticed the ‘bendy jet’ at the bottom; it’s just where I’m holding the paper up, honest!9 points
-
With the forum down there was nothing for it but to do some modelling. But first, some tidying up. I know some of you think my workbench is tidy but I tend to go for very tidy and this is a bit messy: I mean, look at this and this: So I bought the ‘HobbyZone Workshop Benchtop Organizer # WM1' from eModels (great service) and spent some time with a hammer and some glue. I now have this: Of course it needs bench testing (see what I did there?) but I’m now a much happier (if a bit anal) bunny. Time to do some Typhoon!9 points
-
Hello folks , this is the special hobby kit finished in Indian Air Force colours . When the British quit the land for good (1947) , we inherited about 100 each Tempest and Spitfires from the Brits and operated both types for up to 5 years first as front line fighter and later as trainer after we acquired the Vampires and Ouragans . This is I believe one of the older special hobby kit and it proved to be a very frustrating build , the resin wheel well especially required machine tool to sand it down ! This was my first mixed media model built last year and it has everything - PE , resin( including the cowling nose ) and vacuform canopy . The black trimmings were airbrushed and the aluminium was brush painted with Gunze Metal colour before being sealed with a matte coat - these things were painted in Aluminium paint and not actual natural metal so they were not very shiny . I have also added a photo clicked in 2015 at the Delhi Air force museum of the real thing . Ps: I tried to improvise and improve my photography to remove background clutter , as such I would appreciate what improvements I can do to improve the photo further ? Thank you for checking out8 points
-
Heres my attempt at Eduard's MiG-21R. I've tried to replicate the weathering that was shown in one of the photos in the accompanying book from the Silver Arrows kit. As photography is not one of my strong points I had to make do with my camera phone, so they're not up to the standard usually seen on here. It's one thing I really need to work on. Oh, and please excuse the state of the workbench. Everything on it, under it and generally within its vicinity is a work in progress! And in company with Trumpeter's MiG-21F-13... All comment are very welcome and thanks for looking.7 points
-
So the state of play before this fancy-pants new forum (nice work Mike...) sprang up last night was this: 1.5 wings on and filled with sprue soup, then an overlay of PPP. Once that combination had a decent interval to cure, it was a few glamorous hours of file, sand, w&d, prime and repeat. A diagnostic micromeshing all over and we're left with this: The wing-roots weren't too bad in the end so I'm quite pleased with the way they've turned out. I've definitely benefitted from all the advice on various fillers on this build (cheers chaps!) - the Squadron green is largely in retirement as dissolved sprue, PPP and Mr. Surfacer are giving me far better results. Rooting around in reference photos I noticed that the large engine access panel that sits on top of the fuselage behind the fireproof bulkhead appears slightly proud of the main skin, so I've added this using metal tape: Whilst on a roll in that area I also added the squarish panel that sits on the rear of the canopy, just in from of where a couple of antennae and the external canopy handle sit: That's my eyes and patience exhausted for now, leaving the state of play at this: You can see the booms have been mated with the elevator and clamped off for the night - I expect some fiddling and filling will be required at the weekend to get them positioned and blended in with the wings. It's a bit bonkers to think this beast started in late July and we're now in mid-September; it makes me wonder how long it took to build an actual Sea Venom! I have to admit though that even in this half-finished state, picking it up and making faint Ghost-like engine sounds as you tilt it in the light makes you realize just what a rather beautiful shape these aircraft were. I've an old Paul Nash essay on the personalities of aircraft - 'Aerial Creatures': admittedly he was talking about WWII ones but I'm going to check if it's out of copyright and if so I'll scan it in here for you to read. The Sea Venom seems graceful in the way that seabirds are, skimming the winds. Good to be back brethren, Tony7 points
-
Masked up the canopy edges with tape for curves as the forum seems to be warming to it, as am I now. Just takes a bit of warming (rubbing down with a finger), a little stretching and a good burnish down: Filled in the rest with cheap masking tape, again well burnished AND checked for gaps (experience it’s called - never again). Now I know there’s at least one of you out there who’s been thinking ‘when is he going to fit the canards?’. The answer is later. Not intentional. When I was a applying the primer I thought “what are those holes I wonder” and then it hit me: (Those lumpy bits around the canopy join will be sorted) As we all know, I am an idiot. The canards were quickly recovered from the sprue, now chucked in the spares bin, and primed too: This is one of my first jets and the whooshing noises as I sprayed various holes had me worried that paint would now be all over the inside of the canopy - until I remembered that the ‘pit is sealed. I hope. As an educational aside - pay attention at the back - according to Wikipedia “The term ‘canard’ may be used to describe the aircraft itself, the wing configuration or the foreplane.” (so there) and “The term ‘canard’ arose from the appearance of the Santos-Dumont 14-bis of 1906, which was said to be reminiscent of a duck (canard in French) with its neck stretched out in flight.” Qwackers.7 points
-
Back in the old version of the forum, we were forever having to clean up posts where someone had just pressed "Quote" and included a boat-load of pictures that were duplicated from the original post and therefore not needed. This exercised everyone's scroll wheel far too much and annoyed a surprisingly large number of people. No longer is this necessary if you read this topic, which you clearly are. Now we have smart quote, and it's incredibly simple to quote a portion of a post or even just a word! Highlight the part of the other person's post you wanted to quote - selecting from left to right seems most reliable. Up pops a little Quote This button. Click that menu and a new post with just the info you wanted appears for you to finish off with a reply. Cool, eh?6 points
-
This is a diorama I did a few years ago now set during the Russian Afghan war depicting a patrol encountering a recently destroyed tank in a narrow mountain pass... the title of the piece was "foreboding" Kits used were the old Zvezda BTR 80 and the Tamiya T-62 with Verlinden interior.6 points
-
Here's the Hasegawa P-40 finished as a Kittyhawk Mk II in 112 Sqn markings. This was supposed to be a quick build to try out some new Vallejo Model Air paints and pastel weathering, but in the end took far longer than expected. The markings are cobbled together from the old Airfix kit and the spares box. The serial number AK616 is a bit iffy - it probably never wore these fuselage codes, and may not even have been on strength with 112 Sqn! I think the camo pattern may be a bit off too. The undersurfaces were sprayed and top surfaces brush-painted. Several coats had to be applied. A light oil wash was followed by a bit of metallic chipping - hardly visible in photos - and a dusting with pastels to give it a faded desert look. Not sure that it's really worked out too well but here she is anyway...6 points
-
Dear All, kits is Kopro 1:72 Su-25k, One of my very first digital camo trial, I got this kits from ebay for a very low price of 10$ however when I got it here the decal was in really terrible state and would not stick to the aircraft it would just crumbled into pieces so since the decals was gone, thought I do a what if camo, and i never tried a digital camo before thought give it a shot, the kits was really hard to build the plastic was hard and heavy a tough kits and here it is. It is fictitious color in Ukrainian colors, hope it turned out okay, cheers6 points
-
Thanks @AlexN - the drawers, currently in Beta test, have: So masking, clamping and odd bits in the big ones (actually that should be fillers - will be corrected!) and sanding in the upper one. I've applied the Mr Hobby Color H335 MSG = Camouflage Grey to the underside: No, it's not patchy (hopefully), I took that shot while it was just sprayed to show why I dislike paints that change colour as they dry...6 points
-
A very pleasant and contemplative Battle of Britain Day to everyone! In so many ways, the determination of "all that Britain is, and all that Britain means" happens and has happened every day, in a hundred less dramatic ways, and someday I hope to play my own small part in that as well. May it always remain and continue to become a wonderful place.6 points
-
Morning all,both glossed and washed and tools,hawsers etc picked out with relevant colours,only three decals for the Grant,tracks on the Matilda to still need painting though.6 points
-
T-18 Light Tank Model 1927 "But Comrade, you told me to paint it, not to clean it" * This is the newly released T-18 from Hobbyboss. It's a nice kit, albeit with a few inaccuracies and a few simplified parts. It was originally going to be a quick out of the box build, but somewhere along the way it acquired a base, some figures, and somehow became an allegory on communist Russia in the '30's. The base is a vacform one from MiniArt, and the two figures are from Evolution Miniatures. The full build can be found here * Dio name courtesy of Andy, aka Sgt. Squarehead Thanks for looking Andy5 points
-
Hello, here's my rendition of Kovozávody Prostejov's Piper L-4, dressed as General Patton's personal aircraft in France, 1944. Having recently built their new Mustang and Lavochkin La-5, I was suprised by the rough nature of this kit. It's a typical short-run affair with heavy sprue gates that extend onto the kit's parts, some oversized parts and poor fit, especially around the glasshouse and nose section. The wheels are a joke. They should be round - well, you know what wheels should look like. The items in the KoPro kit suffer from offset moulding and look horrible. Because of their relatively small size no replacements were found in my wheel spares, so I took the task of sanding them to shape as good as I could. The decals aren't the best either, they are relatively thick and have a strong carrier film that remained visible even after I've coated with Alclad Gloss. Plus, the Blue of the US Stars is too bright. Because of the small size on the fuselage, no replacements could be sourced from the decal spares box. To bring this kit up to modern standards you will need to invest a lot of time, effort and patience. I added the boarding steps from scratch. The model was painted with Mr.Hobby acrylics. I'm not very happy how this little model turned out, but on the other hand I'm grateful to KoPro for releasing a kit of this important military and civilian airplane. With best wishes from Vienna, have a good day! All pictures taken by Mr. Wolfgang Rabel of IGM Cars & Bikes.5 points
-
Hi all,I did,nt go with the original scheme planned on the Hurricane I plan to use it when more time permits,so I used the decals from an Aldi cheapie I had a while back. And basic paint on the Mustang.5 points
-
Another of my older dioramas, this one titled "Douki no Sakura" (Cherry Blossoms of the Same Season) was named after a popular Japanese wartime song about soldiers who like the cherry blossoms from a single season would likely die in battle and be reuinted in the Yuaskuni Shrine for fallen soldiers in Tokyo. it depicts the aging lone survivor of a tank crew paying his respects to his fallen comrades (accompanied by his family) in front of his old tank recently unearthed from the pacific jungles.4 points
-
Here are some photos of my recently completed Revell Typhoon dressed up in the livery of the RAF's No. 3 Squadron based at RAF Coningsby. The build was quite a challenge as the kit's quality was not up to the same standards as Revell's previous F-15E and Rafale kits. This was a fully OOB build. Painted with Gunze lacquers and weathered with Tamiya enamels and some pastel chalk. Hope you enjoy the photos! Mark4 points
-
Apologies for the swift exit this afternoon. I felt before the RFI I needed to say a big thank you to everyone who helped me through this extensive project. It began as an exploration into why some modelers take older/less detailed kits and turn them into something special, via filler, plasticard, sweat, tears, blood and even quiche tins. I've learned a lot over the weeks and the help and encouragement from you guys has been invaluable, I thank you for that. I managed to take a few shots tonight for the RFI but I'm not really 100% ready yet so I'll get more done over the weekend. I'll post this one just to show the Canopys on. Being horribly addicted to this plastic lark I've started another build already. I've added a link. Here's the RFI Thank you all once again for making this a such a fun build. As always stay cool and Happy modelling. John.4 points
-
We seem to be back! Bit of an odd one losing the site for a bit but hey its all working now. nice one guys. Thaks for all the wonderful comments, I actually got finished last night but didn't take pics. I'll get some this weekend for the RFI and do a double whammy. Here is what got done on Tuesday. The canopy wires got painted and added. Fuse wire wrapped around more fuse wire. the canopy mask got removed, phew no trouble and the bits and bobs got added. what do you mean you cant see the bits and bobs. we have ladders, foot plate and tags. oh nearly forgot, The three remaining seats got PE treatment and painted. The canopys got added last night, I will do a photo sesh this weekend and get an RFI up, I'll pop some picks here too. yikes, just seen the time, Gotta fly as I'm at work. I'll post up tonight with ....................4 points
-
Just for interest,....here is a photo of the Spit that I`m building,.....doesn`t look like the desert scheme that everybody seems to portray and more like grey/green; Cheers Tony4 points
-
Since I like to do conversions I decided to try to do Northrop Delta on the basis of Williams Bros Northrop Gamma. This is a rare, hard to get kit, I had one, so I made just a resin copy of wings, undercarridge and horizontal stabilizers. The engine and fuselage had to be done from scratch. It was hard to decide what colours should given - my favorit is one from secret US mission in Eritrea, so called mission 19. More about it for example is here: http://www.warbirdinformationexchange.org/phpBB3/viewtopic.php?f=3&t=8809 The basis of fuselage is... - reversed up side down P47 bubletop from Novo (sic!) The basis of canopy is from Ju86D (Italeri). Cowling basis (reshaped) is from Harvard (Academy) and engine itself is a resin copy of Williams Bross Boeing 247. It started like this: The canopy had to be changed a little (here you may see that plan is for Canadian Vickers vesrsion): Here is alredy advanced This is the result of scratch build:3 points
-
3 points
-
Sadly I don´t have always the time to follow my dad´s progress on his models but nevertheless I have decided to post some wip stuff. As ususal, he has several ongoing projects, on of them is this Yom Kippur War pair, an Egypt MiG-21F-13 and an Israeli Mirage IIICJ. For the MiG my dad uses the very nice Trumpeter kit with Aztec decals camo applied, used Tamyia XF-58 Olive Green and XF-55 Deck Tan, the underside colour is a selfmix my dad made some year ago. Regarding the Mirage, my dad initially started with the Eduard kit, but due to bad fit and warped parts he thrashed it and turned to the Hobby Boss kit, which is mostly a copy of the Eduard one but easier to build. Only visual nitpick of the Hobby Boss kit are the cones of the air intakes, they should be centered, HB molded them slightly too upwards my dad kept the already built seat from the Eduard kit, fits perfectly into the HB cockpit tub mostly built up already, camo applied with Gunze H310, 312, 313, 314 decaling on the MiG done, Aztec decals are a bit thicker and aren´t very sticky, my dad used Gunze Mr. Mark Setter and Mark Softer and the decals went on troublefree washing done everything sealed with flat coat now on to the rest, landing gear, armament...3 points
-
Hi! Here is my first model after about 20 years of inactivity in this hobby. I started this build many months ago, had many breaks, bought new tools and had to learn many new things. While I am definitely not making a perfect model, I am quite happy with the result. I used the following to build this Folland Gnat T.1: Airfix Red Arrows 50th Display Season Gift Set 1:48 Eduard Detail Set Vallejo Paints I hope you like it and love to get some feedback to improve my next build! Kees-Jan3 points
-
Hi all. My most recent project has come to an end. Minicrafts little 737 kit is rather simple, but also a joy to build. Added antennas, and beacon lights. Decals are from Max decals. Paint from Xtracolor (Maersk blue) Humbrol ("Boeing grey", corroguard, nose) and Alclad for leading edges of wings and vertical/horizontonal stabilisors. Here goes: Cheers Robin3 points
-
This is an aircraft modellers first attempt at a motorbike so be gentle with me! Thanks for looking!3 points
-
G'Day All Latest one of the bench is the Bronco 1/48 H-81. Not one of my better jobs. This one took longer than a 48 scale single engine fighter should. I think because I ended up adding a true Details resin cockpit to correct the kits undersized one. The only gaps were the wing roots. Apart from that it assembled OK. the kit comes with an engine, but I could not display it as I wanted to, as the firewall is forward of where it should be. Apart from that I also added a Ultracast seat, and modified the awful representations of fabric control surfaces Bronco give you to better represent the real things. Bronco has moulded pronounced troughs between the ribs so I smoothed milliput over them. With the forthcoming Airfix kit, I reckon this one will not be much of a seller DSC_7128 , DSC_7133 , DSC_7111 by ,3 points
-
This september marks one year since I started this! Anyway, some progress, I got the 3D printed intake pipe on, Ialmost lines up, It's a little of centre with the schnorkel mast, and a little too forward, but I think I will modify the schnorkel to fit There is more soldering to be done, there are 2 more guard rails. The top one is on another laser cut buck I made, it's a very difficult shape to do, as the railing is at a angle and flares out in the middle. In the deck I cut the postions for all the vertical posts that make up this railing, I copied those positions and included them in this buck, you can see the holes underneath. This way I can insert the brass into these holes and when it's all soldered together, it should just drop into the corresponding holes on the deck. These rails sit just forward of the tower, and have a wires rails connected to the other railing, hense the little tabs that were spares on the eduard set. Here's one installed, it wasn't a great fit but lose enough after a fight. Underneath you can see how it's held bu the laser cut holes. The heat transfer problem I've bee having with these wood bucks went away when I switched to this blowtorch soldering iron here they are in place, that's a lot of railing. Got to do the other side now. I've been further painting the deck, the photos are not showing it but the deck is a lot browner, and I started putting eduard little hinges on the hatches. Did some weathering on the guns, and added whiter salt stains to the tops of the saddle tanks, Thanks for looking!3 points
-
I've made some progress on this now. I've assembled the cockpit tub and the wheel wells, so I'm going to see about fitting the fuselage together next. I found a set of Eduard 'Super Fabric' Fw190 seatbelts, so I used a pair from the set. As you can see in the pics, the cockpit is very dark , so the seatbelts will be the only thing you'll be able to see properly, once the canopy is on and closed. thanks Mike3 points
-
3 points
-
Well, up to date! That seemed to go OK. I've had a lot of emails this morning as the upgrade reset notifications to 'immediate'. I've changed mine and told Mike. Otherwise, all I need to do now is find out how to get my 'Activity Stream' tailored to show content I follow. Oh, and look at the new 'follow member' feature - prepare to be stalked!3 points
-
Cheers chaps, getting a bit more done today More work on the exhausts And more mapping out of the chipping effects for the rear deck. Playing with some subtle rust on the front. Enjoy Dan3 points
-
3 points
-
Good afternoon, gents! Worked on the seat for the MiG, not done yet, an oilwash and a drybrush/pigments are left! Oliver3 points
-
Just adding the finishing touches now, I think it'll be ready for Euro3 points
-
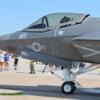
It's been a VERY big day for Cookie and me. We got buzzed by Luftwaffe Tornados, about a million F-16s, some MQ-9s, and this proud beauty:3 points
-
No.230873, Second Subaltern Elizabeth Windsor, No.1 Beaufort Company, Auxiliary Territorial Service, March 1945. Tamiya 1/35 Tilly, SKP Models Princess Elizabeth.3 points
-
I managed to finish off this vignette yesterday so here are a few pics of the finished article, more in the completed builds thread. I had a bit of a nightmare trying to fit the side windows so eventually I used some very thin plastic sheet to make my own and put them in the lowest position - much easier!3 points
-
Hi all, Here is my recently finished Trumpeter 1/48 MiG-21F-13. The decals are Begemot and the wheels are Eduard Brassin. The finish is Mr Color Silver/Steel/Gun Chrome. A full write up can be found at https://jonbryon.com/trumpeter-148-mikoyan-gurevich-mig-21f-13-fishbed-c/. Comments welcome Cheers Jon2 points
-
Hi gang, Here are some pics of my build of Gallery Models H-34. Model Master paints and Caracal decals were used. Pics taken my usual way in natural light. No tricks or filters used. I wish I had the photography skills of some on this this site, particularly indoor shots. So camera set on auto and I just start snapping away. Thanks for looking, hope you enjoy the photos. Rod http://i806.photobucket.com/albums/yy345/rodbettencourt/H-12.jpg[/iMG]2 points
-
"I think you ought to know I'm feeling very depressed" - Marvin the Paranoid Android... why? This is the second time I've replied to this AND the paint. More below. Thanks Simon Hi John Once you've worked out that 'Activity streams' are probably your friend and got used to the prettier (??) scheme it's better I think. Especially on the iPad. BUT (and it's a big but) auto-save has gone on the reply editor and so has 'Ctrl + click' (on the Mac) on a page number to open the page in a new window. Ask me how I know Hi Giorgio It will get bashed into submission - more later. Hi Stu Oh dear... BUT can I ask you to check for me again please? I said here that Hannants says it's 'Camouflage Grey BS381C:626' and not Barley Grey? Also my favourite photo shows the edges / radome to be lighter than MSG I think (I'd planned to use ghost grey)? Perhaps it's a special paint job and the unpainted areas are newer? There's a post somewhere about Typhoon references that says it darkens with age... That said Radder's pictures here do look lighter. Rats. Thanks @Procopius, first on the list of 'pro...' people! I like it without the canards too but ho hum... Hi Benedikt I can see you! What's the red star and where was it? And what are those roundels that have appeared under our member status? We should be told. Thanks Jaime Hi Tony I think you were busy with a Sea Venom thingy? Great build... I shall now pause while I recover my cool...2 points
-
Hi guys after some days i can show you some progress on my Macchi I finished the cockpit with Vallejo colors and a sof weathering, the seat is made with alclad. The instrument panel is composed by plastic parts and two very thin PE parts. I filled the instrument holes with a little drop of Revell clear glue. I closed the two halves of the fuselage and prepared both wings. The fitting is far from perfection but with some corrections everything goes together fine. next step will be the conjunction between fuselage and wings2 points
-
Or, rebuild it somewhere else! Duly noted. The delta winged hyper modern jet thingy is looking really nice. The canopy polishing was pretty darn impressive. You seem to have that area of modelling all sorted out, too bad you don't live closer to show me a tutorial. Reading through your posts over the past while, I wonder what browser you were/are using? Seems the quote function works well for you now which is good, but some of the links here and there are unformatted after the site update. These things confuse me. Oh, and I JUST got a dime dropping notification that you are following me. I'm flattered.2 points
-
You know how sometimes you want someone to see something you have said on the forum, and yet it's a pain to PM them and paste a link? not any more! If you want someone to see, such as a Mod or a friend, or just someone you know will have an answer for you, you must first know their name. We'll take me as an example, but if you over-use it I will track you down and I will kill you. Maybe not, but I might glare at you a bit, reminiscent of a rather large and angry baby. Back on topic. Type the @ symbol and immediately start typing the name of the person you're trying to attract to the conversation. A drop-down menu will pop out of your typing giving you some name options from the member list. Choose the correct one and it will turn into a blue square with round edges. Your quarry will receive a notification that they've been "mentioned". Please don't over-use this feature, as it will get annoying for anyone that's being constantly shouted to have a look at your posts.2 points
-
Ok lots of progress but there's still away to go and I haven’t really gotten my head around the colour scheme yet, or to be more correct the markings, but more on that later. Oh and this will be photo heavy as well. Ok first up the main gear, the moulding wasn’t the greatest, especially the scissor arms, some plastic disks for the pins and they looked better. They’ve since been painted and lightly weather, plus wheels and hubs have been done as well. Next up were the gun doors, as mentioned I was really debating whether to use the PE inner sections or not. The instructions tell you to remove and replace the inner section with PE, but there’d be huge differences in the thickness in the doors. So this is what I did to use one. The top of the inner section was ground back the thickness of the PE. Next the new door hinge was made. Then the new PE section added to the original plastic door, it actually looks quite good! My new door I added to the fuselage gun area ended up being a real pain in the butt! The area is actually very weak now and to make matters worse the new PE door is actually too small!! So it’s probably going to have to stay open now! Ok I couldn’t put it off any longer time to fit either the wings or engine!! In the end after lots of additional test fitted and fettling the wings had to go on first as that was going to give me the fit issues. So after quite a bit of CA and liquid cement and a lot of effort they’re on. The gaps aren’t to bad…… So filling the gaps just took a couple of small bits of plastic strip and a bit of re-profiling. Now that’s done some additional detail to the ailerons. So a quick assembly to see how she looks, it’s getting there and I’m pleased with the fit. Ok painting time, I was intending to paint everything using Vallejo Air acrylics but after some test runs I was really unhappy with the way it went on, I just couldn’t get a nice even finish, so I’m switching to LifeColor. As I’m going to do it in sections pretty much how they were done in the real. So first is the engine cowling, this was built is a separate factory and pre-painted in a lot of cases before it was ever attached to the main airframe. A coat of aluminum is the base, there was no primer used at this late stage of the war so the main colour was just laid on bare metal, and it was a pretty light and uneven coat as well. As well the batches of RLM81/82/76 varied between factories as well. To simulate this I’ll use the Vallejo Air just for this section, if I stuff it up it’s easy to fix. It actually came out pretty good and is nice a patchy, one more light coat and she’ll be done. While that was drying a coat of Aluminum was applied over the rest of the model. The ID strips were done as well, it’s easier to get that done at this stage. The results are really nice there is a couple of really smaller spots I need to tidy up a bit but she’s already for the final colours! She actually looks really cool as she is, may be she can be a factory bird that never quite made it out?2 points
-
It's relatively easy to mask: just sweep the wings all the way back and mask the edge. Then extend and mask the top. Somebody correct me if I'm wrong but correct color is dark camouflage grey/FS36231?2 points
This leaderboard is set to London/GMT+01:00


