
Leaderboard


Popular Content
Showing content with the highest reputation on 13/09/16 in all areas
-
34 points
-
Hello all, I've just joined the forum, and so instead of doing individual posts on each plane, I thought I'd treat them as the one topic, as they all belong to the same shelf at home, and they were all built in a sequence over the last year. 1/72 Noorduyn Norseman (Matchbox kit). The kit was ancient and the decals unusable, so I made up my own paint scheme based on a photo I found of one on Google Images. 1/72 Antonov An-2 (Italeri Kit) I love the An-2. Single engine, 14 passengers, super-slow stall speed, with a production run of 18,000 units, obviously they were a success. There is one An-2 flying here in Australia, and one of these days I'm going to fork out the money and go up in one for a joy ride. 1/72 DHC2 Beaver (Airfix kit). The Australian Antarctic Service bought a small fleet of five Beavers in the late 50s. While they did good service over the following nine years, ferocious blizzards took their toll, destroying a few, and eventually the Beavers were replaced with helicopters. I made the decals for this model, based on photos. Auster AOP Mk6 (ancient Airfix kit) which I've set into a diorama of my home-made snow with a Photoshopped-in background. Finally, while it's hardly a "light" plane it does wear skis, so I'll include it here Lisunov Li-2 in 1/144 scale, kit by Amodel. Yep, it's a DC-3 built under licence. As soon as I saw this colour scheme, I decided I just had to build this model.19 points
-
Hey folks, as mentioned, my follow-up to the F-8 Crusader from a couple of weeks back is another USN subject. One of the quickest (a month-and-a-day), easiest and most relaxing builds I've ever done. The old Monogram F9F-2 Panther updated in 2009 by RoG to an F9F-5P. Only addition to the build was a Pavla resin seat everything else including the 'stickers' are straight from the box. Kit - Revell (nee Monogram). Paint - Tamiya acrylics, Xtracolour enamels. Decals - Kit. Extras - Pavla resin seat. Grumman F9F-5KD Panther VU-1, NAS Barbers Point Hawaii 1959. Paint is mostly Tamiya acrylics with the exception of the fuselage which is Xtracolours' enamel 'Engine Grey'. Nothing else to add, another 'loved every minute' build. Please feel free to make any criticism, comments or ask any questions. AFN Ian.18 points
-
Hi Everybody! Excuse the gap in posts, I've been letting the paint harden off fully on the body work. Next the wheels which are 14", but need to be 15" ! I got My abacus out and worked out that 1" in 1/24 scale is .... 1/24th off an inch! ..... which is roughly (abacuses (abacusi?) are only good to 3 decimal places...) about 1mm, so I took some 0.5 styrene seet and wrapped to rim with it,cleaned up the joint and cut the width down to suit the tyres (crossplies are skinnier),then painted them :- When I fit the tyres, if the rim seems too bulky, I will run a black paint marker round the very edge to create on optical delusion! Basic chassis assembly done:- Engine block and gearbox:- Body mounted for painting:- Body panels painted, Alclad white filler-primer, followed by 4 coats of Citroen Venetian Red (closest I could find for Jaguar Regency Red), followed by 3 coats of clear lacquer ( all Halfords, decanted and sprayed through an Iwata TRN2) :- After allowing sufficient time for hardening off, flatted down with 4000 Micromesh and polished with Novus 3-stage polishing kit:- Basic engine painting started, alclad aluminium and dark alumunium (on Gearbox) :- More soon! Keep Sticking! Cheers, Pete11 points
-
Hi Folks it's cooked. mainly OOB with gunze paints......airscale many thanks to Peter and the seat belts....set... kit fitting is quite good.....decals were great......instruction was poor at best......overall ....enjoyed the painting process....the best as always.....will put the tanks on soon.....just wanted the base to look a bit full....anyone got relevant 1/24 figures pls let me know....can't seem to locate any..... pics sorry for poor quality....weather not very good in my part of the world today thanks a lot folks and a special thanks to Peter from airscale for the panel....it does a lot for the look of the cockpit ..I hope it's presentable enough best regards Brian9 points
-
Those who have read my RFI threads in the past will know that I enjoy renovating old kits. In this case both kits are conversions by jaw and they came my way for a bit of TLC. So my weapon of choice is Fairy Power Spray and it did a pretty good job of removing the old finish. I then cleaned everything up and started the rebuild. This involved re-touching the cockpit and then fitting a set of Eduard colour etch belts - which I don't think you can beat in this scale and I dread the new 'steel' ones!! Next was the glazing, which I replaced with bits from the Falcon Spitfire set. The PR glazing was a real pain as it comes in 3 parts!! I came to the conclusion that it was easier to tape the 3 pieces together using Tamiya tape and that 'sort of' worked! After that I needed to repair the undercarriage legs and propellors. In the case of the PR machine I then needed to glaze all 5 camera ports and Troy was great in suggesting the purchase of a set of hollow punches from eBay for £3.50 posted - I used a 4mm punch and that's just slightly undersize but close enough. The undersides are finished in Model Master PRU Blue - very annoying that Testors aren't exporting to the UK anymore! The top surface is Xtracolor MSG. That was all covered in a couple of coats of Klear - which did not give me the glassy finish I hoped for and, consequently, you can see silvering here and there, which is a pity. The matt coat is Xtracolor XGFF - never fails to work in my experience!! All paint work is by hairy stick with an airbrushed matt coat. I used an Aeroclub white metal Spifire tailwheel set - doors for the PRXI and wheel + oleo for the HFVII. The rear view mirror on the HFVII is scratchbuilt and is the Mk II - Mk I is somewhere on the workshop floor - just when it was finished!! Oh and I used one of the excellent Quickboost replacement aerial masts - tremendous value at less than £3 for 3 in my opinion. You will notice the deliberate mistake - well the one I'm admitting to anyway - the HFVII is coded MDII on the port side - what on earth has happened to the 'I' ?? I don't recall cutting it off !! Oh, and they're all modelled 'as is' in late May 1944 - hence lack of invasion stripes!! That's about it, 2 more done and already salted away into the display cabinet. Next up - renovated Hobbycraft Mohawk IV - Hopefully before Christmas but you never know!! Hope you like anyway. Sorry about the blurred undersides - don't know why that is! Oh, and these took the best part of an hour to upload from Photobucket as my PC is so ancient it allows me to copy at a snails pace - if I'm lucky. Must suss the Mac out, must be quicker!! Simon9 points
-
Thought it might be worth giving you a swift update. The process of filling Hasegawa's dents is ongoing, and really not worth boring you with any more photographs. However, it's time I showed you where we are going. This is the starboard side of the tail pylon. It is now finished, but I have chosen this picture because it illustrates the process better. Applying these HGW rivets is a bit of a knack, but once you have it the results are most pleasing; they are significantly more subtle than Archers (which are, after all, designed mainly for railway rolling stock). The sampler set I have thus far (with fresh stocks being rushed to me as we speak) has rivets in double lines (visible in the lower-most row as we look) and single lines. The top line with the paper still on it shows how they work; you cut them to size like any decal, put them in water for not very long - 10 second max - and apply them as normal, but with this protective film still attached. You then add Microsol (soaking the paper as well as the decal beneath) and then leave everything alone for a couple of hours until it is completely dry. That's when the magic happens, because carefully peeling away the protective paper also removes the carrier film, leaving just the rivets in place. Once they are all done I suspect some primer would be a good idea PDQ, because I bet they are pretty fragile until sealed in place. None the less, I am really happy with these. I don't want my Sea King to look like a Victorian boiler, but equally to look right it needs that "quilted" rivet effect. Doing the entire fuselage is going to take a fair time, but I think the end result could be really good. So watch this space! More soon Crisp P.S. This might be useful, too: left to right, my HGW tail pylon, a row of Archers' N gauge rivets for comparison purposes, and an as-yet untreated Hasegawa tail pylon,9 points
-
Continuing my effort to find things to do which will prevent me from firing up the airbrush, I decided it was time to fit the tail planes. Since I was trying to stick bits of plastic, brass rod, and resin together, I chose the safe option and went with two part epoxy glue. I didn't have a lot of surface area to fix things with so I used a piece of wire to drip glue down inside the mounting slots before the tail planes went on, hoping that it would all run together and make at least a half decent bond. Then just to make sure, I dribbled some more inside once the tail planes were on. Things seem to have worked (so far) with the tail planes staying in place despite my cumbersome handling. However, since that went reasonably well, it was only to be expected that something else had to go wrong.... something I should have checked a while ago but took for granted, and now been bitten in the behind by it - the elevators don't mate to the fuselage very well - rather badly in fact. Original kit part on top with nice tapered fit, and resin replacement below.... spot the gap! In my best haphazard and slapdash fashion, I was so concerned with getting the profile of the outer edge for the Mk II tail plane correct, I had completely omitted to test the fit both that and the elevator to the fuselage - hence the rather large gaping chasm waiting in store for me. Easily fixed... Scrap resin to the rescue - I glued on some scrap pieces to the inner edge, then filed and shaped until I closed the gap to a respectable and somewhat even distance along the length of the elevator. (I may still take a tad more off later) And with elevators taped in place, the back end is starting to look respectively much like a Mk II. (or at least something like the drawing I have of the tail plane area !) That left me free to find yet more things preventing the great airbrush blow out, a quick search and I found a nice little etch step that Eduard would have you try and fit. "Try" being the operative word. After searching for a while I eventually found some photo's of said step in position and realized that there was no way I could fit it. In fact, as far as I could see, the etch part is the wrong shape - sort of back to front, inside out, and upside down. Now, I'm nothing if not resourceful stubborn and by now I was determined I was going to fit a step come hell or high water... So, I scraped a small recess in the fuselage (as the best photo I have come across suggests that the step is in fact recessed), then carefully drilled a few holes here and there.... can anyone see brass looming in my future ? Yup... brass again. I took some Ø0.4 mm wire, bent it into a "U" shape and fitted it into the newly drilled holes. The step on the 1:1 has a "+" shaped section as the actual step. My plan to replicate that involved drilling another hole midway between the first two, then poking another piece of wire in there and just butting it up against the "U" shape, like so.... sadly the wire is too thick to make a decent looking "+" shape - now I have to start thinking again Then another two pieces were added on top as the bracing supports. I'm not entirely convinced with what I have so far. It's certainly more robust than the etch which I couldn't fit but it does look a tad agricultural. I may try and refine it a bit more. - Maybe a hybrid of my brass wire and whatever I can salvage from the etched part. Now for my question for the day. - You can see in the photo above that the new brass step and the other step midway between that and the observers position are both located on the starboard side. - On all the photo's I have seen, I can't see any evidence of these two steps being fitted on the port side - so does anyone know if they were mirrored on the port side ?9 points
-
Hi all, Here is my recently finished Trumpeter 1/48 MiG-21F-13. The decals are Begemot and the wheels are Eduard Brassin. The finish is Mr Color Silver/Steel/Gun Chrome. A full write up can be found at https://jonbryon.com/trumpeter-148-mikoyan-gurevich-mig-21f-13-fishbed-c/. Comments welcome Cheers Jon8 points
-
This evenings work: After many hours fettling the resin intakes, they finally fitted the aperture. I've added a brass tube spar to add a little more strength. Dry fitting with the original kit wing parts... not a bad fit. I've also tried to correct the wing angle which is too low at the trailing edge, causing the carrot fairings and the wing tips to angle down ((I believe they should be parallel to the ground). To do this I dipped them in very hot water and tweaked and flexed them until they looked right. Finally a dry fitting of all the wing parts. Looking much better but I might give them wings another tweak, also, I can appreciate the size of the model now! Thanks for looking, gazza l8 points
-
evening my friends & thanks for stopping by so, a small bit to add to the WIP today - I started the tailwheel bay - once I have this cracked then it is most of the build work done where I need to hack the airframe about - then I can start skinning it (you are right PR!) ..first step was to cut away a section that the bay will slot into... ...as the tailwheel carries quite a bit of weight, I had to think how best to spread the load and remove points of failure - I decided a brass sheet construction lined with litho - here top left is the top and front formers in brass with holes for the leg and a depression the tyre retracts into... below that a bit of litho marked on the back ready to be cut out as the liner.... and on the right a bit of soft aluminium being worked into a balsa former to get the tyre depression fairing... ...next I lined the brass with riveted litho and added a pin to the leg so I could pin right through the angled mount (in the vice) into the bay wall - that should carry the load and spread it into the brasswork... ..like this... and in place - it is too long as I got some rudder geometry a bit out and need to add some skin to make up the rudder shroud... ..and thats it for now - I am away on business for a few days so hope to be back for the weekend TTFN Peter8 points
-
Hi All This is my fourth build since returning to kits after many years and I'm really enjoying it, very relaxing and therapeutic! Well this one is the Hobby Boss M4 High speed Tractor which I just fancied the look of to be honest. It was a great kit, excellent value with the included PE, chains, paint masks, colour chart etc. great value. This is my first play with PE, god it's fiddly isn't it! I still have a lot to learn with regards to weathering especially rust effects which I tried, binned and gave up un but practice makes perfect? Overall I'm reasonably happy for a fourth attempt. It was painted with a Tamiya rattle can and brushed Vallejo acrylics but have just invested in my first ever airbrush for future builds! Mainly OOB except for some spares box weapons and accessories. I scratch built the tarpaulins and weapon slings using thin lead sheet and bought a set of Verlinden 1/35 WW2 US maps and documents. Anyway I hope it's ok and thanks for looking!7 points
-
Having recently joined the forum, I thought I'd show you a diorama I made fairly recently. The subject matter is the "Around Australia" car rallies of the 1950s, which were a major event back then. The first one was in 1953, the last one in 1958, and for all that time the entrants were ordinary family cars: Holdens, Fords, Volkswagens, Peugeots, Vanguards, Morris Minors, etc. There was even one nice old Grandma and her son who completed several rallies in her Rolls Royce. The first scene here is from the first Rally, the "Redex" rally of 1953, won by a Peugeot 203 driven by Ken Tubman, a chemist from the country town of Maitland, New South Wales. Following the Peugeot is a Holden FX driven by "Possum" Kipling, of Port Wakefield, South Australia, who came 10th overall but was the first car to cross the finish line (and so he was quite a celebrity for 24 hours, until they figured out who was the winner). And perched up on the hill filming the action is the newsreel team from the Cinesound Film Unit, which followed the rally for all 6500 miles in their Peugeot 203 Station Wagon. For the record, the Peugeot 203 in the water is a plastic Heller Kit (1/43 scale) I built and made decals for, based on photo research. The Holden on the road is a 1/43 diecast Trax model, again with my home-made decals, plus added extras such as the sun-visor and spotlights. The Peugeot 203 Wagon on the Hill is a Solido 1/43 diecast model, with my home-made decals, plus added extras such as the winch on the bumper, the roof racks and luggage, and spotlights.7 points
-
Hi I’ve just joined the forum, and so far I’ve posted something in the aircraft section and the diorama section, and here I am in the ships section, posting about the third broad “category” of models that interest me. In my case, it’s mostly civilian ships. I’ve been looking at the model ships here and the standard of the builds are incredibly good, so that helped me make up my mind to show you, in a single posting, the four ships I have built since I took up the hobby three years ago. My first effort was this pair of 1/700 scale models of the Hikawa Maru (kits by Hasegawa). One is of the pre-war Hikawa Maru as a passenger liner, and the other is of the same ship during the war, where it was a hospital ship. Amazingly enough the Hikawa Maru survived the war and a friend of mine who visited it in Yokohama Harbour a few years ago says it’s nicely preserved. I just thought a simple diorama of the two eras of the same ship passing each other at sea might look OK. My second ship was this Russian Spy Trawler (kit by Revell, about 1/140 scale, although it doesn't say on the box). I thought I’d try to get a bit fancier with the sea, and to “weather” the ship with a layer of grunge. Apparently those Russian trawlers were the epitome of weather-beaten grunge. The photo above shows it with maximum grunge, and the photo below is the one before I decided more grunge was needed. And now for my most recent effort ... Here's my attempt at the appalling Modelcraft kit of the Shell Welder. Of all the kits I have built so far — car, plane and ship — this is the worst in quality I have worked on. It took me ages to do it, and when I looked through this forum for other builds of the Shell Welder, I couldn’t believe how superbly some forum members have turned this sow’s ear of a kit into the silk purse models they have on show. My main focus with this build was to make my first attempt at stormy seas (partly to take your eyes off the ship itself). Looking at the expert Shell Welder builds here on the forum, I realise that I have the ship sitting far too high in the water, and that the waterline mark is far too low, but as they say, you live and learn. Still sitting in their boxes, waiting for me to attempt them, are the Revell kit of the oil tanker ‘Glasgow’, the Hasegawa kit of the Japanese Antarctic ship ‘Soya’, the old Revell lighthouse ship ‘South Goodwin’, the Revell 1/108 tug boat ‘Lucky’, and yet another Hasegawa 1/700 kit of a sister ship of the ‘Hikawa Maru’, this time serving as a WWII submarine resupply vessel (plus a few 1/700 subs). In between building lots of planes and dioramas, it’ll probably take me several years to tick all of these ships off my list, and in the meantime I hope to learn a lot more about building model ships just by looking at other modellers’ work.7 points
-
Thanks Simon Getting close... but seams do need to be addressed first. One of the nice things about the kit is that the top seam, behind the canopy, is covered so no effort there. Thanks Bill - very punny, I like it Thanks Steve and Giorgio, very kind and especially appreciated coming from you two! Thanks John I think you might need to take a bit more care at that scale but I hope the parts are better... I've stuck on some of the tiny bits and blobbed some Tamiya clear green on the gun sight thingy after seeing a great photo which I can't find again (doh): That photo made me realise I haven't applied two decals to the side of the seat. Doh again! Just gathering my masking mojo for the inside of the canopy ready for this step: Nice to see that the 'demarcation lines' for the plastic part are so well defined so that one can decide whether to stick it in before painting the canopy or afterwards in the hope you get the line right. That was irony. Bit like an iron.7 points
-
Places like that are awfully browsable ain't they? Really sharp chisels are one of the most useful tools for modelling IMHO. Much better and more controllable than a craft knife for removing unwanted bits of protruding plastic such as poorly moulded rib details etc., great for making or enlarging or reshaping holes such as intakes or vents and even useful as a scraper to square off edges etc. in deep or tight fighting spots. I've got a 1mm and a 2mm chisel and my only issues at the mo is how to resharpen them to get them back into as-new condition. If I can't get them razor sharp again I'll have to replace them they're that essential Mr Hobby (I think) do a chisel with replacement blades - but I haven't found a uk stockist. I've finish off the scribing of the rear fuselages now - no piccies as there's only another couple of lines. I was a bit over-optimistic to think that the scribers could be put away as I've just realised that there's a whole bunch of lines just forward pf the flaps and ailerons on the underside of the wing that are missing from the Airfix mouldings: But they're all straight lines on a basically flat surface so with careful measuring and marking they shouldn't be difficult. You know - when I started this build - when I was still a young man - I thought that it would be easier and quicker than the JPs cos - so my thinking went - the Airfix Hawk is a much newer moulding then the old Airfix JP5 and so I won't have so much to do and it won't need so much (if any) rescribing and so on and so on. It ain't quite turned out that way. Self inflicted injury I guess I saw from the thread started over on the Cold War forum that the Airfix 1/72 JP 3 was now on sale and I almost went online to order one - and then commonsense prevailed. Looking forward to the first WIPs on BM tho.7 points
-
Dear Fellow Modellers Stimulated once more by the wartime film of Lancasters based at RAF Hemswell being prepared for a raid, I decided to try and bring the Airfix Matador Refueller up to scratch. Cue much time sanding down over thick mudguards and returning tread to the tyres. Steering wheel from Hauler and driver, wing mirrors and bridge weight marker from Dan Taylor modelworks. Am pleased to say that the Matador is still a nice kit given a bit of love and care, hope you agree? Hope you are enjoying your bank holiday? I spent part of mine working on the Airfix C-47 which strangely seems to need lots of filler, at least in my case Regards Andrew6 points
-
Hello everyone I'd like to present my latest model Kit Tamiya PE Eduard Zoom Gun barrel Master painted with enamel MM and Humbrol and Mr Hobby decal Tamiya and old MSAP a few photos of the finished model: enjoy the photos.6 points
-
Martin, Crisp, Steve: Jury struts it is at all times from now on. I'm assuming an RBF tag is nothing to do with Bears then? I realize that previously I'd been referring to the wing fences as 'strakes' as well for some reason.... Last time I left you was with a dry-fit of the wing-fold to check for angles. It's surprisingly easy to get either the vertical or horizontal angles of the two wing-sections wrong in relation to each other when scatch-building this part of the aircraft, so I've been paranoiacally checking at every alteration. The detailing and supports of the wing-fold are now (thankfully!) complete: I won't bore you with the steps, but card, brass and sprue are all involved: There are one or two short sections tubing and wires to go on yet, but I'll need to wait until joining the two wing-sections at a later stage, as the piping goes from one section to the other and I'll just knock it off in the meantime. It would be easy to obsessively add finer and finer bits to this, but I've settled at the level of the main structural elements: beyond a certain point at this scale I've come to feel there's a diminishing return in relation to the amount of time taken on smaller details. If one part of an aircraft is super-duper-detailed and the rest isn't, it will probably look odd, so I'm keeping this to the general level of the overall detailing involved in the aircraft as a whole. Most of the major panel lines are now scribed. As I mentioned a page or two back, I'm definitely going for lighter, finer scribing from now on. All that remains is the access panels on either side of the nose behind the radome, and the various circular filler caps around the wings. To give you an idea of the abysmal quality of the plastic on parts of this kit, this happened earlier: No undue force or anything, simply dry-fitting the elevator to the booms to checkout alignments and Snick! - it just went. Currently clamped up and glue curing overnight. Also of note is the 30º or so of variance between boom and wing: I've re-shaped the junction area for these two parts at the back of the wing now to cure this. Here we are at page 16 and finally - FINALLY I say - the wings are on: And on that bombshell.... Tony6 points
-
Hi All I have been doing this for a while now after seeing the excellent Dual Meatbox build diaries by the Baron and Spadgent. I picked this up fairly cheap on Ebay and have enjoyed putting it together, it has been built mainly OOB with some seatbelts, boxed in undercarriage bays, U/C front door modification to include the landing light cover and two lights added to the front U/C leg. Some filler was necessary although it was not too bad. I sanded off the subtle raised panel lines,I was going to pencil them in once the Matt varnish had dried but it was slightly tacky still after a number of days and would not stand the handling so did not bother in the end. The decals settled really well. Painted using Humbrol enamels and a hairy stick as usual. Thanks for looking All the best Chris6 points
-
As I walked past the bench I thought I have some patience... so I used the 'Steve scraper' to sort out the airbrake problem mentioned by Chris in post #101. Untitled by Ced Bufton, on Flickr That (and the seat problem) probably confirms this is the same design as the 1/48. The problem with the airbrake is that it's a tight fit laterally and the vertical 'hole' has flash around it and possibly isn't deep enough? The ninja scraper is great - just stroke it up the join and you can see the plastic shaving off. Press too hard and you'll dig in. You also need to be careful that the other 'arms' aren't scraping another part of the model. Ahem. Nothing a quick sanding won't cure. I then thought I'd tackle the intake flap thingies. Now then, of course a perfect modeller would have made sure that the intake separator was exactly in the middle and a perfect kit would have parts that were the same size. Unfortunately neither applies here. Those little pins on the flap fit in little holes inside the intake. Luckily the lower one, which is slightly wider, fits in the right hand intake which is also slightly wider. The left hand one isn't / doesn't: (All relative directions are as per the instructions with the model upside down). You might notice that the sidewall on the left is slightly inboard. Aha! If I push the part in then the sidewall will be pushed out flush - result! Future modellers note - this requires a force of 1.234 Newtons*; any more force and the part will ping into the fuselage and need to be rattled out again (ask me how I know). After some cursing and dry fitting I decided to replace the parts with scratch built flaps using plasticard and some spare PE. Nah, just kidding (of course), I glued 'em in: No patience left. * I have no idea. Just don't push too hard.6 points
-
This is my contribution to the recent 80's NATO Europe vs Warsaw Pact GB. It’s the Italeri 1/72 Harrier GR.3 No. 1 Squadron, Norway, Winter 1986. The build thread is here: http://www.britmodeller.com/forums/index.php?/topic/235001709-arctic-harrier-putting-the-cold-into-cold-war-italeri-172-harrier-gr3-no-1-squadron-norway-winter-1986 There’s some great builds in the GB across all scales and subjects, something for everyone. As for the kit. Well it’s a kit of two halves really: nice details and fine panel lines in parts, flaws and imperfections, and noticeable details lacking in other areas such as cockpit and wheel wells. Plus it’s covered in sink marks like it was infected by some strange virus. Good fit for the most part. Decals went on well. Overall nice kit and build. Added minor details such as a few bits and bobs in the cockpit. Modified and scratched a woeful seat; few lights from clear sprue, added SNEB pods as the kit doesn’t supply any (the one is wonky so I’ll have to correct that). A few spikey aerials from beer can foil, pitot from sewing needle and opened up a few vents and ducts. Humbrol enamels throught with the exception of some Tamiya NATO black and Alclad. Weathered using pastels and varnished with Alclad semi-matt. Thanks for looking.5 points
-
Hi Folks This is my recently finished Swiss AF F-18C made from the new 1/48 Kinetic kit. This was a tester build for me to gauge the new kits strengths and weaknesses so it was primarily OOB. The only thing I added was the Pilot from the spares box and the sensor for the JHMCS helmet, an MV lense behind the clear part for the spotlight and a couple of minor missing lumps and bumps. The decals are from the kit and worked pretty well. The mount was something that came to me while researching pics of the Swiss hornets in action. The twin ALE dispensers under the intakes were done with spare decals rather than the etch items supplied in the kit. Sorry for the dodgy pics but this thing is too big for my light tent so please ignore my bench in the background. Hope you like it. Cheers Andrew.5 points
-
Hi Guy, thanks for your comment! I think this color is the best i can do without an airbrush - also it´s easy to spray on I have a few pics of the Airpower16 in Zeltweg/Austria for you: If you are interrested, there are about 200 pics of the Airpower16 on my Facebook page Oliver Petrosino / facebook Oliver5 points
-
As a 17 year old, you would be surprised to hear how many youngsters are picking up the hobby Kind regards, Sam5 points
-
thanks guys for all the lovely comments. The food festival was wonderful, lots of nice real ale, cheese and pickle was scoffed. As for the prowler we are nearly done, a quick Update tonight and I think she will be finished tomorrow. Any hoo, we has wheels! Front, with flaps and the like. And side. And all together. Excuse the dark shots but it's getting darker earlier. I have been thinking about adding those "remove before flight" tags. I knocked some up in Photoshop dinner time, printed em out onto some paper, cut em out at the bench tonight, painted the rear and sides with a bit of Tamiya red and glued a bit of EZ-line on the back. Small but perfectly formed. It looked pretty so I made some more. I tried to zoom in on the words but they are pretty small. I'm letting the wheels dry before I do seat belts, fit the canopy and hang the Christmas tags tomorrow. Thankyou for joining me on this here epic build. I have a few ideas where I'm going next, trust me it'll be smaller and less CrAzY. See you all tomorrow hopefully for the final ish update. Happy modelling guys. Johnny boy5 points
-
This is the new Tamiya AMX-13 French Light Tank. The model was built straight out of the box, the only additions were the aerials. Painted with Tamiya paints, weathered with a Flory wash and a Tamiya weathering set. Thanks for looking. Here is the link for the WIP4 points
-
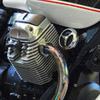
Hi There! My name is Pete Mortlock,I come from the town of Burton-on-Trent in Staffordshire England,and this is My first WIP on Britmodeller! As to the topic title, those in the know will see where I'm coming from, for those who don't it's -- --- .-. ... . , which spells out M-O-R-S-E....... Yes, I'm doing a Tamiya Mk.2 Jaguar in what must be the best known one around, in memory off the Late,Great John Thaw, who left Us (Unbelievably) 12 Years ago, and sadly missed. Modifications to the kit will include:- Vinyl roof ,created with semi-gloss black paint Steel wheels, modified from Fujimi 14" wheels up to 15" diameter Chrome hubcaps, My first go at plunge moulding - Scratch-built Wing mirrors And printed number plates. The Kit:- The wire wheels are stunning,but unfortunately not being used on this build :- Using these instead with modification:- Decals (including woodgrain), metal Decals and carpet included:- I will be cracking on with this from Today! Keep Sticking! Cheers, Pete4 points
-
I had this old airfix kit of the hunter hanging around and decied that as the decals were out of register I would cobble togeather the markings for the Raspberry ripple aircraft XE601. This is not a faithfull reproduction of the aircraft there large gun casing mouldings are still there and I have not modified the kit in any way except to put in a white metal mk4 martin baker seat that I found in the kit. this is the first time I have used acrylics and enamals on the same kit and it seems to have worked ok. Normal 5ft viewing distance please Many thanks for looking Rodders4 points
-
Finished this morning. Massive fun too build and greatly recommended as a kit. For the full build see here: http://www.britmodeller.com/forums/index.php?/topic/234994592-vought-xf5u-1-flying-flapjack/4 points
-
This is my Olifant Mk1A constructed using the AFV club Centurion and a conversion set put together by a good friend of mine in South Africa. was a lengthy build but I'm pretty happy with the end result.4 points
-
Hobbyboss 1/48 plus resin wheelwells, MER, bombs, zoom in cockpit. Camo - Cpt Vic Vizcarria - Thailand 1966 - Takhli AFB4 points
-
Hello, My last model : Special Hobby 1/72 Mirage F-1CZ Decals : Xtradecals and some stencils from Albatross Paint : Gunze (Mix) and Alclad Accessories, Pitot tub from master, and Resin ejection Seat. Great kit, I simply applied Mr Surfacer on the panel line to decrease engraving. Hope you enjoy this kit too Ivan4 points
-
the plan is to put another 3-4 coats on. What's happening is the whole thing is raising. Once I've got another 3-4 coats on, I'll leave it til the weekend to harden then I plan to peel off everything apart from the 2 templates. Once there, I will sand them back down to the tape, before peeling it off. Hopefully that will work. Hopefully.......4 points
-
Airfix Tomahawk IIB 1/72 Built OOB as AK402 112Sqn 1941 flown by Neville Duke, paints also supplied by Xtracrylix, finished with W&N Matt WIP: http://www.britmodeller.com/forums/index.php?/topic/235008280-finished-pbs-tomahawk/4 points
-
Bill: "I keep buying clever stuff other people recommend" is an easy habit to pick up. I mean, one only has to search for "HiQ Parts carving guide tape", just out of interest you know, and before you know it you find that lots of people have it, including places like ModelsRGo for under £6 where you can buy other stuff that might some in handy like seam scrapers and, oooh look "Airwaves - 1:72 Luftwaffe Mottle Masks" and clamps and paint and scribers and....4 points
-
Long overdue an update on this build.......................................... The decals are complete, the stencil decals provided with the Authentic Decal set are not 100% accurate but after some head scratching I decided they're was no other option and they'd have to do. After this I'll be adding the various air inlets and the countermeasures dispensers on the engine nacelles. I'll be working on this again so should see some progress.4 points
-
You have to watch out for that seam monster of Simon's Ced, this looks a far more complex model than I will be tackling any other day But of course CedB will breeze through it eventually, usually with a Beaufort Strength 8 or 9 breeze (I hope y'all seen wot I dun there, it were base punnery of the rankest kind. I do not want to have to do it again later for any that missed it)* Glad a truncated driver can fit too, the canopy driver interface had me a bit worritted nice work amigo *Look no, I mean listen, he's just done a Beaufort so I slipped it in Gently as a weak pun Oh no, never mind carry on with your business4 points
-
Thanks Rob (PM me if you really need the cubes!) Thanks Tony It is growing on me... quite pretty really, and the wing shape... Thanks Chris It is going together quickly... or perhaps I'm not bothering too much? I hope it's the former! Hi John Missed the nap for an air display? Fair enough... Thanks Giorgio Thanks John Thanks Leon Thanks Benedikt I don't know if it's downscaled... Biggles seems to think it is? Thanks Jaime, very kind Very little progress today as I'm faced with lots of fiddly little bits and need to fill my patience tank. I did fit the pilot and test the canopy fit: The pilot's a bit small and even shorter as I had to cut his legs off below the knee to get him in. Don't worry though - there aren't any rudder pedals in this kit anyway...4 points
-
No.230873, Second Subaltern Elizabeth Windsor, No.1 Beaufort Company, Auxiliary Territorial Service, March 1945. Tamiya 1/35 Tilly, SKP Models Princess Elizabeth.4 points
-
I managed to finish off this vignette yesterday so here are a few pics of the finished article, more in the completed builds thread. I had a bit of a nightmare trying to fit the side windows so eventually I used some very thin plastic sheet to make my own and put them in the lowest position - much easier!4 points
-
Things are finally getting back to normal - family gone back over the pond, work piling up and more trips on the horizon, but sneaky old me managed to find some time for muddling, sorry modeling. Not a great deal, but some... I had been plodding about with the tail planes and the issue I had was that the resin parts were designed for the Eduard/Gavia kit and I had the good old Hawk version. The locating tabs for the tail planes were different. The Hawk kit had great big thick locators and the resin parts had two thin locators offset from each other - I guess they fitted one on top of the other in the Eduard kit.... but not here. In the end I drilled the resin parts, added a small piece of wire rod, filed to a sharp point, and pressed that onto the kit (after marking where the Hawk kit parts lined up. - small sharpy pointy thing here.... With the kit suitably marked, I then drilled out a hole for a larger piece of brass rod as you can see here. There will still be a little bit of phnargling around when the time comes to (eventually) fit the tail planes but at least they will be secure. I also fitted the sliding shelf and a small radio looking thing at the rear of the observers position (of course never to be seen again once the ledge gets fitted) I think I'm almost at the point of being able to throw on a coat of primer to see what's what and all that. However, I noticed that there were a few greeblies hanging off the underside which were not (unsurprisingly) represented on the kit. First up was this small panel just aft of the cowling - I scribed the panel then followed that up by adding a small section of bent wire as there appears to be a small fairing or summat around the front edge on the BM walkrounds. A few more panel lines were scribed - I'm getting better but still not anywhere near as good as some of my esteemed colleagues on here. That panel line just behind the undercarriage looks awful in the photo. I used some stretched runner to fill in the original gap then rescribed - you'll just have to take my word for it that what you see is the stretched runner that looks bad, the actual panel line isn't that bad - I'm putting it down to a badly fitting panel hammered in place by some grumpy rigger. Also added at this stage are the four small rectangular parts - I'm assuming they are some form of panel fastener. I did actually try and make them line up a lot better than they are, but again, looking at the photo's o the walkround, they don't look too neat on the 1:1 so I'm going to live with it. The camera port was added by drilling then lining with styrene tube - there is a small etch panel to go over this later. I think it should have been more offset but I had a wandering drill. Now, the big white panel and the two "runners" may be a point of contention... the drawings I have show a sliding panel, they also show a panel which supposedly folds out with a small ladder - and I have seen reference to both of these in a few threads and other material. That said, there seems to be no definitive photo's showing this arrangement, and the best photo's I have seen (so far) merely hint at the hardware. So I'm taking a bit of a liberty and decided to show these - mainly just to add some visual interest on the bottom half, which will likely never be seen anyway. What is absolutely concrete though is a number of holes and cutouts on the 1:1 - now they may, or may not be present on the Mk II, but again, visual interest wins the argument for the day. This one caused me a bit of consternation and a fair bit of mind work trying to figure out just how to do it.... There are two slots, one on each side of the fuselage. Well, they are more ovals than slots, but at this scale..... My initial plan was to shape a small piece of brass, heat it up then push the brass through the fuselage. Luckily I had a few trials on some scrap kit plastic - the plastic is so thick and so hard, that I had to heat the brass up to quite a high temperature before I could get it to start melting plastic. With the brass that hot, any slight movement on my part deformed the slot - so I put that idea to bed. Next, I tried another option.... drill two holes, one at each end of the slot, then cut out the plastic in between. Much easier to write than to do... but I got there with a mixture of drilling, scraping and filing. Whilst enjoying the photography in the walkrounds, I also noticed that the kit rail for the sliding canopy was a bit iffy, being about half the length it needed to be - and also didn't look very good. I searched around for suitable materials, hoping to find some tiny plastic strips somewhere - but to no avail. The best I could find was this small diameter wire... which means superglue! AAaaarghhhhhh Now, knowing my history with that 'orrible ca stuff, I decided I needed a more robust attachment method, and came up with this crazy idea... Masking tape marked out the extents of the sliding rail - I then drilled a tiny hole at the rearmost point of the rail. The wire was then bent at 90°, and another 90° at the forward end where it met the observers bay. I tried to make the forward bend just slightly short of the length needed, then I used a three square file to make a notch on the rear frame of the observers bay. (and you can see here that I've also been drilling holes all over the fuselage to represent fasteners, and other such greeblies). While we're here - I also removed the very nicely engineered rivets from the vertical stabilizer and did some more scribing around the tail. The notch allowed the "rail" to sort of click into place, and the tension, small though it was, helped keep the rail straight. More masking tape was applied around the rail so I couldn't see any plastic, then I ran ca glue up and down the rail in the desperate hope that some of it would seep into the gap between the rail and the fuselage. The masking tape was then removed and a small stop added to the end of the rail. Now, just how long that will all stay in place is anybody's guess.4 points
-
Hi all First time posting a build on here Here's the kit I will be working with Decals are on the way from Draw Decal Haven't decided on winglets or not yet but plenty to do before then Anyways onwards and upwards I may get it started3 points
-
I was able to get my butt down to the EAA Airventure airshow in Oshkosh, Wisconsin this year. My first ever Airventure. My first airshow in many many years. And my first airshow since getting into photography. While there were numerous aircraft that caught my attention, this one I knew I had to get as many photos as I could. I should have shot more but there's just so much to see you can't really afford to linger in any one spot for too long. So why is this aircraft so interesting? Well, as I was walking past I couldn't help but notice that she looked like she was fresh from a factory in 1943. The owner noticed me and said that's actually a pretty accurate statement! The restoration had been completed only two weeks prior. And this restoration was as complete as humanly possible. This is exactly how the aircraft looked in 1943 when she was reassembled and made ready for operations in the PTO. As the owner said to me, Rosie the riveter was good, but we had the time to make her perfect. And boy is she ever perfect. The gun sight is fully functional. There's a gun camera complete with film! Enough talk. Here are a few photos with far more up on my flickr page. Thanks for looking. 20160731-MJS_8741 by _m_sinclair, on Flickr Another point of interest. This isn't just any P-40M that happened to be painted in these colours. This really is NZ3119! These are the same colours she wore way back in 1943. While this aircraft is not known to have scored any kills, the pilot of this aircraft did get a kill in his previous aircraft. 20160731-MJS_8520 by _m_sinclair, on Flickr 20160731-MJS_8530 by _m_sinclair, on Flickr 20160731-MJS_8559 by _m_sinclair, on Flickr 20160731-MJS_8561 by _m_sinclair, on Flickr Although he did not fly this particular P-40M, this aircraft was signed by the highest scoring ace in the RNZAF, Geoffrey B Fisken. 20160731-MJS_8548 by _m_sinclair, on Flickr The level of detail is jawdropping on this bird. Everything on this aircraft is as it was when it was new in 1943. The individual markings were not just copied in appearance. But they were applied was using the original technique. 20160731-MJS_8566 by _m_sinclair, on Flickr 20160731-MJS_8569 by _m_sinclair, on Flickr 20160731-MJS_8575 by _m_sinclair, on Flickr 20160731-MJS_8579 by _m_sinclair, on Flickr I had no idea P-40's had a cloth liner in the wheel wells. Wonder how long they actually lasted? 20160731-MJS_8581 by _m_sinclair, on Flickr I learned that along with keeping out FOD, there was a second purpose to taping the guns. It indicated to the pilot the guns were armed and ready to go. 20160731-MJS_8594 by _m_sinclair, on Flickr 20160731-MJS_8599 by _m_sinclair, on Flickr Nice chocks! 20160731-MJS_8617 by _m_sinclair, on Flickr If I ever get the chance, I will happily shoot far more detail shots of this magnificent warbird. If you would like to see more just click the link to get the whole album. https://www.flickr.com/photos/92554273@N07/albums/72157672652776801/with/29616383635/ Cheers! -matt3 points
-
Quick update Doors on and just the aerials to build, Oh and the 1/48th Hercules. The final aim Last picture care of NZ Govt Antarctica survey. Cheers Colin3 points
-
Moving onto the main gun, I'm waiting for the chipping fluid to dry on a couple of road wheels that I missed on the first pass. Cheers for looking Dan3 points
-
And with some dark brown chipping More later Dan3 points
-
Wing fold jury struts would be the words your looking for. Correct terminology at all time Gents, this is a Naval aircraft we are speaking of! (The aircraft in the pic is reputed to be WZ.937, my second resto) Debris guard, the tag looks like a US label or some such, way too small for an RBF.3 points
-
S'funny - I nearly wrote: "Looking forward to the first WIPs on BM" - how about it Crisp - might it tempt you into 1/72? (after all if you can do a 1/350 boat......) But then I figured you were gonna be busy for a while with the definitive Sea King (although I do myself have a greater fondness - and not a little gratitude - for the old girl when dressed in her yellow clothes).3 points
-
I know what you mean, Bill - but even if you don't use your chisel for months, when you actually do you will realise why you got it. I bought mine almost 2 years ago, but only really used it in earnest got the first time a couple of weeks ago... and it is awesome3 points


This leaderboard is set to London/GMT+01:00