Leaderboard
Popular Content
Showing content with the highest reputation on 02/09/16 in all areas
-
Built oob so I didn't go in for any super detailing and too much weathering as I wanted to try out Spencer Pollards take on nmf so kept it looking a clean aircraft, which looks as though they kept them that way at the time. Kit wasn't the best to try out nmf with the fit work involved around the intakes and I don't know what's happened to the molds at Eduard with this kit, as the small stuff suffers from what looks like mold slip and it needs a lot of clean up. Tamiya AS12 decanted and sprayed through the airbrush, followed by Mr Hobby super metallic, and Tamiya smoke all used with Mr Levelling thinner. There is some variation on the nmf but it seems to have vanished with the photos, looks better in the flesh so to speak. Thanks for looking Mirage IIIC No 92, EC02/010 seine,Arme'e de I' air BA120 Cazaux, April 197619 points
-
Hi all Spitfire MK XII - Airfix 1/48 For the first time in more than 25 years I've built an 1/48th scale model. This was a Kris-Kringle present and I decided to build it despite not being my preferred scale. So here we go! This new tooling Airfix kit is really very nicely done, excellent details and fine and crisp engraved panel lines. Also the fit is just perfect and I haven't use putty at all. The decals has two options and I decided to do one flown by South Australian RAAF Flight Lieutnant Donald Smith. Don Smith was the Squadron Leader and it was his personal aircraft. References: The model: Until next time! Cheers18 points
-
VC10 C Mk 1 10 Sqn, RAF Brize Norton, 1968 Roden Super VC10 kit converted to the RAF version by removing fuselage sections ahead and behind the wing. A lot of Milliput was needed to blend in the rear section. Cuts were made to retain the wing to fuselage fairing. A tailcone extension was also needed for the APU mounting. Decals were by TwoSix. I expected this to be a much easier build than it was. Fit of parts was not that good and needed a lot of work. Surface detail was good, but a tad on the heavy side But hey – it’s a new VC10. No more mega-scribing of the 60s Airfix kit! PS – If anyone finds my photos distorted where I’ve cropped them, which seems to have happened to me previously – I’m sorry but I’ve no idea what to do about it!14 points
-
Hi, Here is my attempt at the old but still nice Spitfire VI from Hasegawa. It's my first 1/32 build as an adult. My dad built the old Revell Harrier kit for me when I was a nipper. I guess I should give that a go at some point. Anyhow this build is strictly OOB I did make some belts out of tape and wire. But given its a VI and the canopy is closed not much can be seen. I painted some of the markings. But used the kit codes. I enjoyed the build. The kit went together nicely and without fuss and the result looks like a Spitfire to me. I also enjoyed dabbling with 1/32 I'm sure I'll do another aircraft in this scale. Thanks for looking Plasto14 points
-
Evening All. Just finished the Aoshima Ta 152 tonight. This one has been in the unfinished box for a couple of years and I finally got it finished. There was no real reason for me stalling on this build as it goes together really well. I think I lost interest when I was painting it. Cheers Allan12 points
-
Morning Peeps. Been absent from BM for a few weeks as I've had other calls on my time - oh and also had a rather pleasant trip to the Orkneys to go walking and cycling. I love the Orkney Islands. This is Pierowall Bay in Westray - big skies, blue seas and basking seals! Great day out on the hire bikes The coastal walking is great as well - with lots of seabirds for company. I saw a fascinating dog fight between a Skua and a Black Backed Gull as the Gull tried unsuccesfully to harass the Skua into dropping its fish. Lots of turning and burning and I swear the Gull was doing low speed yo-yo's to try and turn inside the Skua And the Fulmars provided a near constant air display as they endlessly rode the air currents along the cliffs edges. They clearly haven't read the CAA rules on keeping clear of the crowd line as they came so close I could get decent photo's of em with my iPhone! Anyways - enough of such drivel - I have at last been able to spend a couple of short sessions on the Hawks. I used some scrap plastic card Tom. I think it's 0.5mm. I drilled a suitably sized hole at each corner - to get the correct radius - and then just cut away the plastic between the holes and used a needle file to clean it all up. The next task was scribing the Ram Air Turbine doors on the fuselage spine. This caused me a bit of a headache as the doors are neither a regular rectangle nor oval shape - or for that matter any other shape that had an equivalent on my scribing templates! So I had to make another home-brew template.....and cos of the difficulty getting it properly symmetrical I thought it better just make a template for one door - and then reverse it to scribe the other door - like this: Rather fiddly - but it worked out ok in the end: Incidentally; the two rounded rectangular shapes forward of the starter exhaust hole are outlines I scribed for the fuselage grills that were discussed several posts back. You may remember that I thought I'd be able to scribe them using a PE part as a template? Well Phil (Longman2) was correct when he said that the template looked overscale. Heres the PE part just positioned alongside one of my scribed outlines for size comparison: I've got one or two ideas for how to represent the grills - but that's a job for another day..... After the RAT doors the next task was the collar for the starter exhaust. For real this is a plate/moulding screwed onto the fuselage skin and so is very slightly raised in profile. I thought it would be fun to make it out of 0.1mm card to add a bit of surface detailing to the models. Started by punching some 2mm holes in 0.1mm plastic card: Then I punched out a 3.2mm disc with the 2mm holes slightly offset: The shaped the punched discs a little using a sanding stick: And stuck em over the exhaust holes thus: The starter exhaust nestles inside the fuselage exit hole - and I've fabricated the exhausts from some suitably sized aluminium tube that I've thinned at the ends using my Tamiya battery router as a lathe and micro files and sanding sticks to thin the tube walls: Next step is to cut off the thinned ends of the tube and glue them in the exhaust holes. I'm hoping that these little bits of fine details will stand out and add interest when the darn things are finally painted......Otherwise it'll all have been a waste of time (albeit quite fun to do) Right - I'm off to catch up with other folk's builds on BM now......12 points
-
#26/2016 After my dad started the Eduard Israeli Spit and learned how to build this kit, he decided to build the second and last Eduard Spit of our stash too. After two two-color schemes he wanted to do something easier. I suggested a Foliage Green Aussie Spit and he liked it. Sadly the decal aftermarket for green Spits isn´t big. Finally I found a nice sheet from DK Decals (Czech made, good quality, but limited series of 200pcs)which included one green scheme. Used Eduard Super-Fabric seatbelts and Eduard Brassin block tread wheels, painted with Gunze H302 for Foliage Green and Gunze RLM65 for RAAF Sky Blue. The model shows the a/c of Sqn Ldr Ron Susans, 79Sqn RAAF, first Mk.VIII raised through the Australian Victory Bond. P.S.: Thanks to fellow Hyperscaler/Britmodeller Ed Russel for providing info and pics!9 points
-
Long work, but I can be happy to show you The construction of the model I have used additional sets: Quickboost Su-7 Gun Barrels Quickboost SU-7 pitot tubes Quickboost Su-7 radome9 points
-
Thanks Jon I'm not sure I can live up to that... in fact I'm sure I can't! Paper templates cut and affixed: and fuselage masked with Panzer Putty: I do like this stuff and I'm getting the hang of it, stretching it into thinner sheets / strips rather than trying to mold it on... As I was spying the DE I realised I should have paid more attention to fixing the paper - I'd just 'stretched it down' and taped it on the edges with only a few bits of tape underneath where it was obviously raised above the surface. As usual I couldn't wait to pull the masking off: It's still not dry. Naughty. Some bits will need attention and there's some strange black lines which must be the Panzer Putty sticking to the paint? A bit of touching up will sort that and I need to paint the cowlings anyway (I don't like trying mask these - too hard). The good thing about the Lifecolor is that it brushes well too IIRC. I think I've made a mistake too in not having Sky under the wing roots. I'd convinced myself that the demarcation line was along the bomb bay due a photo I'd seen which I now can't find... off for a search but I think I need to paint those too. When it's dried properly.9 points
-
I'm struggling to find the time to do any modelling at the moment, but I do find it a good way to de-stress in the evening, so this has been a quick "out the box" build of a reasonable modern kit to reflect one of my favourites from this year's Fairford Airshow. It's the Italeri 1/72 MiG 29 in its current issue, with some excellent Polish Air Force decals. Apart from a little filler on fuselage and wing joints, plus a need to tidy up the intakes, I found this an easy build, although the commemorative markings on the fins and spine seem to be in the wrong colours - if I had had a little more time I would have applied a light grey wash/filter over them. Although Italeri neglect to tell you, the image on the tail of this MiG is that of Polish pilot Eugeniusz Horbaczewski, the third highest scoring Polish fighter ace of WW2, with 16.5 confirmed kills (16 individual and one shared) and one probable kill. FredT8 points
-
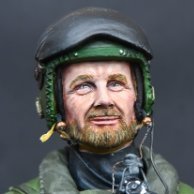
Thanks Stix! You're the master of the ground works, so I'll steal some (or a lot ) from your work, if you don't mind. Thanks Cookie! Alright, a couple of days ago I received my new toy modelling tool : and decided to put it to good use, painting the Indian Tracker's face. I normally use a magnifier, the lamp built in type, but especially when painting faces, it gets in the way of the brush, so I'm forced to work at awkward angles. Now this visor is so much better in that respect, and even has five different magnifications to select from; after trying all of them, I did the job using the smallest one. I spare you from all the painting steps, which were very much like what I did for the Yankee's face, here are just a couple of in progress shots: The biggest difference with the Yankee's face is that I had to apply multiple filters to tie in properly the contrasts and to attain an appropriate skin tone, which I'm not totally happy with BTW. I guess I need to experiment more on the Native Americans skin tone, but not in this scale. I have a 120mm resin figure in my stash that could help Anyway, here's the guy: For the last pic, my camera was set in AUTO mode, and switched automatically on "Face detection"; that's when I know I did a decent job Macro effect should be banned for this scale ... :D Hopefully more progress during the WE. Ciao7 points
-
spaddad - thank you for your preorder. Release date is clear - Telford show, not earlier. Preorder action is still running. During the finishing touches on the master kit we decided one of the "early" type of the rudders to give you even more choices. My avatar, well, I have to check my photos and find something another, smiley one. But there is no promise from my side... :-)7 points
-
I couldn't resist manipulating the photo above for a little period feel. It's the Caudron C.448 Goeland from the Paris-Saigon 1936 race. A race that none of the three participants finished... The model is built from RS Models 1/72 kit using a mix of decals from both Renaissance and LF Models, as well as a resin rudder from LF. I went mostly with Renaissance instructions and the only small blurred reference photo I could find. With some unclear details I have simply used my imagination. There is a build thread here. And lastly together with a little sister, the Caudron C.635 Simoun from the Paris-Tokyo raid 1937 I built quite a number of years ago.7 points
-
The hair shirt was donned, the coir mat underbreeks were donned and the birch branches were laid out for a good session of self flagellation. Actually, I managed to get the wife and the mother in law to head to Rehoboth for a couple of days so at least I will have one day to myself. As Martin pointed out, the tailplanes were relatively easy. (Sorry for the quality of the photo) The resin blocks were cut roughly to shape with the razor saw, then careful filing brought them into line. Micro mesh finished them off for the moment. From the drawing I have it looks as though the trailing edge of the elevator is at a slightly different angle from the Mk I/III but close enough, particularly as I don't fully trust the drawings. You can see how far out they were compared to the kit items. They're good enough for now - I'll know more when it comes time to prime them. So, since I was working on the tailplanes, I thought I may as well make up the small vertical panel that fits at the inner edge between the tailplane and the fuselage. I first made up a small template in styrene then transferred that to 0.005" brass sheet. I tried chain drilling the slot but my angles were slightly out. However, once that's painted, and the fuselage is painted I think it will pass muster. (I know... slacking again!) Then I put some wings on ! Okay, they're only small wings, but they're wings nonetheless. That's a major step forward in this build. Since there's still a lot of handling to be done on this adventure, I thought it best to pin those winglets on. Brass rod was superglued into the undercarriage - making sure it was a good tight fit with both undercarriage and winglets, then styrene cement to stick the actual flappers on. I'll let that cure overnight then start the ritualistic filling and sanding once I know they're definitely stuck on there. I was tempted to hang the engine on the front end, but that would only be tempting fate with all the handling that's still to be done. Now, since I seemed to be having stupendous leaps forward, it was only to be expected that something was bound to go wrong... and it did. - I started the final shaping and sanding of the wing leading edges - only to find that yet more holes opened up as I got to the micromeshing/polishing stage. booger! You may just be able to see the few small crevices starting to open up in the photo below. This was starting to get a bit repetitive. I had already gone through about 4 rounds of Deb's SoupGloop®™[patent pending]/[as seen on BM] filling and sanding, even diluting the soup enough so that it ran inside the wing - obviously not enough it would seem. But then I had a brainwave, or at least a little bit of a brainwave.... I still had not closed up the gaps in the aileron bays, therefore, I had decent access to the insides. I mixed up some resin and squirted it inside the wings using a pipette. While the resin was still liquid, I tipped the wings back and forth, praying to the modeling gods that the resin would flow back and forth along the leading edge and provide a nice thick layer inside. (plenty of tape to protect the wings 'cus I'm a messy booger at timers) Well, whadya know - it seems to have worked ! The resin was liquid enough to start seeping through some of the small holes I had created - which means that the resin has successfully coated the inside of the wings all along the front edge. I'll leave that to set up overnight. The wings are a little bit heavier now, but I believe I can now sand and polish the leading edge without any more crevices opening up on me. Tomorrow's adventure in Lysander land will tell. (Though I will probably now have to make brass struts to support the weight of the resin in the wings.)7 points
-
Tamiya 1/48 Panzerkampfwagen 38(t) Ausf.E/F Calling this one done, was going to be a weekend project, but went on a bit longer than that, really pleased with the result though, think i have fallen in Love with these Tamiya 1/48 Models;6 points
-
Hi Folks, Finally I am calling this one complete. So I managed to cobble together a bit of a base and a figure. I had intended to add a lot more foliage to the base as I had 'won' some scale trees on ebay, only to be told the day after thath the seller was selling them on behalf of a friend, and the friend sold them without telling him, so he couldn't.......blah , blah! Money refunded though! So two twigs are the poor substitutes. The figure is by Platoon. Just playing on Adobe something... Cheers Keith6 points
-
Let me show you what I'm doing for the weathering of this Walker. Maybe you'll think that it's too much but according to the story I want to tell, it's coherent ! I worked on the head... Endor is really a moist planet ! As you can see, this side is not done yet !6 points
-
I hope you are all sitting down as you read this as you are in for something of a shock. Martin has actually finished a model!!! I am pretty stunned myself at this news. The model in question is the Fly Models 1/72 Avrocar. I have been plugging away at this kit for nearly three years now. Partly due to the fact that I decided to open up the cockpits and scratch build replacements for the kit items and partly due to the fact that I find Fly kits are the kind of builds where you do a bit and then have to go away and think about them and do extra research. Down to the esoteric nature of some of the subjects I guess. All of my Fly builds have followed this pattern but I have always ended up with a great sense of satisfaction and a model I am really pleased with. Anyhow, to prove that this is no figment of my fevered imagination here are the pictures. Thanks for looking Martian5 points
-
03.07.1944 No. 3 Squadron Tempest V JN752 JF-S Fl/Sgt. Stanislaw Domanski Operation: V1 Patrol Date: 3rd July 1944 (Monday) Unit: No. 3 Squadron Type: Hawker Tempest V Serial: JN752 Code: JF-S Base: RAF Newchurch Location: Cliff Farm, Playden, Sussex. Pilot: Fl/Sgt. Stanislaw Domanski 782357 PAF Age 24. Killed REASON FOR LOSS: On patrol looking for incoming V1's when hit by allied anti-aircraft fire. Crashing at Cliff Farm, Playden, Sussex killing the pilot. Stanislaw Domanski was the brother of my grandfather Painting Gunze, Tamiya5 points
-
I built this about 2 years ago, two 2nd place at the IPMS Atlanta Show, Built almost straight from the box , except decals and some photo etch in the cockpit, The kit is the Hasegawa Bf-109G65 points
-
A gift from a modeler in Ohio. I had never heard of this plane before. It was one of 6 kits he sent that he would "never build". I am grateful for the kits and the chance to build them. Thanks Rick Typical Eastern European kit, soft plastic, resin "fiddly bits" and a vac canopy. This is #11 for the year hope you like it. Painted in MM enamels. All decals are from the kit.5 points
-
So the Heller-Matchbox 1/72 combo is ready. A target towing plane from the Swedish A.F. The two targets are scratch built. and the plane was converted. More about the build here: http://www.britmodeller.com/forums/index.php?/topic/235007520-saab-j-29f-tunnan-target-tower/5 points
-
... although I think the cowlings will cover that bit so I won't bother. Looking at the scheme (that we know isn't to proportion): I reckoned I could use the DG bits for paper masks so I did this: More drying.5 points
-
Hello All, I have been building a Breda 65 from RCR, build thread here. This is a short run kit, with the usual mix of resin, PE, white metal and, yes, plastic, with instructions that show parts magically coming together to be glued in mid-air next to other parts. Oh, and decals that shatter on contact with water. Actually, it wasn't that bad, although a certain amount of "fun" was had to make it all join up. Here we go: Thanks for looking, Adrian4 points
-
I can't actually remember when I built this but it must be about 4-5 years ago. It's the Trumpeter 1/700 HMS Eskimo (Tribal class), the kit was enhanced by etch scrounged from various sets and with WEM resin 4.7 inch guns (* 3), a twin 4 inch gun, quad Pom-pom and a torpedo tube set. The rigging was done with WEM's rigging material (no longer available) and it was painted with WEM Enamels in a Western Approaches camouflage scheme. thanks Mike4 points
-
Hi folks, Long time no post. Lots of stalled builds, so I tried something simple for a quick build and as a leaving gift to a colleague who is shortly returning to New Zealand. Zvezda 1/144 Boeing 787-9 kit with f-dcal decals. I figured there'd be tons of these on here, but surprised I couldn't find any. Kit is deceptively simple but very good. The engines, with separate fan blades are exceptional. The entire lower wing is a single piece moulding, significantly aiding the wing/fuselage join and the wing dihedral. The only downside are the overly shallow panel-lines, which all but disappear under paint and varnish. I replaced the landing gear with the Scale Aircraft Conversions white metal gear out of preference. The f-dcal decals are mostly silk-screen printed, with just the engine exterior decals and cargo doors on a supplemental laser-printed sheet. The silk-screen decals are exceptionally thin, like to curl up and stay put, so need some care, but survived quite a lot of abuse. They responded well to MicroSet and Sol without any adverse reactions. The rear fuselage fern is printed integral with the rear set of windows (aids positioning) but was challenging to get into position and remove wrinkles/air bubbles. Patience is most definitely the order of the day. Which I had run out of by the time I got to do the wing walkways. Oh, and to note, the kit decal windows do not fully align with the kit windows, so these need filling completely or one has to resort applying the windows individually. I found out the hard way. :-/ Paints were my usual Zero Paints white primer, white and black, AlClads metals and Alclad Aqua Gloss varnish, latter applied with a wide flat brush. On the with photos. Regards, Darren4 points
-
Here's my latest build. I built this from the weekend edition kit. I added scratchbuilt levers in the cockpit and hand painted the gauges. I also scratchbuilt the engine tubing. Seatbelts are Eduard Superfabric. The kit decals were used, which were magnificent. They went down wonderfully. Paints used were Vallejo Model Air and Model Master Acryl. The kit went together perfectly, the fit was outstanding. The only mishap was losing the pitot tube to the carpet monster.4 points
-
Nothing much to report. The intakes have been sprayed white and the steel compressor blades have been sprayed with a coat of klear ready for a wash. IMAG1687 by Mark Inman, on Flickr4 points
-
Hi Alberto, thanks for the pointer, but I'm building this purely for my own amusement and do not intend any radical surgery beyond that demanded by the kit instructions - I don't know enough about the real aircraft to be upset by any inconsistencies in the kit and I am quite happy in my ignorance Thanks Cookie, I hope it will look acceptable once the canopy is fitted Thanks very much Aaron - about that surgery... I'm actually in a slight rage about that, it didn't go terribly well and the most irritating part is that it was sort of my fault for not checking before cutting... but in short, if you remove the area of the chin shown on the instructions, as I did, you will end up with a hole that is both wider and shorter than the resin part intended to fit over it. Also the resin part has bevelled edges so it is clearly not meant to fit in the hole, but over it... now if I were a better and more conscientious modeller I would be able to advise would-be builders what to do about this, but I am not and I blindly followed the kit instructions and then on finding the true situation tried to fill the gaps with superglue gel. This worked after a fashion but I have no idea if the resin part is where it should be: It's still going to need some cleaning up but I am reasonably confident that the underside won't be all that visible when it is finished. I also assembled the nose-cap with the forward-looking-infra-red unit and the chin turret: ... and I packed both of these with Liquid Gravity mixed with PVA glue, as the instructions call for 3g nose-weight (in truth I have no idea how much 3g is in real terms but I hope this ought to do it): Those parts will be fitted soon and then the tail assembly can be started. Cheers, Stew4 points
-
here is a Il-2 in a late winter early spring with the remnants of a winter theme camo... http://i345.photobucket.com/albums/p37 To achieve this effect. The original camo colors were put down and modulated to get a slightly worn efect . This was followed by adding a salt sludge. While the salt sludge was still damp the whit was oversprayed in varying layers to further add to the worn effect ......lastly about 10% light flesh was added to cold white and then selectively sprayed to get a dirty look to some of the white distemper4 points
-
Lateral thinking and desperation make a good combination Leonl! It turned out that my idea worked (Pete, I'm surprised that you didn't make some comment about resonating somewhere) and the wings appeared in good shape this morning. It didn't take long before I had them knocked into shape. I was so happy that I started to get the airbrush and primer ready when I remembered.... access panels ! darnit ! The Lysander wing is dotted with a number of circular access panels on both the upper and lower surfaces. The Eduard etch kindly supplied a number of these panels on their fret, but for some obscure reason, only supplied panels for the lower surface of the wing. Now, normally I am not a fan of etch panels stuck on a surface because 90% of the time it looks exactly just like that - etch panels stuck on a surface. However, in this instance, I managed to convince myself that little metal panels on a fabric surface would stand out a bit, so decided to go with the flow and use the supplied etch panels for the wing lower surface. The first one didn't look too bad.... but.... I measured the fret thickness and it turned out (as usual) to be about 0.005", and I wanted the upper panels to be less conspicuous - so I dug out the shim stock I had ordered a few weeks back and lo and behold, I had a sheet of 0.001" shim stock - success ! I found a punch that was the right size (more luck!) and punched out 14 of the little blighters. I then spent a while surfing the interwebby until I found The best pics I could of the wing surfaces - there's not that many good shots out there. In fact it was so difficult to see some of the panels that in the end I just took my best guess - as long as it looks like a Lysander in the end I'll be happy. Here we are - 5 thou panels on the lower surface and 1 thou panels on the wing upper surface. - Also, I've now cut out the areas for the navigation lights. I went with some photo's I have for sizing as the kit impressions for the lights were way too small. No doubt someone will come along now and post a great picture of all the access panels on a Mk II... too late! it's done and I'm sticking with it. The airbrush and primer readied and I fired off some quick (alclad) priming.... the "new" tailplanes don't look too bad with just minimal cleanup required. However... the wings.... I'm very happy with. The 1 thou panels have achieved the effect I was looking for -so much so, that you can hardly see them here in this shot. So, after a few weeks of frustration and set backs, I'm now much happier with this build and feel I have actually achieved something in the last few days. There's still lots of work to be done in order to make the slats and get the ailerons and flaps fitted but it always helps to make some headway every now and then.4 points
-
Hi everyone! Here’s the latest kit off the bench, Hasegawa’s very new Typhoon, finished in 3 Squadron colours. This is a fine kit, has bags of additional weapons and though there are simplifications here and there, is very easy to build, with zero need for filler or additional work to have it ready for painting. I changed a few things: detailed the cockpit, repositioned the flaps and canards and opened the canopy – the latter not offered in the kit… This will appear in Military Illustrated Aircraft. I hope you like it! Spence4 points
-
It looks a bit to me like the sort of low key operation that does what they enjoy doing. I for one would love a Firecest & this is probably the only way to get one. The Venom, Canberra B2 etc belong on the stock lists of main stream manufacturers imho. Steve.4 points
-
Hi, Here is my MiG-25U built from the Condor kit. I used some decals From Bergmot and The Engine cans are from Armory. Painted in Tamiya Acrylics. Its been an on and off build for a while. So I'm glad to get it looking finished.. Thanks for looking.. Cheers Plasto4 points
-
I'll have you know that I personally fracked the oil that lubricates those hinges. And Zebedee the Terrorist Terrier (my dog!) is out digging for more as we speak...4 points
-
4 points
-
4 points
-
..and where all this is heading; the first droop stop (experimentally) complete: Perhaps seen the right way up it will give a better idea: ...and a close-up reminder of a real one: I love it when plan comes together! More over the weekend (away tomorrow) Crisp4 points
-
Hi everyone, This my latest work: UH-1Y from Kitty Hawk kit. Hope you enjoy Thanks3 points
-
Hi Chaps, here's one a finished a couple of months ago - it also won a prize at the NZ IPMS Model Expo back in April. Combrig 1/700 kit with scratched brass (soldered joints) masts and yards, added coal shute covers, ash-truck tracks, boat oars, etc and as much rigging as I could interpolate. This was both black and brown eazy-line stuff de-stranded to single threads for halyards etc and Caenis thread for most standing rigging. I found an image on the interweb showing Monmouth with new stockless anchor fit and obvious repainting near the hawse holes. A major botch that I didn't notice was quite a bit of blue overspray from the sea base - I thought I had masked sufficiently. Doh! Dedicated to the 690 or more men and boys lost with the ship, Battle of Coronel, 1 November 1914, at least 9 of whom had been to my old school - Royal Hospital School ("Cradle of the Navy") - until the 1930s where Maritime Museum Greenwich is now. Cheers, GrahamB3 points
-
This one has been a must-do project for a while, having built it twice previously: once as a kid, with no additions, alterations, rigging, or anything else not supplied in the box, and once about 5 years ago when I got back into the hobby. That time I added some basic detail such as interior, rigging, and a little engine detail, but when I looked at it later on I realised it was nowhere near what it should be...Once I got hold of a Choroszy engine and Miniworld guns the project was all set to go! So, what was needed? Here's what went into this transformation: Choroszy resin engine Miniworld brass guns and Scarff ring Barracuda resin pilot's seat PE stitching, control horns, and seatbelts Aeroclub prop and wheels. Everything else was either scratchbuilt or corrected from the kit parts. The fuselage had the tip of the nose removed to bring it back about 1mm and I removed all hints of the "engine" and cooling air scoop. It was cut through the middle of the pilot's cockpit to shorten it, and again just aft of the gunner's cockpit, to both shorten it a little more and to raise the rear decking to the correct height. The underside was then sanded to give a straight line from the bottom of the tail to the rear wing spar (the kit fuselage slopes from the tail to about 1cm aft of the rear spar) - I had to add some plastic inside the fuselage just below the gunner's position to provide enough plastic for the change in the profile. These corrections gave me the straight line I needed for the upper longeron, all the way from the top of the tail to the nose, just below the front cabane strut - the upper line of stitching follows this longeron. The gunner's cockpit was then moved forward by about 2mm. The wings were thinned considerably, the span and tip shapes corrected, and the rib detail added with 0.5mm Jammy Dog masking tape - I won't use that method again as I feel it is still a little over done. especially towards the rear of the wing where it should be very subtle, if not invisible. The lower wing was cut into 5 sections: the centre section was attached to the fuselage once that had been completed, and blended in to be a part of the fuselage. The inner stub wings were drilled out and corrected for their shape, then added to the fuselage with brass pins for strength. The main wings were also pinned with brass rod. Wing struts are kit items, thinned, reshaped, and with brass pins added for secure fitting to the wings. The undercarriage is scratchbuilt from brass rod, with plastic card CA'd on for the fairings. All tail surfaces are from plastic card, including the little vertical fin on the underside. Rigging is 1.5lb test Gamakatsu monofilament fishing line of 0.06mm run across a silver paint pen to give it some colour. I'm not quite sure why I omitted to add any panel detail on the nose, it should certainly have some. It looks a little bare, but I'm not going to do it now! That, in a nutshell, is it....I hope you like her! Here are some comparison pics with the unaltered one I did a few years back.... Thanks for all the support and good wishes during this build! Ian3 points
-
Hello all A few pics of one of my latest completions - Revell's Arado AR 196 in 1/32. All built out of the box with just a Montex Mini Mask for the canopy, and what a lovely kit to build. Loads of lovely detail inside and out, so I've posed it with everything open and with one wing folded. Eventually painted with a mix of Tamiya and Mr Hobby acrylics. I had intended to go with Humbrol's range of RLM colours for the RLM 72/73 topside camo, but these proceeded to block my airbrush in no time at all, and the paint i managed to get onto the plane had a horrible gritty finish to it that i could have sanded down another model with! I'm sure others out there have got good results using these paints, but I don't think I'll ever use them again... The eventual colours used for the splinter camo were a mish mash of greens and greys which I played around with until I ended up with something I was happy with, even if nowhere near the actual colours specified. Kept the weathering light as I usually do, with just some pre-shading of panel lines and oild-based washes applied. Overall I'm quite chuffed with how this one has turned out - a real pleasure to put together. Thanks for looking. Cheers Adam3 points
-
Aaaargggghhhh, it's being attacked by the Creature from the Black Lagoon.... Looks good after you peeled the monster off Ced! Keith3 points
-
Can you please place a second ruler next to the first ruler to prove that the first ruler is genuinely marked in centimetres and inches and isn't a trick ruler? Thanks. Badder3 points
-
I have two old fashioned metal and wood rifles, both Winchesters. One .22 and one 30-30 ( 7.62 ) for target shooting. A friend has a large calibre plastic jobbie and some of us have offered to fill it with wet sand for some weight, but he doesn't seem too keen.3 points
-
Bloomin eck. If something has to be this complicated in order to fly.......well praps it just didn't ought to. I'm glad I never had a close-up look at one before climbing on board Great metal working skills Crisp - this is definitely gonna be one to watch3 points
-
Being a bit of a transport aircraft fan I was pleased to see Roden release a "Proper" kit of the C-123, one that is far better than any that preceded it. It builds with no problems and has a nicely detailed but largely hidden interior. The only filler used was a bit on the underside where the surface is slightly concave to help with the seam. Paint used was mainly Humbrol 2002 polished aluminium with some panels in Tamiya flat aluminium and Model Master Jet Exhaust. Having enjoyed the flying (and crashing ) sequences in the film "Air America", their rather plain scheme seemed a natural choice and the somewhat sparse markings are contained on the decal sheet representing an example based in Laos where according to the movie the old workhorses performed all manner of tasks during the SE Asian conflict. All in all a great kit and most enjoyable build. Trev. IMGP8050 by Trevor Putterill, on Flickr IMGP8056 by Trevor Putterill, on Flickr IMGP8047 by Trevor Putterill, on Flickr3 points
-
I posted the following to ARC and the 72ndscaleUSmilair@yahoo group: I saw the sprues of the new Academy Super Hornet at the US IPMS Nationals last month, but was unable to find it for sale ... until two days ago when I saw it listed on Scale Hobbyist: So I paid for Priority shipping ($10.50) and got it today!!!!! (I use Scale Hobbyist regularly, and this outstanding service is typical. They also seem to have new kits the earliest of the US on-line shops). As for the kit, it's a snap type, and like the recent Academy Snap Phantom, the detail is outstanding. Unlike the recent (very nice) Academy F-16 Snap ,this one has full landing gear, full intake, and a comprehensive decal sheet (VF-84 and VFA-103), among other things. The yellow backed sheet provides stickers. I was amazed at the fit on the snap F-16, and it's just as good on the F/A-18F. Virtually no seams to fill. The only Cons to me are: the huge mounting holes on the wing bottoms for the pylons; and the One-Piece-Only canopy (but an easy cut). When I do my Blue Angels Super Hornet, those mounting holes will be filled with the nubs I cut off from the pylons. I have not checked "accuracy". Gene K (and since we all have to "experiment" with pieces from the spare parts bin, the Hasegawa E Model canopy is a near perfect kit ... however, note that the Academy kit includes the fuselage piece to blank off the second cockpit, meaning a snap E model is coming).3 points
-
Thanks guys! The masking wasn't too bad, but i won't know how well i did it till i remove it! Just a quickie, we have blue!! When its dry I'll do a top down lighter mix, then use a slightly darker mix for some post shading. Thanks for looking, more soon3 points
-
Thanks Kirk, I'm leaving the canopy open, so I followed your advice and painted the duct bottom with some thinned Matt Black, see below.Everybody, here's a small progress report: I'm heading to completion for the interiors, I only need to paint the seat now. Speaking of which, in preparation for the painting job, I did some dry brush with Lifecolor Dark Gull Grey to highlight the nice details of this resin bit; that should help me to better identify the different areas/parts and ease the painting: Control stick painted and flat clear coated Some dark tempera wash on the interiors and the tub: Following Kirk's advice, I repainted the bottom part of the seat rails with the cockpit color, and run some black paint into the two small ducts behind the bulkhead. Here's the IP: As anticipated, I cut out some spare decals for the gauges, but ended up putting only two on it (I think they're pretty obvious), because the smaller indicators are ... very small, and after loosing two of the decals and struggling 15 minutes each to place them, I decide to only add some white marks with a very sharp toothpick I have then put a drop of Tamiya Gloss Clear on them as well as on the two LCD screens, to simulate the glass cover. I might have to do some touch-up on the switch panel just below the HUD, but apart from that the IP should be completed. Unless I find the PE HUD framing, of course, but I still have some margin to put that on later ... Comments welcome Ciao3 points
This leaderboard is set to London/GMT+01:00



















.thumb.jpg.76f12b87ce9ca9929c9aabdcf8f9d2dd.jpg)

.thumb.jpg.d63052df9f30de247fb49bf44f442289.jpg)
