Leaderboard
Popular Content
Showing content with the highest reputation on 22/05/16 in all areas
-
Ernir (Eagle air Iceland) purchased this Twin Otter in USA 1988. Then painted red and white registered N127RL. Brought to Iceland registered TF-ORN then white plane with red stripes along the body and burgundy stripes in between. Later Ernir used it in task for FAO in relief in Africa, Kenya and South Sudan. Then the aircraft was marked WORLD FOOD programs. Later used by Ernir to aid flight projects for the International Red Cross first in Kenya, Sudan, Mosambique, Angola and elsewhere and flown under the marks International Committee of the RED CROSS. When the plane came back to Iceland from Africa, she was painted white with Ernir logo while she flew in Iceland. Went back to Africa and finally sold 1996 to the Central American country Guatemala. Home made decals, red stripes Xtracrylic decal, burgundi stripes painted with shaking hands Small windows KristalKlear23 points
-
Here is my entrant for the Spitfire group build in memory of Edgar Brooks, it is also the first kit I have finished in months (been going through a bit of a dry spell). Apologies for the quality of the photos, couldn't take them outside as I normally do as the weather is not cooperating. Completed straight out of the box, SX273 of 714 NAS, St Merryn, England, 1947. Brush painted with Tamiya Acrylics. A very enjoyable build. WIP here. Hopefully a fitting memorial to a very generous and knowledgable man who is very much missed. Any comments welcomed. Cheers, Simon18 points
-
Here is my go at Airfix's 1/32 World War One B Type Bus "Old Bill". There are loads of photo's I am afraid so I am sorry if you get bored. The full build is on the forum and if you have any questions please let me know. Here is the build thread http://www.britmodeller.com/forums/index.php?/topic/235001202-132-airfix-world-war-one-b-type-bus-old-bill/page-114 points
-
This turns out to be as much a tour of my reworked patio as the Aeroflot airliner. Not only is the photo lab patio changed around, so I lost where I used to take pics, but my brother bestowed a new camera on me recently. I need to break down and read the instructions - the thing has so many buttons on it, one can't even pick it up without pushing two or three of them and setting off all sorts events. ( I'm a bit of a Luddite I'm afraid ). So besides some rebuilt fencing and iffy masonry, may I also present the Aeroflot Il-62, 1980 Moscow Olympics official carrier. The Zvezda kit is just a delight to work with, and the decals were one of the new Liveries Unlimited sheets. Great detail on the sheet, but something odd with the glue used, The decals would form an immediate and immovable bond with the first thing they touched, so a lot of floating off the backing and, rinsing for want of a better word, saw things right. Cockpit windows from Authentic Airliner Decals. Really love this new 3D look for realism. . . . . . and the 'with something else' shot - her stablemate, my other Zvezda Il-62. The Il-62s operated by Air India did not look exactly like this - but they should have. Thanks for taking a look, Cheers, Mike14 points
-
Hello everyone. I've been sorting out old kits to record them for my website before they fall apart. I unearthed these two, built about ten years ago for a series of Silver Wing models I completed. They're in pretty good shape, the TM two seater a simple conversion by tilting back the wings, cutting and detailing a second cockpit, adding new panels from thin sheets of plasticard and a new tail. I can't remember what paints I used, probably a combination of Halfords BMW Silver spray and Alclad. The decals for the TM came from the kit and spares box, whilst the 29 Sqn markings for the single seater were off a very nice RAFDec sheet. Rigged with fishing line darkened with a sharpie. Probably one of my favourite Airfix kits of all time, it still makes into a great model. Haris14 points
-
Here is my latest build... and sadly the first finished build of 2016, but the year isn't over yet. No complaints with the kit, it's just Tamiya's Jug. I used Eduard placards, TD wheels, Aeromaster decals, and a quick boost seat. Colors are OD over Neutral gray with medium sea gray camo on top. It's a scheme that's been done before, but I like how much color it has. Brewer took the pictures for me, thanks!! Thanks!11 points
-
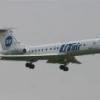
Sometimes it’s nice to take a stroll off the beaten track and that’s exactly what I’ve done with my latest offering, the Rus-Air resin Yak-42D in the simple, attractive scheme of Kazan-based Tulpar Air. I’m no expert on Russian airliners and I haven’t done any checks on dimensional accuracy but to my eyes the Rus-Air kit really captures the character of the Yak-42. The kit itself is gorgeous and one of the easiest kits in any medium I’ve ever built. In the usual Russian style the fuselage is split vertically like an injection-moulded kit but with a separate one-piece fin and central intake. There was a small bit of slightly awkward filling below the intake and the split engine pylons were a minor irritation (think Airfix BAC 1-11) but otherwise everything assembled easily helped by Rus-Air’s thoughtful provision of marks to drill for locating pegs. In fact the only issue I had was with the undercarriage. I managed to break both main legs while I was cutting away the surplus resin and had to resort to pinning with fuse wire. The side struts were useless and I replaced them with plastic strip. Enthusiasts of super-detailing could go to town on the undercarriage but in light of experience I decided to play safe and content myself with drilling out the torque links (very carefully!) and adding lamps to the nose leg which I promptly lost and had to fabricate a replacement. Needless to say, as soon as the replacement was finished the original part turned up. Although they provide a choice of several schemes including Cubana and Aeroflot, the kit decals are thick, matt, yellowish and utterly horrible. They went straight into the bin. The Tulpar Air decals are by Ascensio. I had seen rather mixed reports about Ascensio decals but I found them straightforward to use and anybody with previous experience of laser printed decals should get on fine. Ascensio are one of the very few manufacturers who provide after-market decals for the Yak-42 so we should be grateful to them even if the decals aren’t without their flaws. Although the sheet says it was designed for the Rus-Air model, some items such as the windscreen and the large grey anti-glare panel (which I ended up over-painting) bore only a passing resemblance to the kit and required significant modification. Ascensio have mistakenly printed the main cabin door the same size as the other doors instead of the bottom edge being noticeably lower. I dealt with that by using a section from one of the doors provided for the alternative livery on the sheet. It’s actually dark grey rather than blue but the subterfuge isn’t noticeable on the model. The decals generally are a little stiff and virtually impervious to decal solvent. Drawdecal’s trick of pressing into place with a cloth dipped in just-off-the-boil water helped considerably. On the plus side they are very robust and will take a lot of abuse as I discovered when I had to reposition one of the Skynet Aero titles after it was firmly stuck. Mistreatment like that would have made most other decals disintegrate but the Ascensio decal took it in its stride. Overall I was much more impressed with the decals than I had expected. I kept weathering to an absolute minimum since all the photos I could find of RA-42555 in this livery showed her looking immaculate. That might be because Tulpar Air, apparently a rather dodgy operation, was grounded before their four Yak-42s had time to get dirty! I enjoyed building the Yak-42 so much that I have bought a second one to keep it company. I intend to finish it in Kras Air livery (again by Ascensio) but with the forthcoming Group build and various other ongoing projects it will be a while before I get round to it. Thanks for looking and as always constructive criticism is welcome. Dave G .... and with the PAS An-7210 points
-
Hi, Another archive model - from a deep past. Fairey Firefly FR I in markings of 1770 Sq FAA based on HMS Indefatigable, Pacific fleet, spring 1945. I made it i 1993, so many years before much nicer SH kit appeared. As usually I was trying to do small improvment to the kit. Some are perhaps still visible. Now - before posting I had to change roundels and lettering - the original were bad quality did not stand time. The present are taken from Techmod sets (for FAA Wildat and a white lettering). Comments welcome and regards Jerzy-Wojtek10 points
-
I have had a bit of a blitz on this Corsair over the last few days to try and get it over the finish line. It was started for the recently finished F4U Corsair GB but unfortunately the build stalled and I missed the deadline. I have used a True Details cockpit (not that you can see much of it) and Microscale decals. The decals are for a Guadalcanal based F-4U1 from VMF-213 in 1943. I have used the build as a test bed for a couple of weathering processes I have not used before. The chipping on the wing roots and walkways was done using Maskol and the mottling effect on the paint was done with salt. Overall I am very happy with the outcome and will be using both techniques again for future builds.9 points
-
Hi All, Here's the latest kit off the workbench. I bought this off my old mate Troffa back in late 2009 or early 2010 and consigned it to the stash as soon as I had looked at it. It scared me. The fuselage is in eight separate pieces; upper left and right and a bottom section for the rear fuselage, left and right for the cockpit section, the nose section for the gun ports and then a two piece radome which can be exchanged for a two piece RF nose. I was going to do it for the lesser built airforces GB but I was still put off by the multi piece fuselage, then the F-5 GB which I didn't get time to do. Well I finally plucked up the courage, and overall it went together really well. The cockpit section needed some care lining it up with the rear fuselage assembly. I made sure the sides lined up and were level at the top, which left a gap between the rear cockpit halves. This, and the underside join of these sections, were the only place I needed any filler at all. Paints are a mix of Model Color, Lifecolor, and plain old grey primer for the interior of the cockpit. The photos I found of the Venezuelan F-5As showed them to be very clean so I haven't weathered the paintwork. The pitot and the gun barrels are made from Albion Alloys tube, so much better than the plastic bits in the kit, but otherwise it is out of the box. Decals are a mix of kit decals for some of the stencilling and Colorado decals for the national markings. Despite a nice glossy coat of Klear and loads of Micro Sol and Set I still got some silvering on the decals. Everything was sealed with W&N satin varnish. It looks like this: The underside is really boring: But the cockpit isn't too bad straight out of the box: Thanks for stopping by to take a look.9 points
-
Tomorrow at Newark Air Museum there is a V Bomber tribute event. As part of a display in have built the three bombers, in flight. As I'm waiting on glue to dry, this is the only one in a fit state to be photographed. It's the ubiquitous Revell/Matchbox kit, converted to B2 with a Freightdog conversion kit. Flightpath Resin intakes replaced the kit's ones, which are painfully inaccurate. Airdecal decals for 139 Sqn have been used. Overall, a horrible experience, which I never intend to repeat.... On to the pictures.9 points
-
Thanks Matt. Me too, or at least eager to get it wrapped up. Too many other things ready to be started I've weathered up the generator thingy and the steps. I added the aforementioned Imperial logo, which was chipped then faded a little. I think it adds a bit to the story of the scene. There are still some areas that need extra work. The silver cap on the tanks had only just been painted when I took the shots, so still needs a wash added, and some of the instruments on the end panel (not seen on this shot) need picking out This is a rough layout of how it will all sit on the base. I might still twist the orientation of the base plate a little, but I don't want the X-Wing to be turned so far that it's corner on to the frame. I'll make up the revetment wall next, and see how it looks with that in place Andy9 points
-
Hi Pals, I finally finished the kit, to my taste. Not exactly as would have imagined that over, but I like the end result. I tried some new methods for me as the most severe pigmented and do some snow. I also decided to add at the end some leaves and dried herbs, to see what they looked like, and ... there they stayed. The kit is OOB except for the slogan in Cyrillic As a final point, I have taken pictures with a SLR camera, which is, I think, the perfect complement to a finished work, for good or ill. Thanks for commenting and watch, and the support and good wishes in the thread. Included link to WIP, and vice versa the RIP To WIP: http://www.britmodeller.com/forums/index.php?/topic/235001060-white-hunter-red-heart-isu-152-zvezda-135/ Some shots on detail.... Cheers to all8 points
-
De Havilland Comet 4c - 1:144 Airfix (Updated pictures) Dan Air - 26 decals [Edit] New pictures as I had forgotten a few final details on the model. Added this morning are nav lights, aerials, aerial line from fin tip, taiplane black tips, and some panel lining/weathering. [/edit] The Comet is one of the most beautiful airliners ever. In the 4c version with extended wings and pinion tanks it looked at its very best. To further emphasise its beauty and pure shape I wanted to model it in flight without the clutter of undercarriage. The idea of doing a 4c was inspired by Phil 'Vulcanicity's lovely model in BOAC colours. Phil used 1:72 drop tanks from the Airfix Vampire for the pinion tanks, so I nicked his idea! It's appropriate too, from one DH aircraft to another! Decals are from Two-six, and as usual are top quality, settling down beautifully. I used the cockpit decal here, although I normally prefer to kit the kits clear glazing, but there was no hope with the tiny, ill fitting part supplied with this old kit. I used one from my stash, remember this bit of nostalgia from the 1980's? The decals were yellowed and curled though, so I'm glad that Ray at two-six sells a far superior set for the 4b and 4c. This is the major part of the conversion. Extended wing tips, and slots cut for the pinion tanks which were also shortened by cutting a section from the middle. Starboard side mostly complete, port side in rough format. Thanks for looking, John8 points
-
8 points
-
Hi! Just finished this Myrsky (finnish for Storm). It was the only finnish-built fighter to serve during WWII. I painted the kit using Gunze colors. Any comments appreciated8 points
-
Here it is ! My first dio ! I hope you'll enjoy the result ! Some views of these two droids... And the details. The first machine... And the other one... They are old and in poor condition but they still work ! Poor vader... Used as a target for blaster practicing And... Here's the secret of light bye !7 points
-
Thank you guys! Jürgen- Lucky guy living so close . Yep I've seen 'Und sie liebten sie doch' and quite a few others on Youtube. Here is one that was actually very useful for modelling purposes in this build: https://www.youtube.com/watch?v=aKv9lsdln7E. It shows the ground crew walk around etc.. when preparing the aircraft. Craig- Thank you mate, I got lucky with the paint removal on this one! Darwinism- I agree the shape of the Starfighter just has something special about it, more so when clean imho. As for the parking, . WIP I think this will be the last WIP update on this thread, so here are some things I've been doing this weekend. The main parts of the UC painted and wash applied. Those are the Brassin wheels btw, need a better modeller than me to fully do them justice! The seat, looks real busy in the flesh and I'm quite happy about it. I had to chop the oxygen bottle little to get it in the cockpit but you won't be able to see the bottom of it anyways. Canopy explosive charges, yellow canopy handle and canopy locks added which I think completes the add ons to the cockpit. Centre pylon, most of this was just oversprayed red on the real thing. For weathering a wanted to replicate the finish on this picture: https://www.flickr.com/photos/baettig/9443555137/ So I gave it a very light panel wash and then dirtied up the white surface in select places with streaking too, also the cream antennae areas got real mucky. The tail area with the very tip slightly sooted up, this only applied a towards the end of the display season. In the flesh the weathering looked just about right (would be all to easy to overdo a white finish only a few months old) so I added a final satin-matt layer in various areas to just break up the surface a bit. I used the highly recommended Winsor and Newton matt varnish heavily thinned with Mr.color thinner (it thins nearly everything!) and built the sheen up that way. The FOD covers. They showed quite a lot of chipping as shown in the linked pic above. Now I need to sort out the tiny attachments. I went over the exhaust again with pure matt back to soot it up more and reduce the chipping. It looks a lot better now compared to my references. Phew, nearly there, old 1/32 models sure take more time than 1/72! Gonna start sticking it all together now and hopefully have the RFI in the next few days. Thanks for any comments or advice . David. edit, also keep forgetting to do the lights!7 points
-
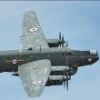
Seafire F.XVII 714 NAS, Air Warfare School, St Merryn, England 1947 Airfix 1:48, built OOB WIP here Many thanks to Col and Giorgio for hosting this Group Build - so glad I could take part.7 points
-
Small car? Why the 911 has back seats and a boot (in the front obviously) and everything. Mind you I'm just a tad over average height for a UK male so fitting in cars or jet cockpits was never a problem for me. Tis true I'm well on the way there...... But anyways, the PDK in sports mode is quite sporty enough for the public roads. And there's the steering wheel flappy paddles if you fancy an old man's try at being an F1 racing driver. I had use of a Midget for several months in the 80's. I liked it but the electrics were all over the place in the rain. Rather unfortunately the first electrical thing that stopped working in the rain was the windscreen wipers.......IIRC I had to rig something up with an old wire coat hanger and manually operate the windscreen wipers as best i could...... I reckon I've done close to 200mph on 4 wheels. . . . . . . But them would be the Jag main wheels -with the nose wheel raised just before take off with a heavy load Don't think I've even done 120mph in a car. Never been on a track and never fancied losing my licence.... You won't regret it Radders. I did want one of them when I was a youngster. Wot's you current sports car Colin? Although I wondered for a moment if you were talking about the bucc I'd like to see that Phil. A few gotcha's with the kit tho' like the shape of the fuselage tail. All I've been able to do for the last couple of days is work on smoothing down the joins. So not much to see I'm afraid: Steve7 points
-
Moving on with, or more aptly, crawling along with, the undercarriage, I had to figure out how to replicate the landing lights - which were not part of the original kit. This was a relatively straightforward task - I drilled a couple of pilot holes then opened them up gradually with one of those stepped drills/cutters. As luck would have it, one of the step diameters was a prefect match for some styrene tube I had lying about. I then cut a thin slice of tube, and shaped it as best I could to follow the inside contour of the undercarriage - I spent a good while thinning out the inside of the spats with my dremmel clone. The plastic was very thick in this area, but as I mentioned previously, this plastic is extremely hard - which really helps when you are attacking it with machine tools, and with a bit of care, I got it as thin as I dared. The tube slices were then glued inside to begin forming the landing lights. I seem to have taken a lot less photographs than I thought... or my camera is playing up!. Anyways, I cut some more of the same diameter tube, rammed it full of filler, then pushed the end of a paintbrush into it to form the concave reflector. Once the filler had cured, I cut a swatch of aluminum tape, laid this over the top of the tube, and again rolled the end of the paintbrush into it. This gave me a nice metallic reflector looking thingy. I find that BMF is too weak for this sort of action and tears easily - the aluminum tape is much stronger and can put up with much harsher handling. Once I had the shape I wanted, I popped the reflector back out, dropped in a touch of CA then pressed it back into place (the adhesive on the tape isn't great if you're only covering a small area). That allowed me to rub the tubey thingy over a rancid old piece of micromesh, which "cuts" the tape around the tube giving a nice neat edge. In among all the photo-etch stuff I purchased, I found some landing lamp stuff including a couple of bulb holders which were a prefect fit for the tube. They were glued onto the end of the tubes/reflectors than given a quick dab of black paint. I know this looks like a nasty paint job - but I deliberately left some bare brass around the edges as they will be CA'd to the back end of the light fittings already inside the undercarriage. ... using my patented landing light fitting stick! And we now have landing lights in the undercarriage, so we're ahead of the game on the original kit. Now how I am going to make the clear covers is another matter... for another day! The lights are probably sitting a bit too far back in there but considering the kit, as designed, didn't really have any lights, I think these will suffice. Now I just have to protect them for the next two years while I finish this build! The kit wheels then presented a slight problem in that each side of the hub was domed. That little bit of dome took up a lot of real estate inside the spat and I wanted to get the wheels back to flat, (as I believe the 1:1's are). Another reason I wanted the wheel hubs flat was so that I could use some more of that etch stuff I sold my first born child for. How to flatten them ? well. I had purchased a 1/4" end cutter a while back, so duly mounted that in my pillar drill. By carefully rotating the wheel under the end cutter I managed to remove pretty much all of the dome on both sides. The wheel on the left still has the dome, the wheel on the right has been "flattened" And I still had a full compliment of fingers and thumbs when finished. The flattened hub will now allow the photo-etch to sit nice and flat inside the wheel when the time comes... with added bonus, should also make painting a bit easier and a lot neater too - provided I don't mess up the paint job when fitting the brass. Now came the worrying part, the actual undercarriage legs themselves. I drilled the legs and soldered in a length of brass rod to act as the axle (the easy part...). Since I removed the kit's original wheel covers, and thus the wheel mounting points, I had no real reference for positioning the legs. I spent ages trawling photo's and diagrams trying to figure out exactly where the legs came from, and went to, and at what angles. In the end I decided just to go for it. I ended up making a small, very simple jig to get the wheels to sit on the same location in each cut out - and forgot to photograph it! Once the legs were in position, I tacked them in place with some CA. That was followed up by some epoxy glue to ensure that everything stays put. The wheel arch will be covered by some thin styrene later.... I was just about to glue this on when I realize there was still a bit of work to do to the undercarriage. Stirrups! We needed stirrups! Well, maybe in Bill's equine related build, but not in this one (as far as I know). You guessed it - these are for the steps on the side of the spats, or at least, for the upper step. On every photo I have, the upper step is always open, so I decided to add this backing piece to the upper step so that it didn't just open up into a black hole. The other thing I noticed in my reference photo's, is that in 99% of cases, the lower step always has the hinged cover in place. I assume that cover is spring loaded to stay in place... but isn't always 100% flush with the outer skin... which gave me an idea! I found a punch that gave me the right diameter circle then just cut the circle in half to make the hinged cover. A piece of styrene was glued inside the spat to act as support, then I glued the step cover in place. It's difficult to see in this photo, but I pushed the top half of the cover in slightly so that it is not completely flush with the outer skin. Hopefully it will look okay when painted up. So, moving in the right direction, but I feel I still have a fair amount of work left on the undercarriage before I can set it aside and start working on some other area.7 points
-
This took some time. Almost at the finish line and then a bottle of wash spilt over it. The irony being I'd already moved it out of harms way as I nearly spilt it earlier. You can see the dried tide marks left behind despite copious rinsing. Heavy weathering couldn't hide it. A vain and forlorn hope. Oh well. I left the torpedoes of the rails as they just looked 'old' but then the kit is '70's vintage. So in true vintage style it was brush painted throughout. EZ line was used for rigging and rails and I added a couple of modern additions port and starboard aft of the wheel house in the form of ship screens. The little white boxes with wet and dry bulb thermometers in them just as my own 'signature.' Well, it had it's moments but overall I enjoyed the old school modelling on this one. I may add some figures and try a small sea scape dio sometime later but anyway, here it is. Endure.6 points
-
Dont recall one of these on WIP or RFI so heres my effort. Waited for this when it was first runoured and thought that the Airfix and Frog VC10s of 50 years vintage would be awash in ebay! I still have a regular Airfuc VC10 BA and their RAF tanker version and will build both one day but the Roden kit looked to be a quick build. No sprue shots - presumed they have been seen before but what I can say is that there was a suprising amount of flash. No problem but took a while to prepare the main parts for assemebly. But the parts are finely detailed with fine recessed panel lines, so a big leap forward from Airfix. I intend building this out of the box in the East African scheme supplied. Heres some pictures on progress so far Fuselage, tail and engines glues together with reference material to hand Close up of nose with glazing glues in and nose cone stuck on and thin coat of primer. You get window mask for the kit too! RR Conway engines represented quite nicely. Windows again have some flash which isnt helpful! Tail cone needed some filler and 'adjustment'! to get it right! Looks right to me Fuselage seam reasonably prepared and wings showing the fine panel lines Engines baffling a wee bit - bump on one side but not on the other! A bit of work required to tidy these up More to follow - now swithering about getting some BOAC decals!6 points
-
This is my OOB build on a Trumpeter kit one and a half years ago. Plese follow the link for more pictures: https://www.facebook.com/liu.andy.3701/media_set?set=a.622234411258761.1073741829.100004166226490&type=3 I hope you like it. Cheers6 points
-
Heres a few models ive made over the last 6 months or so. First up, two Tamiya F1 kits, the 1/20 scale Ferrari 640 and Williams FW11. The Ferrari went quite well, only really the nose doesnt quite fit properly, it doesnt quite meet up with the panel surrounding the suspension arms. I used Halfords Vauxhall Flame red, looks ok but im not really bothered if its not 100% right. The Marlboro decals with Mansells name on were plain with no "marlboro" on them so i printed some on decal paper and added it, looks much better imo. Im still getting to grips with spraying paint and theres some signs of orange peel. Also added a few photo etched screw heads to the side panels for a bit of realism. The Williams gave me alot more trouble. Firstly the panels around the front suspension leave unsightly gaps so i decided to do as ive seen others do and stick these to the main body and fill the gaps, then cut down the suspension in half. After lots of sanding i think i got it right, not really noticable. The biggest problem were the decals, the originals had yellowed slightly on the white so i bought a set from Indycals, these werent so great. I had major trouble trying to get the decal flat enough with no creasing around the small bumps above the suspension and i probably made an error as they didnt quite fit together right. So i decided to leave the original ones in the sun for a few days to try and bleach the white bits. I then stripped the decals and applied the tamiya ones. These were much better and although i never got them prefect even after tons of microsol im happy with them. Last problem was the engine cover, its a bit warped and doesnt quite sit right. As someone pointed out to me i shouldve checked at the start I tried putting it on and holding down with a rubber band and it helped a bit but you live and learn. Also i used a Tamiya photoetched seat belt set and a few PE screw heads on the rear wing to cover the join points. Ive decided to do a TV cars theme and i started with Revells Starsky & Hutch Ford Gran Torino(1/25). A nice little kit with not majorly over detailed but some nice dashboard decals to give a woodgrain look, the stripe was in 3 parts and a bit tricky to get lined up. I made a mistake with the headlights and the glass clouded up. But here it is, again im still happy with it . To go with the TV theme i have a Aoshima LA chips kawasaki 1000 police bike, ive never done a motorbike and want to do it justice so i thought id buy another bike to practice on first. So i bought the Tamiya Yamaha XV1000 as its quite cheap. The instructions say to paint the fuel tank and side panels maroon but i wanted to do something different, as you can see. The only problem with doing the stars and stripes would be the stars. But my mrs makes hand made greetings cards and happened to have a die that popped out some stars, although not perfect and they are rounded on the ends rather than sharp i think it looks ok.(although im not sure if i put too many stars on?) So thanks for viewing. (And if you read all that, well done )6 points
-
Hi everyone, Just finished this beast and as many others have said it's a stunning kit, superbly engineered... in fact the fit is so good you probably could assemble it without glue! This is my first Russian aircraft build ever, I've never had any interest in building one until I saw Mikes excellent WIP on his Foxhound and just had to buy and build one... thanks Mike!!! Painted with a mixture of Tamiya, Alclads and Akan paints, although I couldn't find the Akan grey anywhere for the main colour so I used Tamiya XF-83 RAF medium sea grey which I think looks a pretty good match. Weathered with pastel chalks and an oil wash for the panel lines, the only additions I made were decal dials on the instrument panels and Tamiya tape seat belts. Thanks for looking, as always comments and criticism welcomed. gazza l6 points
-
This is my attempt at Mark1s excellent Wessex. I built this for the helicopter GB. I added Brengun's PE etch set for some extra detail, although one night the PE fairies stole one of the wipers. In the end they were so small I remove the other. Chin whiskers are from a paintbrush & the rigging is Lycra thread. Painted in Humbrol 69 from a rattle can. Any mistakes are all mine. Please enjoy the following, it was a pleasure to build & all in amazing 1/144. C&C's welcomed6 points
-
Hi all. I want to show one of his last works. T-35. Сolors painted AK sets for modulation of Soviet tanks.6 points
-
evening folks Many thanks for dropping in ... I just do my thing, and I am really glad you like it.. I have been doing a little bit on the Spit - I want to get some of the sidewall laid out so I can start working out how to build it up into a module to slot into the cockpit section I cut out of the airframe.. ..I needed to finish the U/C control so used maskol (a rubber like masking fluid - very useful) to cover various bits as I sprayed a couple of black shades.. taking off the first mask.. ..and then things like the handle and connectors.. ..I added some of our airscale placards - I do have one on the 1/24 set that says 'Chassis' but I think it is too small so might look at other options as I also need an 'Up' and 'Down' in fairly large letters too.. ..because much of the base construction was in nickel silver etch rather than brass, it weathers really well - I am toying with changing all my new 1/24 brass panels to nickel silver too as I think it is a much better medium? ..I had already fitted the mounting lugs to the sidewall so started to dry fit what goes where.. ..and this little section of cockpit is starting to take shape... ..need to think about the many layers & plumbing of all the parts as a whole so I don't tie myself in a knot as there is a lot of detail to go... TTFN Peter6 points
-
Hi Another model from shelvs - DH 98 Mosquito Mk XVIII in colours of 248 Squadron RAF, during summer of 1944. This variant of Mosquito was eguipped with 57 mm gun and was mainly used in CC duties. I made it in 1995. Model was made from Airfix kit, I do not remember any improvments besides home made individual markings. I posted a single photo of this model in my post on Tamiya Mk IV converted to Mosquito PR MK XVI http://www.britmodeller.com/forums/index.php?/topic/234966442-de-havilland-mosquito-pr-xvi-tamiya-conv-pavla-reshaped/ on which he is together with PR Mk XVI), but I hope that I am not abusing rules posting photos of this model separately Comments welcome Cheers Jerzy-Wojtek6 points
-
Special Hobby working on SAAB VIGGEN scaled down to 1/72 metal mould made with 3D CAD-CAM CNC technology like Vampire, Gnat, Mirage etc.5 points
-
Good afternoon everyone Finally now finished the Revell Shackleton AEW2. She was a lovely kit, there is a couple of issues in regards to accuracy as it is a hybrid of a AEW 2 and MK 3, but ignoring those details I decided to build it oob, as it is. On comparing it to the Airfix kit, fit of the overall kit I found better, the surface detail is 100 times better than the airfix kit, The revell kit has some very think sprue gates connecting the parts, which does require some clean up, there are pros and cons for both, but overall they are both fantastic model kits. But I'll leave you with pics of the Revell one and then the 3 kits i've built. I hope you enjoy.5 points
-
Since the Ju-88 group build looks like one that I have no chance of finishing in time, I would like to enter this one, if I may. I will build the Toko P-63A kit. Luckily, it includes the ventral fin for the P-63C-5. I will decide what to do about the canopy in due course. It's not as awful as one or two reviews make it out to be, but it may need a little grinding and polishing to deal with a bit of distortion or misplaced canopy frame. Need to examine photos. I have to use some imagination about the markings. While it is easy enough to see which planes went to the VVS (see Joe Baugher's online lists of airframe serial numbers of US planes), it is not easy to find photos of Soviet P-63s of 17 IAP and 821 IAP of 190 IAD; 781 IAP and 940 IAP of 245 IAD; or 888 IAP and 410 ShAP of 128 SAD. These are the units that were arrayed against the Japanese in August 1945 that had P-63s. It looks as if I will need to buy some decals for the tail number, which will begin either "311..." or "444...". I'm not sure I can devote the time needed for a model right now, but here goes.5 points
-
Just completed this, a 1/72 scale Trumpeter Sturmtiger. Had issues with the tracks not sticking to any glue, of any description, and with the lighting in my photo booth pulling out the rust run colour that isn't as strong in day light or my modeling lamp , but here are the pictures Ive taken anyway, enjoy..... [/url] ATB Sean5 points
-
I thought it about time I cleared some part finished/built models from dusty boxes and shelves in my shed. To start with this one: AZUR kit to 1/72nd. Finished as G-ADLT mid 1930's. Sold to France as F-AQAC and then to Spain As R-E (as in kit decals) in use as courier aircraft between Catalonia and the North front Spanish Civil War. I opted to complete it as the British civil reg example and used Humbrol Brunswick green and some silver form another brand. I originally built the kit way back,'X' amount of years ago and stopped when I could not find suitable civvy reg lettering in decal form. So today I found white letters from a BEA Vanguard decal set to 1/144 scale that were just right but not in silver but it looks fine as is. I also added the exhausts from fine plastic rod to replace the very delicate resin ones from the kit that are long gone. During the build I recall deciding on depicting the open hatch. The support for the cabin top and position of the door is purely how I think it was. Whatever the arrangement, I am happy with it now its done. Enjoy: All canopy frames depicted with silver decal stripes. And all done this afternoon. Incidentally, the cheat lines along fuselage and rudder and the silver disc are kit decals. The wing reg lettering are still needed but am unable to source any in green to match the fuselage as was the norm back in the 30's (More part built finishers to come....)5 points
-
Hi, I had Airfix FB Mk XVIII made about 20 years ago I wanted to add to collection another Mosquito, which will be different as much as possible from the previous one. It was about 5 year ago. My choice was bomber/recce machine with glazed nose. However I wanted to do another difference - longer engines. If one would like to build a model of DH Mosquito with longer Merlin engines - I do not remeber if there any other option then old Matchbox kit. I belive that there is no other option, still. So I bought Tamiya kit and Pavla conversion kit which consist of two engines and set of exhaust pipes all made of resin. When I started to work on this - I was shocked - the Pavla engines were of the same lenght as short engines of Tamiya! I do not know the reason for such huge mistake. Anyway, I decided to use those engines, although I move them forward as I remeber 3 or 4 mm (I had nice drawings so it was under control), I cut off coolers which are below engines, replaced them and also moved position of exhaust pipes. I have used original Tamiya exhaust pipes since the one from Pavla were proportionally to short. All together there was some body putty and sanding needed. I changed the propellers, I belive, also. She is wearing markings of US 8th Army from UK, late 1944-45. Airplane was used for photo recconesance and some weather recce flights. And a family photo: Regards Jerzy-Wojtek5 points
-
Yesterday when fitting the nozzles I spotted that the first one was not quite orientated correctly but the glue had already taken hold, when I twisted it this fuselage seam cracked open: Its surprising how strong just Gator Grip can be. I have now filled it and while that was hardening up I located and applied some decals from my spares box. After several hours I got the upper surfaces done: I still have the underside to do and then sort out the filled seam. Bye for now, Nigel5 points
-
Been a while, holidays, DIY etc. Tried out my new airbrushing gear, made lots of mistakes, mainly abysmal masking, lots of retouching. Major failure on the camo front, noticed as I was taking the photo's, I got the colours mixed up on the starboard wing, also made a mistake with the actual pattern. This is my first attempt in 20 years to finish a model aircraft, I'm just gonna leave it as is and continue with my major bugbear, varnishing and decals! Also, airbrushing doesn't 'alf reveal poor joins !! Ah, well, it's all a learning curve. Watch this space.5 points
-
Thanks Jaime OK, I tried the H91 on the u/c and then painted some bombs and part of the spinner. Can you see the difference? Untitled by Ced Bufton, on Flickr I can't. Hmmm. I shall now declare this paint OK. It's the tip of the spinner, the left two little bombs and the big one I've painted. Weird eh?5 points
-
Latest of the bench. The old Hasegawa kit revisited, in the markings of 778 NAS, Arbroath, 1946/47. The FAA had one of these from the RAF for evaluation. Added a "hook"......(they do that in the FAA). It was the last Airacobra to see service in the Uk. It did not live up to expectation. Decals are from the spares box. It's a bit different and will be a talking point at the next club night. Hope you like. Please feel free to comment. Thanks for looking Dick5 points
-
5 points
-
Afternoon all!! Here's the first one finished - for which the WIP is here - http://www.britmodeller.com/forums/index.php?/topic/234999662-meteors-first-one-now-finished/ Finished as the WA785 the CO's aircraft from 66 Squadron with hand-masked & painted squadron markings, and mostly Airfix decals for everything else. Painted in my own mix for High Speed Silver with decanted Tamiya aerosols, and a medium/dark grey oil wash to add just a touch of wear - as the CO's crate I don't expect it ever got too dirty at all, but the wash does help lightly accentuate the panel lines just a tad and stop them catching reflections of the HSS finish. It's a lovely kit, though not without its foibles. I've got two more to finish now All comments welcomed as ever, I hope you like her! Heres how she looked when first posted..... Since the above were shot, and with thanks to Roger Lindsay who sent me what appears to be the only photo of this machine - the tail has been repainted to match. So now she looks like this. I'm also relieved to say that it appears the squadron marking blue was different to Roundel blue - being "Royal" blue - so by luck I got it right. Note the Squadron Leader nose pennants and the individual aircraft letter L now on the nose gear door too. Cheers Jonners4 points
-
Just a quick photo of my BB-8 that I finished up a short while back while taking a break from my AT-ST. A (semi) Pro shot, and where he resides now, sitting proudly "thumbs up" on the shelf in his own teeny tiny display case.4 points
-
Getting paint on is coming soon but first we need to have her stood on her own two (three?) feet Airfix's at best poor representation of the U/C legs has been damaged in the strip down, thank the lord, so needs a new set up making The Wheels are somewhat mmmmmm too so they are in for treatment, I have no alternatives to draw out of the bits box So on with the legs first, 536 has just been completely recovered which means that her tubular legs got a streamlined covering, this made it easier to replicate from polycard Cut out the shape and round off the edges as if they are two tubes covered with cloth on each leg I've left the characteristic gaps across the top of the tubes but actually although 536 doesn't have these it is quite a familiar feature so if the plan to replicate the old scheme falls through I can pick one of the others If I need to, filling the space will be a cinch I glued the legs in place with Humbrol Tube Glue from an Airfix starter set, lovely jubbley, proper glue and set up the angles with this block jig built from Wilco's Blox to let it dry and set seen from below the quite complex undercarriage assembly parts are coming together nicely on the TW536 facebook page the recovered undercarriage legs are nicely featured so I was able to get a decent look at the things first The two bracing struts are of aerofoil section (made by glueing a tapered wooden spar to the brace tubes in real life) but as I only have clumsy fingers I used John Aero's lovely aerofoil strut set I bought off him at Huddersfield instead Thinnest strut is perfect for this Now I had to do something with the wheels, ouch When I glued the original kit together some glue strayed out of the axle into the hub space and wrecked the inner surface Even though they weren't the best wheels Airfix ever made they were quite close to 'right' so it was a drawback to me So after a think, and a couple of swigs of Gallereux Lager I decided to repeat the wheel building I did on the nosewheel of the Sherpa Drill out the hub 'rubble' and leave the tyre alone, make the holes 0.250" and then insert a piece of 0.250" evergreen tube from their rods and tube set Cut to length to make the wheel rims, then using some of John Aero's excellent tubes make inserts to be the wheel inners Here ready to cut down to length and receive a drop of Tamiya Extra Thin each Sometimes a drop of Extra Thin is too much, more to do to rectify that now You can see the wheel nave structure is in place now ready for the next part (yes even more stuff down in that 1/4" hole) Take a length of Slater's plastic rod (Very much the hardest type of such rod available and my long time favourite for construction jobs) and slip inside a piece of the Aeroclub tube that fits inside the nave part of the wheel and glue it in with Extra Thin Then when dried out thoroughly (ask me later why THIS is important ) cut a thin sliver of the rodded tube to leave a hub plate's width on the end of the rod OH ... like these Now we can relax Here the loose ends of the struts have been locked in place as it all sets And lo... and behold And to hold it I will be adding the thin skin of cyano to add rigidity and allow handling during the upbuild of wings and things Soon be in the paint shop now, then I will get a move on with the Hansom She who... is getting irritated at the delays on that one Cheers and thanks for looking4 points
-
Thanks Chaps! The red is now done, I did the last coat with an Hairbrush John4 points
-
... and... It worked! Sort of! Actually it worked quite well, but I did need to do a couple of retouches here and there, but I think overall I might have got away with it: With the proof of concept under my belt I mixed up a combination of ACJ22 IJAAF #7 Ohryoku nana go shoku and white to make up the pale grey-beige colour for the underside of the -III as advised by Nick Millman (though I may possibly have made it a tad too light, any errors in interpretation are mine - not to mention that under my daylight lamp my camera just looks at it, shrugs and says "I dunno, light grey?"): In addition to this I have assembled the landing gear legs and given them a coat of black as an undercoat for the flat aluminium paint, masked the tyres and painted them tyre-black and sprayed the propeller tips yellow, masked the yellow strip and re-sprayed them brown as the transfers Hasegawa provided for the job were stiff as boards and not in favour of conforming... next I have to mask the undersurfaces of the -III to spray the uppersurface coat of Ohryoku nana go shoku... Cheers, Stew4 points
-
Thanks glad you like the paint.. That unique moment in modelling arrived today.. The moment when you put your first roundel onto a Spitfire build. There you go instant transformation... Cheers Plasto4 points
-
Last little bits. Painted exhausts with my own burnt metal mix. Finished getting all the little decals on, which was a bit tedious - particularly the little yellow hash marks around the canopy. Used water colours to bring out the panel lines and mucky her up a bit, but not too much as I guess being post-war the aircraft would have been kept pretty clean. Took of the excess with cotton buds and a tissue. Added a few little breakable bits and the undercarriage, a couple of coats of Humbrol MattCote, took the masks off the canopy and added an aerial from a shoe brush bristle. Just waiting for some sunshine outside so I can take some decent photos for the gallery. Thanks for following my build, I like how its turned out.4 points
-
I'd probably plug the hairdryer in and switch it on first .... you may find that the heat works better than just battering them to death with a room temperature BaByliss4 points
-
Thanks Kev, fret ye not I am still really enjoying this project when I get time to work on it. Last year for the first time ever I had my Telford models all ready in good time and really appreciated the lack of stress and not making myself ill. Therefore, I have decided to get well ahead with the Telford stuff this year and when I feel I have things under control, allow myself to work on this project as a bit of a treat. Martin4 points
This leaderboard is set to London/GMT+01:00







-1-1MINIATURA.thumb.jpg.bd7a7e672869500d45ee6e80478f6f25.jpg)










.thumb.jpg.3c5b41eb004e624ff9bdf837868ecbb6.jpg)


.thumb.jpg.158e2e086d45b8f96b7d93b8bee8dc21.jpg)


