Leaderboard
Popular Content
Showing content with the highest reputation on 21/03/16 in all areas
-
Good evening gentlemen, yes I do have a serious weakness for the early british jets Cheers from Czech rep. Andrew17 points
-
This is the first time I have put something in RFI. I finished this about 3 weeks ago. I thought there would have been more of these to be seen on this site. Its a nice wee kit, very nice details and rather fragile. The rigging helps strengthen it. The fuselage stripes are decals. The top and bottom pieces do not align with the side pieces. I think whoever drew them forgot that a stripe cut an angle is wider than a straight across cut. The rigging is done with stretched polythene plastic sprue. Sprue from a set of Airfix figures. It can be stretched till its very thin and it has a small amount of elasticity to it: enough to pull tight for rigging, as here. The wires at the front of the wings were done with one long piece, as were the aft wing wires.17 points
-
Hello All, Here's my Revell re-box of the Frog Bristol Blenheim, lightly converted to have retractable skis: Sorry for the wierd "daylight vs electric" lighting effect, but I just couldn't get a decent shot yesterday. Work in progress thread is here. I was inspired to do this example by the picture shown here. Here's my reproduction of the shot: So I need to source some spinners (I think the Revell re-box of the MPM Wellington II may provide these) and build a trailing aerial dispenser. Since the photo was taken I have rigged the top aerial - I'm now wondering if the trailing aerial superseded the wiring on the top one. I've had a blast doing this model. I detailed the cockpit, replaced the turret glazing with the Falcon one, added oil coolers and detailed the undercarriage/skis, but other than that it builds well from the box and looks very good alongside the new Airfix one. The main difference to my eyes is that the Airfix nose is much wider. I will post a comparison picture when I take one. Thanks for looking, Adrian15 points
-
Hello all, I want to introduce my 1/48 RF-4E Built a few month ago a The model shows a Phantom II Rec.fighter RF-4E of the AG 52 / Leck in the German Air Force camo : NORM 72 of the early 1980s As background I chose a typical Shelter scene. Thank you for sharing10 points
-
For the build, see http://www.britmodeller.com/forums/index.php?/topic/234997262-tamiya-148-supermarine-spitfire-mkii-douglas-bader/10 points
-
The latest off the bench is Hasagawa's Ki-84 Hayate, built straight from the box with some of the kits decals, as they weren't the best to use, and I ended up painting some of the markings. Other than the decals the kit was a pleasure to build, no filler used at all, and went together nicely. The scheme represents an aircraft of the 29th Sentai, 2nd Chutai, Taiwan 1945 Other than the Hinomauro, which are from the kit, I chose to paint the red, yellow and blue markings as the decals weren't up to the job. Mr Hobby acrylics were used throughout, except the blue which was Humbrol enamel. Aerial wires are E-Z-E Line, and this was after the fifth and final attempt. Finally a "night time shot" Regards, Sean10 points
-
Calling it finished. My first but certainly not my last Wingnut Wings offering. Can't think of a single bad thing to say about the model, enjoyed every moment of the build. Blog can be found here: http://www.britmodeller.com/forums/index.php?/topic/234996941-132-wingnut-wings-hansa-brandenburg-w12-early-version/9 points
-
Unlike the rest of us who collect unbuilt kits purely to build them but never get round to it! Duncan B9 points
-
Hi all,\here is my Il 2 from Accurate Miniatures it was build way in the year that this kit was first released If i am correct in 1997. Recently my dear friend Hartdeco took these lovely pictures. I hope yhat yoy like them.8 points
-
Hi everybody; massive WE progress report, with lots of photos. I eventually started spraying the top camo, but first let's see a few details I did before. Spraying red (Tamiya X7) inside the aux air doors and air brakes: I then airbrushed Tamiya Flat black mixed with Future (experiment, not really worth it) on the canopies: and inside Removed the inside masking, looks OK, but I saw some of the paint leaked through the outside masking. Easy fix, I'll just remove it with a toothpick, but poor masking job The inner sides of the main U/C bays doors where airbrushed with Lifecolor Matt White, thinned with Future: Few more bits got primed: Then it was time to start masking the bottom: and then I airbrushed FS30219 - Lifecolor Tan, again thinned with Future: Port side pylon unmasked There's a bit of overspray, but overall not that bad Canopies: and the AC: The pics don't show much of the pre-shading, but it's more visible "in-flesh"; what you see is also the result of a first round of post-shading, made with a lighter mix of the base color (adding Lifecolor Matt White). It still looks quite dark to me, so I'll probably go over with another post-shading. This first color was sprayed freehand, roughly covering the areas where it should be; for the other two, I'll use blue tack to mask and define the borders Inside of starboard intake: Wrap around camo: That's it, comments welcome. Ciao8 points
-
Thanks for the kind words everybody, it is quite a bit to keep track of and it's a good thing that the actual Supermarine factory was more organized! I doubt that Giorgio, I really lucked out with the Sword wing, it went on easier than the Airfix. I'm not counting on that happening again. Thanks Giemme, I just added some sprue to a Tamiya Extra Thin Green Cap bottle that was running low. Add a little at a time and give it several hours to melt and then add more as necessary. The Extra Thin flashes off as time goes by and the concoction gets more stringy and gloopy. I really need to add a little more Extra Thin to mine. I used Tamiya sprue (from the P-47 kit), but I wish I had used Airfix sprue as it's much softer and I think it would be easier to sand. The XII's have their tail feathers. Edit: The CMR XII got stabilizers from an AZ Mk IX Joypack - reason 137 to own a Joypack or two. PIC LOST TO PHOTOBUCKET And their carburetors, radiators, and oil coolers are attached. PIC LOST TO PHOTOBUCKET Same for the XXI. PIC LOST TO PHOTOBUCKET And the current state of the trio.8 points
-
well here it is my MK 1X spitfire . 1/48 scale by Airfix struggled from day one with this model very poor panel lines and poor fitting parts not to mention the wings and wing tips . I am still learning a lot with this hobby so i decided to crack on and finish this model even though it came very close to being flown into the man cave dust bin more than a few times . any way i treated it as a practice piece for airbrushing and a new masking Technic using blue tack for cammo masking and also some weathering practice of which i do need lots of help . then i had some orrid reaction with my decals and the water based varnish i was using . so all in all this aircraft did very well to survive the build and paint job . i even lost the aerial down the flippin sink while i was flatting down my decals balls up so ive used a cocktail stick to replace it . then i glued the canopy in place and could not get the driver back in so all in all not one of my better ideas ,so the pic where he looks like hes getting out i am trying to blag the scale pilot getting out of his plane look lol so here it is ready for inspection warts and all.I have my tin hat on waiting for the flack from the real modelers out there . cheers lads and ladies .. Andy7 points
-
Here is my latest completion. It was built completely OOB minus Techmod decals and tape seatbelts. I began using the kit decals, but they were old and cracked upon immersion in water, hence the use of the aftermarket decals. Paint used was Vallejo Model Air UK Azure and Middlestone, and Model Master Acryl Dark Earth and RAF Interior Green.7 points
-
Today I fast tracked the priming, painting, weathering and varnishing of the box thing to go in the cockpit as well as painting the wiper motors so they could all be installed with Gator Grip: I installed the control panel on the roof followed by a little weathering and a coat of varnish there too: This is what the motors look like from the outside: This is what they look like on the real thing: As I will be gluing on the glazing with five minute epoxy I thought it was probably prudent to mask the outside (I don't want sticky fingerprints on the glass). I was a little disappointed with the fit of the Eduard masks, these outboard panes were too big all round and the angle at the bottom is slightly out: So I trimmed it down as well as adding the angled cut out in the bottom corner: The masking for the side windows didn't fit too well either and I ended up making quite a few of my own corrections. Now I could glue on the glazing, I had to hold it in place for about fifteen minutes until the epoxy was set enough so that I could clamp it up like this: Even then it was still trying to spring away from the coaming so I added a dab of CA to the corner which seems to have stabilised it. Doing a fit check with the roof and engines I found I had to remove more plastic to get them to fit properly: I knew it was a tight fit with the wiper motors but I didn't think it was quite this close: The next job is to get the roof and engines fitted me thinks. Bye for now, Nigel7 points
-
Here's another 61st Sq aircraft from Zemke's Wolfpack - Lt Frank Klibbe's 'Little Chief'. The kit is Tamiya and is OOB except for some seatbelts. This is the first Tamiya 'Razorback' kit I made and I thought, I must make this one because the artwork is stunning! Note the white lip inside the cowling too. thanks Mike7 points
-
After an inspection, little corrections, filling, new layer i wraped the Eagle with clearcoat. Decided to give the bird her provision - AF 89-0474, 336th FS/ 4th TFW -Seymore Johnson AFB. Arming Operation Iraqi Freedom. First decals going on well Please excuse me for the bad pics quality!!Enjoy, Oliver.7 points
-
I can't think of an easy way of making the three blades of each fan, I estimate they would be about 2mm in diameter. I've had a look and I don't have any suitable PE so I think will leave them off. The first job of the day was to re-mask and get a coat of semi-matt varnish on: That certainly got rid of the cloudy appearance but now it looked too glossy so I misted over a bit more matt varnish: I think it looks OK now, I also gave the seat leather a dark dirt wash to break up the uniformity a bit. I looked in my spares box for something interesting to fill this space and came up with one of the parts intended for the cabin: I was also looking for something as a start for the wiper motors and found this: Its just over a millimetre in section so just about right, I trimmed and shaped the end of one of the blocks then drilled out the other end with a 0.5mm drill: With some half millimetre rod glued in this is how it looked next to the real thing: Here all three are finished ready for some paint: Next I made a gun-sight from clear sheet and attached using Gator Grip: I painted the edges black but its hard to see in the above photo. Here's how it looks with the glazing in place: It is a tight fit, hard up against the binnacle (and heater pipe I think), but I think it just about works. Bye for now, Nigel7 points
-
Hiya Folks, Here is another Hasegawa Hurricane,.....finished on Friday. I`ve converted t into a Canadian Mk.XII with the obvious addition of a Hamilton Standard propeller (from a Revell Ventura) but the tropical vents on the panels below the cockpit were removed, as were the vents on the side of the left hand engine cowling plus a Mk.I style tail wheel and exhausts were also used. The decals came from a mixture of Flightdecs, Sky Decals and with the codes for the u/c doors and under the nose from a Ventura 1/32nd serial sheet. Here is the WIP; http://www.britmodeller.com/forums/index.php?/topic/234997122-148th-hasegawa-hurricane-mkxii-135-sqn-rcaf-canada-one-morefinished/ And here is the finished model; As usual it was painted using a hairy stick using Polly Scale acrylics,......hope you like it, Cheers Tony6 points
-
just finished my latest build being the old italeri 1:72 Ac-47... build was pretty much straight forward though the kit is showing its age , only modifications were I used the minigun barrels from quickboost, and I replaced the kit whip antenna with a home made one and added the other two as the kit instructions only illustrate one where most pics I saw they had 3.... for the paint I used the Ak Vietnam paint set which went down great, for the patches on the cam I used the same shade but from valejeo and mr hobby, strange how the shade differs but think works great. I then tried to add a flow look by using a watercolour pencil, but didn't want do to much being first time. I also put some staining be the rear guns as saw many photos where there was a build up of carbon staining, just adds that bit more interest I thought!!!! hope you like I feel got the worn look I was after.. my c-47 family......so far!!!!!!!6 points
-
I have not posted in RFI for a while and so after seeing the sterling job done by CedB on the YFM1 Airacuda, I thought I would put this up. The kit is part of a series from Valom that cover the Brigand, Buckingham and Buckmaster. This creates the first problem as in the kit they all use the same wings, which are fine for the Brigand but lack the air intakes outboard of the engines that the other two have. I salvaged mine from a Magna kit which I had built was never happy with. The good parts of the kit are the fine surface detail and the main bits fit together quite well. The canopy is quite clear and can be bullied into an acceptable fit. There are resin engines which are very well detailed, but should be invisible behind cooling fans which are absent and which I confess I have not got round to reproducing. John Adams says the mould for them went west a long ago. The kit is a bit of a challenge as parts location is vague in places and not helped by the instructions which lack clarity and the parts numbering does not always match that on the runners. This can be fun as engine cowlings for both Buckmaster and Brigand are given. I used those on the runner with the fuselage halves as they looked right. The undercarriage is fair with nice wheel detail, but is missing a strut and I think I have not mounted the roof of the undercarriage bay far enough forward as I think the undercarriage should be a little bit further forward. The model is in the markings of RP205 RCV-F of the Central Flying School in 1946 and are based on a colour photo on p47 of 'British Experimental combat Aircraft of World War Two' by Tony Buttler .National markings came from the kit decal sheet and serials and codes were inkjet printed on to decal paper.5 points
-
5 points
-
Good Morning Chaps Picture the scene... 1982, a young Mad Steve is taken to Beatties in the Bull Ring in Birmingham by his father to go have a look and see what they've got. There, sitting in the window is this, enormous motorbike kit.... Strange feelings start cursing their way through the young mans body and mind, (as yet unaffected by silly things like women, booze and heavy metal...) I cant remember how much it cost, but in 82, it was probably a fortune. The young man makes a mental note to himself that one day, he will build such a beastie.... Fast forward 33 years of women, booze and heavy metal, and out of knowhere, a KZ1300 falls into my lap.... Whizz forward a few months and tadaaaaaaaaaa.... I've decided its time to make good on the promise I made myself... This is the Beastie in question The box is huuuuge.... I've built many of the 6th scale bikes, from the Monkey Bikes to the CB 1100, but I have a feeling this is going to be a bit bigger. One thing I did notice which is kind of cute, was that this kit was purchased in 82 as well in South Africa... nowadays you can quite easily add a 2 and a 0 infront of that price, if you can find them Okay, onwards. The kit is going to be built straight out of the box with no additions, just as they were intended back then. The only deviation will be the colour, The one in the window at Beatties was Blue, and that's what I'm going to be doing. So... The Frame Tamiya's quality back then is still the same as it is today. the frame went together without a hitch, and the clear fuse box and coils were added and basically everything was sprayed Semi Gloss black. Here we have the Crankcase and gearbox being constructed, rather a large bit and one or two quite obvious joint lines to deal with, but after a good sorting out and a coat of Zero Aluminium, I dont think it came out too bad. The whole affair bolted into the frame and shiny bits added. I wanted some variation in colour on the engine, and not have the crank, head, carbs all the same colour, so I sprayed the rather large 6 cylinder head Tamiya Gloss Aluminium, and i added a little Titanium Silver to Gloss Aluminium for the Carbs. Not that this matters in the least, because in the photo, it all looks the same And here it is all together, with the airboxes added... Thus endeth the 'lets build a huuuge engine' bit and time to start looking at the rest of it... Worst part of Bikes, for me, is the wheels, especially when you have 2 tone wheels. They are hell to paint in 12th scale, and 6th Scale just seems to magnify all the mistakes After a good talking too from myself to myself, I stripped the chrome off the rear wheel, undercoated and resprayed Semi Gloss Black (Can 1, nearly empty) Keeping the annoyances (wife, kids, dogs) to a minimum, I took to a hairy stick and Tamiya Titanium Silver and.... I don't think it looks too bad, bit of a tidy up and it'll be hundreds.... BTW, I used Titanium Silver because it looks closer to the actual rims than Chrome Silver, just my opinion. That's it for now... Next up is the rear swing arm and suspension when I'm on leave later this week And if my wife lets me use the rather nifty Camera I bought her for her birthday, might even have better piccies too. Thanks for looking and as always, all comments welcome Mad Steve5 points
-
This will be my first post so be gentle, this is my 1/72 T-50 by Academy, converted to FA-50PH of the Philippine Air Force. I modified the top of the tailfin, added wingtip sidewinder rails and hardpoints, weapons are from Hasegawa weapons set. Decals are home made to represent the new aircraft of Philippine Air Force. Hope you like it. Thanks for looking.5 points
-
Hello Folks Just completed them today. Full resin kits from Fibre Model. Always wanted them in 1/48. Both done in Royal Malaysian Air Force Schemes Big thank you to Aidy Abdullah who did the shark mouth and Sqn logo artwork and Richard Rocco Forneder who did the Keris artwork on the tail. All other decals from Punzer Aneh and sparebox. Colors gunze. Seats were scratch built First up 3 FTS based in Kuantan 1 FTS Alor Setar - Taming Sari Acrobatic Team Retire Scheme Thanks and happy Modelling Rgds Mr b5 points
-
Yes I confirm that my image of K9942 was pre the 2003 reversion at Rochester. I would suggest that the b/w shot by Martin Waligorski on the 'Spitfire site' is a modern image taken at RAFMus Cosford post 2003 and shows the repair to the top skin where the larger cross-sectional aerial and its required base plate have been removed. Almost certainly K9942 would have been originally fitted with the early type aerial as these two images:- It was then converted to the broad aerodynamic aerial and base plate as this image although this is not K9942:- This is K9942 in this 1951/2 still from the film 'Angels One Five' albeit with the aerial slightly out of focus:- ..and finally a shot of K9942 at Rochester in 2003 showing the top skin repair required to revert to the early style aerial:- PeterA5 points
-
Hello Everyone! I would like to share this build from early 2015. Living in sunny Goa, India where a squadron of the Ka-28 used to be based, I used to see these birds flying around overhead. Their characteristic shape with the lack of a tail rotor made for a very unique sight. The kit used was the Zvezda Ka-27, so to convert it to the Ka-28 (Ka-PL), I scratch built the tanks beneath the exhaust, the extended starboard cockpit window along with some rudimentary cockpit detailing. At the time, I lacked styrene sheet to build the tanks, so I attempted dissolving some sprue in paint-stripper and poured it to dry out flat on a sheet of glass. I effectively knocked off a few years off my life span dealing with that noxious stuff. Also added some riveting, drilled out a few absent vents and the radio antennae. I got the rotor setup all wrong though- Not sure where I messed up. Decals and stencils were from Begemot. A picture to compare the before and after weathering. The final matte coat toned things down quite a bit. Thanks for watching! Cheers, Alex.5 points
-
5 points
-
The following images have been taken at various locations around Cornwall since Jan 2016. Unfortunately the few remaining 771 Squadron Sea Kings have been rather elusive. Locations here include Bodmin Moor, Davidstow airfield, Godrevy etc:4 points
-
Hello everyone. Here's my latest, Roden's very nice Heinkel 51B completed pretty much out of the box, but using an old AeroMaster decal sheet bought a long time ago for the Classic Airframes kit that I never got around to building. I think this kit is probably a little easier to put together! The build should appear in a future copy of Model Airplane International. Haris http://harisali.co.uk/4 points
-
Hiya Folks, Built as part of the Hurricane STGB,....here is my 1/48th scale Hasegawa Hurricane Mk.IIb kit built as BG827/ W of 273 Sqn, Hurricane Mk.IIb, flown by Warrant Officer Zayzezeirski when the unit was based at Ratamalana in Ceylon during September 1943, a photo of the real aircraft shows that it was not fitted with a Vokes filter. Unfortunately Zayzezeirski was killed in this aircraft on the 29th October 1943 after hitting a tree during a dummy attack on his home airfield, The model was brush painted using Humbrol Earth Brown, Polly Scale Dark Green and Sky Blue undersides were replicated using Aeromaster Finnish Light Blue, I chose a lighter shade of brown to try to make the airframe look a little sun bleached, hope it worked? The blue and white roundels and fin dlashes are from a RAAF Mitchell and the code `W' was made up using seperate `V's' to try to replicate the right style, with serials from a Ventura serial sheet. The WIP is here;http://www.britmodel...e-morefinished/ And here is the model; Cheers Tony4 points
-
Academy 1/72 P-47D Thunderbolt done as Lt Hopkins P-47D-26 of the 509th FS, 405th FG, 9th AF, Dec 1944. Decals are from Eagle Cals and were on the same sheet as I'm using to make the Trojan Warhorse - pretty good spare set of decals of you ask me! The bombs are 1000lb-ers. thanks Mike4 points
-
Hey Everyone, I have finished with all eight ends of the detail work for the trucks. I still have a small amount of clean up and spot fixing. This will take a day or so, but about time to move on to the finishing of the outside wiring. The outsides of the trucks have a bit of wire detail to add that I have been putting off to the end of the detail work that is needed. And to be truthful I'm not sure if I should do this just yet anyway, but it dose need doing at some point, so this is it. In this shuttle era photo, you can get a look at the outside wiring that needs doing. There is not a terrible amount of work to be done, just very small and delicate. At the scale I'm working, the wiring should be about 0.10- 0.25mm thick and some 0.25 metal rod, plus the mounting brackets. All small stuff. And I still have to track down some scratch material for other things here to. So..... Thanks all for checking back. Be back with outside wiring.4 points
-
Gentlemen, I've had a rough last week and this is the result Proper photoshoot soon. Following images courtesy of Milan Pospisil.4 points
-
Cheers fellas, it was very enjoyable, even if at times it felt like at times I was the pigeon, at others I was the statue! Thanks for having me Rich, I shall indeed be taking part in other GBs, I'm in the Edgar Tribute at this very moment, and will will be signing up for the Cold War GB, and not forgetting the Vignette GB. As usual, I've tried some new things, mainly using Mr Hobby acrylics, Microscale Decal Film, and not because I wanted to either but hey... and E-Z-E Line. Thanks all for taking an interest and here's to the next Thunderbolt GB.... Sean4 points
-
Last weekend i had the time to paint the Hawkeye crew. I decided to give them a desert uniform in order to have some contrast with the vest. This is how it turned out. Next is a gloss varnish and some shadows/highlights:4 points
-
Right......I am slowly dragging this towards the finish line. I have now got the Olive Drab areas painted on the top of the fuselage plus the whole aircraft has been given a coat of Citadel's Runefang Steel. It's gone on reasonably well but I had a few areas where it was reluctant to go on smoothly . You can also probably see from these photos, taken earlier on yesterday: ......that I have also started to paint the odd panel or hatch with other metallic colours to give some variation - the photos I have of the actual aircraft seem to show any number of variations with the panels/hatches so I'm using a bit of artistic licence. While these areas were drying I also did some work on some of the other parts: I didn't want to end up having to make all these towards the end of the build. As of yesterday afternoon these are the collection of parts still to be added: This is how I decided it was best to paint the machine gun barrels. I drilled some suitable sized holes in the block of wood before gently pushing them in. They are in deep enough to hold but not so deep that the bare plastic will be seen when they are in place in the wings. They were give a light coat of Revell's Anthracite before I dry brushed them with Revell's silver - they do actually look more metallic in the 'plastic': Before I started the painting I also drilled out the ends to make the holes look like they go all the way through. Also yesterday afternoon I took some more photos - the natural daylight seemed quite nice: Next weekend I'm going to finish getting a few more panels highlighted on the fuselage before I give everything a coat of Pledge (new Klear) and then get the deals on!.......not sure I'm looking forward to that! Comments and suggestions welcome. Kind regards, Stix4 points
-
And the fin flash. Mr p that made me laugh a lot. Cookie, I used two methods. 1. Ripped off giemme and used a masking sheet, mine was not the tamiya stuff it was a low tack sticky back plastic, tamiya sheet would probably be better as the plastic had trouble adhering to the ridges and panel lines. I measured some stock lettering the size I wanted to recreate and the put that on to the paper backing using a trusty (don't use the shifty looking ones) pencil and ruler. I then cut out with a blade very carefully. A curved blade would probably be best as you can roll it along the line slowly but keeping pressure. Stick that to the AC Matt coat then paint. It worked ok-ish... 2. Masking by eye using tamiya tape and pics of the aircraft, good to do if there are clear way points to go off. I would start by making boxes for each letter then making and cutting the lettering onto the aircraft with tape. Curves can be done with curve tape, but I do them with a small paint brush and by hand as I don't have curve tape... Can be inconsistent and if it goes wrong it's really wrong but most of the time it's good! Easier with 1/48. My hurricane build in the KUTA GB is a good example of what I mean... If any of that makes sense, well done to you. Hopefully it is some use Rob4 points
-
4 points
-
Morning all, Some progress on the Mark II over the weekend: I've never really liked the "bullet" nose of the Mk II Rotol propeller, so I'm taking the liberty of doing one without this feature: P7350 as she flies today with the Battle of Britain Memorial Flight. I've nabbed an unused Sword spinner from the spares box and the backplate of the old 1970s Airfix Vb, and inserted the Rotol blades that come with the new Airfix kit, with a bit of reshaping at the tip. These blades are not going to be a perfect copy of the blades on P7's current propeller, but I'm not sure anything easily available will be. I've added the vents for the gun heating under the wings, and the tiny intake on the right hand side of the top of the cowling. I also removed the gunsight as it is no longer fitted to P7, and I used the later oil cooler as is currently fitted. Justin4 points
-
4 points
-
Good morning It is by a pure coencidence if I show my Nmf GC 2/5 Lafayette Jug just after sean's OD Thunderbolt So this is a Tamiya converted into a D30 with the Qb wing conversion set ,Qb fin fillet I replaced the seat by a Pavla one , the Ip by a Yahumodels one and I used a Revell propeller , the decals come from a Berna decals sheet and I used Humbrol Metalcote paint brush painted Build thread is there http://www.britmodeller.com/forums/index.php?/topic/234997095-p-47-d-30-gc-ii5-lafayette/ Thanks for looking Patrice4 points
-
4 points
-
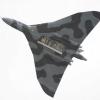
I've been kept away from my modelling desk this week, but I have managed to spend a bit of time on the intakes. I've glued them together as seamlessly as I could, which wasn't particularly successful as in all the other Vulcan builds I've seen. I then set about sanding, a covering of filler and sanding again. This is the position I'm at after that. It actually looks better to the naked eye. I'll keep repeating this process until I'm happy with the results. I've also been working on the tail. Again filling and sanding to make the tail look like that of XH558.4 points
-
So I started off with the job I like least - masking the canopy. Surprisingly tough job to get right at first with what appeared to be a simple canopy - barely any straight lines it seemed. I then started gluing a few parts together. A few issues along the way - one of the rudder pedals was missing (short shot?), so I cut the other one off as well with the intention of scavenging from a past build for a better shaped part (scratch building not being a great skill of mine). I also managed to break the grip of the control column, but was able to glue it back on with too many problems. And as suggested by Darby, I drilled the exhausts out with a pin vice, used the tip of sharp blade to scrape to the right shape and then cleaned up by brushing with some Tamiya Extra Thin Cement. Thats it for now.4 points
-
Finally got around to pulling a Spitfire/Seafire kit out for this group build. Wanted something I could do without too much aggro as work is rather busy at the moment. Settled on this, which has been in my "to do" pile for a longish time (fair amount of dust on the box). Sprue parts after a bit of a wash: Decided on this scheme, as I have a plans to do a FR47 in the classic DSG/Sky markings. No funny business, just a straight OOB build.3 points
-
Thanks I just found a pinhole in her ear which I'm hoping I can ignore, but it keeps catching the wash I'm using. I sprayed some very thin Flesh Wash over the face, concentrating on the lower parts, to warm the skin up a little, and then started working with Flesh Wash and Baal Red to add some glazes: I've also applied some highlights with the skin tones I mixed - these were Tamiya paints thinned with lacquer thinner which is a bit scary, but it seems to blend really nicely. Except on the cheeks where I need to go over the edges of the highlight with the mid tone: Coming on nicely, still lots to do. Will3 points
-
Academy 1/72 P-47D Thunderbolt (razorback). Flown by Lt Dean, 317th FS, 325th FG 'The Checkertail Clan' 15th AF, Italy 1944. The kit decals are awful but I really wanted to make a Checkertail Thunderbolt as I've also got a Checkertail P-51 and P-40! thanks Mike3 points
-
Thank you all for the great feedback people, A very brief update as not much has happened over the last week or so as my heart wasn't really into doing much modelling. Anyway I'm back on it now, a few changes and tweaks have been done as I've been looking at some great ref pictures. Anyone thinking of building a Sherman needs to book mark this page. http://the.shadock.free.fr/sherman_minutia/index.html It's great and should prove helpful. This also another good link. http://www.usarmymodels.com/ARTICLES/Sherman%20Corner/turretcheekarmor.jpg So I've added the later version of the 2 inch mortar that was fitted, it had a weather cap and chain and the barrel was slightly proud of the turret. I also swapped up the Commander aux sight, I used one from a much earlier version. Also removed the lifting lugs as they were glued too high up, mixture of Tamiya putty and cemment added to the damaged areas, these will get reworked later. Not much of an update but its been a mad week ! Dan3 points
-
I sat down on Saturday and decided that I'd better tackle these things, starting with the fiddly job of adding seat belts (who, oh why couldn't they just not fly upside down, eh? Think of the time we'd save...). Not great, but inside that small dark cockpit covered up by a framed canopy, it'll be sufficient. I also finished up the cockpits, and stuck 'em all together. Ditto on the above - in 72th scale, no-one can see the gauges anyway. And here's the terrible 2, all stucked together and waiting in (for) the wings. So yes, progress is happening. As with my Revell P-47D build, I'm looking for solutions to replacing the louvres under the rear fuselage. Currently playing around with 1/4 round strip, but it's a wee bit too big - any suggestions welcomed. Hopefully get a bit more done tonight.3 points
-
Thanks Rich. This photography lark is tougher than the build!! OK - No sunshine but taken outside without a flash. Do I need more layers of the Alclad? Big learning curve for me here so all comments welcomed.3 points
This leaderboard is set to London/GMT+01:00

