Leaderboard
Popular Content
Showing content with the highest reputation on 03/04/15 in all areas
-
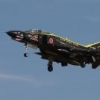
Here’s my latest: Hasegawa’s 1/48 Boscombe Down Phantom, in its original Hi-Grade boxing. No great dramas, and I’m reasonably pleased with the result. The only elements not in the kit are that I’ve used DMold intakes and reshaped the fuel dump pipe under the rudder. Those intakes are an absolute must. Not only do you get a full intake tunnel and compressor, the boundary layer spill ducts are cast hollow too. However, the leading edges of the splitter plates are moulded against the casting blocks and are so fine that both were damaged in the box. They proved impossible to remove cleanly. Luckily, the kit’s parts are equally sharp, so I was able to graft the plastic onto the resin and you can’t see the join. As you can see, she’s not in the even gaudier colours for the 25th anniversary of the Phantom, which meant a bit of scrabbling around looking for alternatives. My thanks to all who helped out with my questions, as usual, but great big thanks in particular to Clive (SHAR67 of this parish) for the unit badges on the tail, without which she would have been a bit bare. High points: fine surface detail; good exhausts (you really don’t need resin replacements); excellent part-metal seats. Low points: occasional poor fit, especially the photo-etch in the cockpit; steel PE (!); a lot of flash considering this was only the second or third pressing from these moulds; no alternative to the 25th anniversary decals, not even the markings that were underneath them; ropy instructions in places, especially the cockpit. The last picture shows the Boscombe Phantom with its Hi-Grade half-sister, a VX-4 F-4J that I built a few years back.24 points
-
SteveHnz has requested a few photos of the York in my avatar. So at his request, here are a few photos. This is the CMR conversion with the Hasegawa wing, it was built several years back, so please don't be too critical.12 points
-
Happy Easter, So before starting major construction on the Airfix Hurricane I thought I would finish this one to make it 4 built so far this year I can now claim to have built two models in my life that don't have wings, enjoyed this one as much as my previous fuel truck. Built from the box with nothing added, Gunze and Tamiya paint. As always comments welcome, Rick G12 points
-
9 points
-
Call it done. I lost a antenna standoff so I ended up robbing my Coyote kit. Base is made from plaster and coloured with pigments. Rocks are bits of Gibrock. PE is from Blackdog Ammo cans, Bergens and some boxes are from Paul Wade at Red Zebra Models. (http://www.redzebramodels.co.uk/) Cardboard Boxes are from J's Modelworks8 points
-
I wanted to try out the new photography setup on something with a black background, and this little chap came to hand: And then I thought "Since I have powerful lights on both sides, why not try a more moon-like lighting effect..?" It's a very nice 120mm resin figure. Just a tad difficult to get all the hoses like the real thing, so they have been messed around with a bit. Plus he got a proper watch. Sadly hard to get hold of these days (they used to make a wide variety, including Al Shepherd's "golf shot" and a fantastic SR-71 pilot figure. bestest, M.8 points
-
Thank you very much gents, the dog and I both arrived safely (though one of us - naming no names - was sick on the bus from Aberdeen to Tarves) and are now comfortably esconsed in the bosum of my only-slightly-strange family I confess I did pack a Heller Dewoitine D.510 to keep myself amused if required along with a scalpel, glue and a few paints - I hope this will form the starting point for a build for the French Fancies GB. Anyway Happy Easter all Cheers, Stew7 points
-
7 points
-
Guys... Finally got round to finishing this chap, he's only been on the bench for about a year (not bad, eh? ) It's the 120mm Verlinden figure, painted mostly in Vallejo acrylics... Still need to perfect the skill of skintones, but I'm getting there. Hope you enjoy...6 points
-
Hiya Folks, I got my Airfix Hurricane yesterday and I`ve started sticking it together today after painting the interior,....what a fantastic kit! I have not bothered with sprue photos but after using spray can silver, Tamiya Interior Green and Black here is the interior built up with one of the wing gun bays furnished; This is the first time in years that I have tried to brush paint using Tamiya paints and I was pleasantly surprised at how easy it was, so I have found an easy to find replacement for my last bottle of Polly Scale Int. Grey Green! Here the wings have been assembled with one gun bay cut out and opened up, the interior parts have had a wash pf watercolour before assembly started; Another view of the assembled wings, fuselage halves ready to join and,...yipee,...the kit also includes a Vokes filter!!; Here is the Vokes filter alongside the lower nose for the normal variant; Even better,.....the kit also includes an arrester hook, the forward pair of catapult spools (tlose from the rear fuselage are missing but easy enough to make) and a seperate fuselage section to mount the hook on,.....so a Sea Hurricane Mk.Ia or b can be made from this kit, but you will have to fabricate your own pilots head rest; The kit includes both De Havilland & Rotol (blunt spinner) propellers which can be seen here with the fuselage almost ready to be attached to the wings; And here is the kit together. I have added the Vokes filter; So that is what I`ve been up to today,.....this is a great kit although the wing trailing edges will need some effort, Cheers for now, Tony6 points
-
Well, you can't have a BoB Spit and not have a Hurricane can you? My first impression is, well... WOW!! This is a very very nice model - with levels of detail that would out a 1/32nd scale kit to shame. If you want to know just how good - then go to your nearest ironmongery shop, purchase a 2 foot length of steel rod, and lift it very high above your head - and you will not have raised the bar far enough!! Panel lines are rather nicely executed, and the fabric effect on the rear fuselage is not overdone, and looks like nice tight doped fabric rather than the troughs and ridges one normally gets. Well done The 'Fix! The only thing I can see that will annoy Troy is that the fabric area on the lower fuselage sides beneath the doghouse is still shown as a separate panel - so will need filling if you want to be 'spot-on'. Clear parts are commendably thin - with a separate canopy section provided for both open and closed options ( the latter being slightly wider and a little spayed - which I think is the first time anyones tried to replicate this feature on a model). Anyway - here are the pics - so you can see what I mean. In short if you like Hurricanes or WW2 fighters - go buy one More to come as I start building.... Jonners6 points
-
Hi evryone This was intended to be a quick build, about 6 weeks which is quick for me, while I was waiting for the French Fancy GB to begin. What I should have done was finish something from the shelf of doom but temptation in Hobbycraft got the better of me and I've been meaning to try some of the new generation of Airfix kits for a while. So hear we have an Me 109 E1 finished in the markings of 2/JG 26 from March 1940. Not very heavily weathered as these machines were quite clean in the photos I found and not very well photographed by me either, apologies for that! Ultracast prop, spinner and wheels were used. The decals are from Aeromaster. Cockpit shots first. The RLM 02 was a mix of Tamiya paints. I found the kit to be a fun build with very good fit apart from the gun inserts, the only gripes really being the thick transparencies and ejection pin marks in annoying places. Questions and comments welcome. Thanks for looking James6 points
-
Finished in the markings of the aircraft displaying at RIAT a couple of years back.6 points
-
6 points
-
Hasegawa 1:72 F/A-18C built as Kuwaiti Air Force F/A-18C. Eduard photoetch set. Hi-Decal decals. Paint: Revell, Testors, Tamiya, Humbrol Flat Base. Built in three months.6 points
-
So here's a couple new pics with the splinter guards installed with their restraining ropes, added the ladders and attennas also.6 points
-
Good afternoon dear colleagues! I would like to present you my latest model. Yak-3 on a scale of 1/48 from Eduard. Models are built out of the box with a few additions. Building process can be found here:https://plus.google.com/u/0/photos/102698301609539618358/albums/6119534114439963521 The final photo session. Many small defects and a lot of what happened not as I wanted to, but in the end I got enjoy this project. And is this not the main thing in our hobby? I hope you enjoy viewing.5 points
-
hi all, some photos from my recent trip to Malaysia. Hope you enjoy them, Andy5 points
-
5 points
-
This is the 1/48th scale Tamiya Vought F4U-1A Corsair. The markings are from Superscale Decals sheet number 48-501. 'Big Hog' VF17, USS Bunker Hill. Aeromaster paint was used for the main colours. After looking at photos of Corsairs coming into land, I changed the following:- I cut the main undercarriage into two sections, and rejoined them using a small diameter twist drill bit as an extension to represent the undercarriage hanging down. The hook was lowered. I cut the rudder from the fuselage, and reattached it slightly to the right which compensated for the engine torque during landings. The horizontal stabiliser was removed and reattached slightly up. I used lead foil to represent the pilots harness over his shoulders. The Eduard Corsair zoom set was used for the instrument panel, cockpit detail and some of the undercarriage detail. Lowered flaps option come with this kit, so I didn't need to touch these. The base is Perspex, painted black from underneath. I made this model when it was first released in 2000. I still don't know why I didn't do anything with the propeller. Maybe I should have waited for the motorised version that followed shortly after. Thank you for looking. Joe4 points
-
Today is a 'good day'. A couple of months ago, my six-year-old started becoming very interested (then obsessed) with the whole Star Wars genre. This interest coincided with a Sci Fi 'Campaign' or 'Group-build' over on www.modelersallaince.com where I spend quite a lot of my time when I'm not hanging-around Britmodeller. . Long story short, I took advantage of Bens interest and bought this old STAP & Battle Droid kit to enter in to the campaign and to see if he'd like to have a go with Dad at building a kit. He did most of the major assembly with the minimum amount of help form me, whilst I was allowed to do the painting. We finished at 0700 this morning (only just) in-time for the last day of school and this mornings' 'Show & Tell'. Yes, today is definitely a good day. Kit - AMT/Ertl 1:6 STAP & Battle Droid Paint - All Tamiya acrylics. Decals - None Extras - 'pins' (wrist joints), patience and lots of strong coffee. As ever thanks for taking the time to look and/or comment. Because I enjoyed this 'change-of-pace' so much I spent a lot of time over the last week or so wandering around eBay looking for more Sci Fi builds to spend my money & time on. As it's turned-out, on a purely 'modelling level' this is not one of my best, however as a fantastic experience of building a kit with my wee son, it's absolutely bl**dy marvelous. AFN Ben & Ian.4 points
-
Here is Revell's Airbus A400M 'Grizzly' in her roll-out colours. The A400M destined for the RAF and other European airforces. A straight-forward out of the box build of what is a lovely kit from Revell... Tom4 points
-
Tonight I am definitely on the home straight. I gave the inside of the U/C doors a light wash of Dark Dirt and got some metal primer on the lead wire brake pipes (0.28mm diameter): I then mixed up and applied a dark grey wash for the details on the U/C legs and brush painted the brake lines Black Grey: I then glued in the brake lines and attached the front U/C doors with Gorilla glue (love that stuffs instant grab): I let all that harden up while I made dinner. Dinner done, I progressively glued on the brake lines as well as finishing off the doors and got the wheels and pitot tube fixed on: The final bit of assembly was the guns: The holes for those were a tad tight so I did have to drill them out again. All I have to do now is apply the matt varnish, give the exhaust area some weathering treatment and unmask the canopy. I have been thinking about Chris's (dogsbody) comments on the finish and the semi gloss finish does have a certain appeal. There are some quite shiny areas though so it does need some matting down. I think I will just try to apply the lightest of coats to pull the overall finish together. Bye for now, Nigel4 points
-
Hi everyone Well its finally finished (I do have a little tidying up to do here and there - but that's for another day!).. ...Once the weather improves I'll post some better pictures in the RFI along with my Mustang IV. Thanks to everyone that show an interest in my build, I've had a few self induced trials and tribulations but its turned out ok. Now to clean up my workshop and start my next build. Cheers all Iain4 points
-
I have taken a few pictures without distraction from the net on the balcony. I close this build now. Enjoy the photos. Balloo4 points
-
Curtiss Kittyhawk IIIA FR458 GA-C, 112 Sqn RAF Cutella, Italy, 1944 Kit: Sword 1/72 P-40K Warhawk "Long tail" Build thread:http://www.britmodeller.com/forums/index.php?/topic/234974854-killer-sharks-and-an-old-friend/4 points
-
Curtiss Kittyhawk Ia AK772 GA-Y 112 Sqn RAF Sqn Kdr Clive "Killer" Caldwell, Gambut Libya March 1943 Kit: Hasegawa 1/72 P-40E Decals: Legato "Kittyhawk Aces" kit Build thread:http://www.britmodeller.com/forums/index.php?/topic/234974854-killer-sharks-and-an-old-friend/4 points
-
Curtiss Tomahawk IIa AK498 LB-C 250 Sqn RAAF Flt Lt Clive "Killer" Caldwell 1941 Kit: Airfix 1/72 Tomahawk 1A Decals: Xtradecal 72139 Build thread:http://www.britmodeller.com/forums/index.php?/topic/234974854-killer-sharks-and-an-old-friend/4 points
-
Hiya Folks, A very small update but first of all a confession,........I stated that Airfix tell you to open up the gun bay as a big square,....WRONG!! My cockup,.....I could have sworn the instructions said to to this but I simply assumed that this was the case and so,...don`t do what I did!! Here is how it should look on my 2nd Hurricane; Anyway,......that aside, after all of the sanding last night here is how the (1st) Hurricane now stands, with black watercolour applied over the joints just before I sand over them for the last time, as this helps me to judge whether the joints are smooth or not because if there is a line of watercolour still visible, then there is still a gap; And to show how the Vokes filter was fitted, here is the underside of the nose with the part which had to be cut from the wings alongside; Sorry for the cock up earlier,.......believe it or not I was following the instructions carefully and I still got it wrong! Cheers for now, Tony PS- Chris- Yes you can tell that the kit was designed by the same person who did the Typhoon,...it is a pearl of a kit! The only thing that I have noticed so far is that some of the guns are numbered wrongly on the instructions, you have to judge where the cartridge shell ejectors chutes should actually be and mix and match the guns accordingly,....it is the outboard pair which need swapping around.4 points
-
thanks all. I'm Thai from Thailand. I don'n know of engine fin. I used parts in box and build follow instruction sheet. Royal Thai Police....... wait a minute....in soon4 points
-
Thanks for digging them out HAMP man - much appreciated. In fact I have the Flightpath set so have the white metal bits and bobs already - what I was hoping you'd have would be a spare etch fret. What I was really - really after was a second rear cockpit instrument panel and side panels - and I see you have used them Fancy not knowing when you bought the set that years later some idiot on BM would try and beg your expensive etch from you That said - I could certainly use one of the two remaining front cockpit panels in the back and maybe some of the other etch bits if you're willing? TVM Steve Tom - you're a man with skills to burn - you'd have no difficulty at all doing anything I can manage I made up a jig for the JP 5 MDC - which worked well: But the main difficulty I see with trying to do the Hawk MDC in wire is the simple extent of it. It runs up and down the front canopy 4 times and I cannot see any easy - or perhaps even practicable - way of using a jig. I think I'll re-read CT's briefing on home-brew etch. That said I'm not sure I understood it first time around. Notwithstanding that CT wrote it with such clarity that one might reasonably expect a muppet to be able to understand it. I didn't do "O" level Chemistry and I haven't got a PhD neither And I never really understood wot was keeping my aeroplanes in the air either...... Anyways - I've skived of work a bit today and done a little bit more: The aim for all of these bits is to use them as masters to produce resin cars for the 2 Hawks. I've just added the supports and tube to the back of the bang seat. Not much of interest there. I've re-contoured the back of the tub by adding some angled 1mm plastic card - to reflect the shape of the real thing. Not much of interest there either I have got the front and rear instrument coamings into a state ready to attempt to make RTV moulds tho'. Quite pleased with them. The front one is a substantial re-working of the moulded in coaming in the italeri kit. More or less completely reshaped. The back one started off as this from the CMK Hawk 100 resin part: And I cut it down. Reshaped it, and then detailed the front of it (what I think is probably a moulded instrument cover) out of bits and pieces of plastic card and strip. Here it is compared with the Airfix offering and before I gave it a coat of Tamiya white primer: And here it is ready for the RTV: TTFN Steve4 points
-
4 points
-
Hi I built this kit a short while after it was released in April 2012 - what a superb kit it was, great fun from start to finish. I added the missing cream band after these shots were taken. I've seen many other built versions of this kit since - mine was straight out of the box while on holiday - I took my tools and semi-prepared painted sprues along with me and 5 days later, had this...3 points
-
Welcome to my Group Build Thread! I've gone for the Academy 1/48 P-38E. The kit is in good condition however as you can see a few parts are off the sprues. Some of the cockpit parts are missing though so I have been forced into getting resin replacement. I have also ordered better decals. The after market parts will be photographed when they arrive! This will be my first GB, first 1/48 model and first time using resin! Im a little nervous but very excited, I hope you'll enjoy the journey with me.3 points
-
Calling this one done - earlier stuff can be seen here. Comments/thoughts/abuse appreciated! Have fun... Iain3 points
-
Hi,today i finally made some pics of my second BMW M1 Procar. The Car was driven by Niki Lauda and won the titel at the end. Thanks for watching this! regards Christian3 points
-
It's an Abarth Tributo Ferrari: Fujimi 1/24 kit with some of the Hobby Design PE fret (the 'hole' in the wing is the indicator repeater, and it is orange in reality, honest): The gloss black shows every spot of dust and imperfection unfortunately, but hey...and with it's little sister: and the real thing - Abarth 595 Competitzione - this one is done in a green vinyl wrap at the Abarth Dealerships in central London: and the one I'm about to order, with the new 180hp engine with Garrett Turbo: Graeme3 points
-
Just finished, the new 1/72 scale J-15 from Trumpeter - complete with flight deck and crew figures........ The only alteration I have made is to lower the nosewheel oleo to make it more compressed - the rest is straight from the box. Ken3 points
-
Finally got this to a point where I can about call it finished, just a few remaining touches. Not happy with the glazing, the front screen wasn't a good fit, and the time thishas been sat around so much dust has collected in the foot well areas and I can only reach half the panel from the inside to clean it. The oil wash is much heavier than I would have liked too, it just wouldn't come of despite the varnish under it. She looks better from a bit of a distance, things always seem to look much rougher under the camera.3 points
-
some small , but late update camo demaarkation lines set: this is supposed to be a two tone , pre-nile valley one! it is loosely based on available photographs and artworks... as no two machines were the same, my version will be hard to contest... , let's wait and see! and as I am advancing at that enoumous pace, I think I will throw in the main air defence weapon of Egypt at that time , the SA-75/ SA-2 longe range air defence missile it is a nice resin kit, more on that later!3 points
-
Curtiss Kittyhawk III FR742 OK-<> 450 Sqn RAAF Flt Lt Frank Schaaf, Gambut Libya July 1943 Kit: Sword 1/72 Kittyhawk III "Short tail" Build thread:http://www.britmodeller.com/forums/index.php?/topic/234974854-killer-sharks-and-an-old-friend/3 points
-
Hiya Jon, I`m split between these; Hurricane I, Z4769,during its flight from Takoradi to Egypt in 1941. It later went to 237 Sqn but ftr 2.12.41. Above- Tony O`Toole Photo Collection via Jim Pickering With a similar aircraft below,.....reproduced here under fair use; OR; Hurricane I-Z4932-OL-B, with the name `KIWI' under the cockpit from the Royal Naval Fighter Squadron Western Desert, flown by Sub Lt Mike Fell when he was shot-down-by Otto-Schutzan from JG27. All above reproduced under fair use, thanks. I intend to build both sometime but may opt for the Takoradi Route scheme for now,.....I`ve still not fully decided, it depends if I can find my resin drop tanks! Cheers Tony Edit- Sorry Troy I missed your post,....no not Malta this time but if somebody does a Mk.IIa/IIb,...hell yes,....as a certain Wallace like `gimpy' person said recently!!3 points
-
Another day another update, Work continues on the same area.. Lots 'o' brass.. Hopefully this deck will be finished tomorrow. Cheers Warren3 points
-
Looks great Stew, the Decal onto Kleer method of application is something I've only tried once as I fear I'd put too much Kleer on and it would leave a lumpy surface underneath! I bet the dog was really embarrassed at you being sick on the Bus, it's that withering look they give you when you've made a fool of them by doing something particularly Human that gets me! Duncan B3 points
-
3 points
-
greetings everyone Well, it's been a while since I last posted an update and TBH, I haven't really done a hell of a lot due to major changes at work and in life blah blah blah..... So what have I done? Well, I made the interior of the bridge including a few 1/800 figures just to add some interest. It's lit (and it works this time!) and is all glued up. I've run a wash over the panels ready for painting. The wires run through the neck and into the main body - which took a fair amount of working out. I also added a tail fin of sorts because I thought it looked cool. I have also begun detailing the upper surface. I should really be detailing the center intake section first, but I am still working out what I am going to put in there and I keep coming up against stone walls (so to speak), so I have moved on to the surfaces. this is how I will connect power to the ship from the stand - nothing amazing but it works: I have also spent an inordinate amount of time trying to come up with a different style nose as I just don't like the shaver front. However, I am stuck trying to figure a way of casting it and even emailed Bandai asking for a replacement nose piece so that if I do screw it up, I always have the original to replace it with. However, they have not gotten back to me at all and I am not sure I had the right email address to start with. If anyone knows what it is, please let me know. This is a really rough drawing of what I had in mind (please bear in mind that art is not my strong suit). If I go ahead with this, I will reduce the length of the main probes to just 2 sections from 3 Well, that's it for now. I should hopefully have something better to show for my time next update. Any thoughts, ideas, critique and so on are always welcomed thanks for looking MH3 points
-
All done; H/B supply only one marking for the tail fin, but the instructions shows one on each side.3 points
-
Glad to be included in the above collective. A fine bunch of miscreants if there ever was one.3 points
-
On the technical drawings of MS and Breguet, june 1939, the interior was indicated "gris bleu clair" and "gris bleu". Breguet wrote: All areas not exposed to corrosive agenst will be painted chamois(category 2). All others paints were category 1 better than category 2. In the D520 technical manual (1940), it was wrote: cockpit, chamois protective coat will be overcoated by one coat of night blue. But the pictures of D520 build before 40 show a lighter color. perhaps "blue grey". Thus the Potez could be painted in blue grey or night blue depending on the date of production(see pictures in my previous post). On the picture, the interior could appear lighter than reality, the exposure is for show the detail in the shadow. Look at this pic of Latecoere 298, it is light, it is not chamois, but blue grey (wreckage) All french constructors applied the rules of Ministere de l'air, so the cockpit or areas communicating with the outside were not painted with chamois , or this color was overcoated by one other color.3 points
-
Well, she's brought in and done, my friends. I have changed the subject, to a machine of the 8th Pursuit Group's HQ section, at Langley Field in 1940. Those at Chanute with the ACTC were near the end of their tether and mostly served as instructional airframes; the ones at Langley were certainly flown. Here are a couple of pictures, there will be more in the gallery:3 points
This leaderboard is set to London/GMT+01:00


