
Leaderboard


Popular Content
Showing content with the highest reputation on 05/07/14 in all areas
-
Hello friends This time a quick build with a fast build kit??? Regards from Portugal Vitor Costa5 points
-
Hi all! Here is the results of my modelling since April: a dual build of the Airfix 1:72 Swordfish and Gladiator. Both are more or less OOB, although I added Quickboost gun barrels to the Gladiator, and did a little modest interior scratchbuilding in both cases. The Gladiator's three-bladed Blenheim prop is cobbled together from a resin Blenheim hub and cut-down Lancaster blades. I used the kit Swordfish scheme, K8393/5A of 824 squadron, FAA in Operation "Judgement" against the Italian fleet at Taranto, 11/11/40. The Gladiator uses the recent Xtradecal sheet to represent N5520/S or "Faith" as flown by the Hal Far Fighter Flight in defence of Malta, summer 1940. I'd always wanted to model these aircraft in their respective "finest hours", and also have a real soft spot for the early FAA schemes Rigging is from nylon thread, paints are Humbrol (and Tamiya white primer underneath the Glad.). I was reasonably profligate with the weathering, particularly on the Gladiator, as the defence of Malta was a bit desperate to be spending much of the time polishing cowlings! These are both fantastic kits and I would recommend either. My only niggle is that the Gladiator's engine cowling is a bit over-simplifed, and the separate pilot's door has rather faint and weak detail. Also: follow the instructions when building the 'Fish! I nearly came to grief assembling the upper wing. Constructive abuse always welcome WIP here: Enough waffle: photos! Lastly, here's the Gladiator with one of my Heller kits, made for the Interwar GB back in 20125 points
-
Airfix 1/24 Spitfire Mk1a https://www.justgiving.com/DaisyThorne/ Well its finally done. Its taken 1 weeks and more hours than i can count. The challenge was to get sponsored to build the kit in 1 week and then auction it off. All of the monies goes to little Havens. This was also built in Memory of our little 3 year old Daughter Daisy who tragically died on 14/02/14. I always new that there was a really nice kit of a Spitfire hiding in that Airfix box. With the kind donations from Airscale , John Dutfield model railways in Chelmsford , Grey matter Figures , and Dave T. This has been a slog that has mentally drained me. I found myself starting everyday at about 8am and working on until about 4pm every day. The kit went together OK and with a bit of scraping , filling , sanding , and swearing it worked out. I made a spar for the wings to get the correct dihedral. The gun covers and side panel are removeable. I wont waffle on any longer other than to say , " Daddy finished it my little Angel , for you and your little Boys and Girls".4 points
-
Dear All, Thanks for the positive comments about the Sunderland Flying boat. They were very encouraging for a newbie like myself. Below are a few images of my last effort to build the Revell 1/72 scale Supermarine Stranraer which is a strange and ugly looking beast when you consider that it was designed by the same person who designed the beautiful Spitfire. It was not popular with the pilots who flew it hence a nasty nickname which was the "Whistling PoopHouse" except not using the word poop but the one which starts SH and ends in T. I got my wrists slapped for using the historically accurate word. I didn't realize Britmodeller was so "Prim". The Revell offering is a reboxing of the 40 year old Matchbox kit which I would never have touched with a bargepole had my wife not bought it for me from Marionville Models in Edinburgh as a present. However, on looking at its ungainly proportions I was hooked. Indeed, I spent more time, and had more fun with this kit than any I care to remember! The detail was non existent so I had to scribe 90% of the panel lines from a blueprint I got on line. I also used a rivet wheel (trumpeter) for the first time hence why some of the rivetting has gone squint. In addition, because of the amount of rigging I set about making attachment points out of some copper wire and gluing them into holes drilled at the base of each spar. This made rigging the beast with easyline much much easier. I did the same prop effect as on the Sunderland before and also installed some resin CMK Pegasus engins to replace the kit engines which were utterly lacking in detail. Weathering may be a bit heavy but I reckon the long range trips made in bad weather would not have kept these beauties pretty for long. Critically, I have included crew and I'm keeping my eyes out for any further alien incursions! Thanks to my wife, Rhona for buying the beast and my daughter Leacsaidh for the photos.4 points
-
Another one finished; this time back to aircraft. Seafire 46 (Airfix) 1832 NAS, RNVR, Culham 1948 This was agreat build and the last in the Culham "holy trinity". Decals are from Freightdog and are brill !! The end picture shows her with her 2 stable mates. A 15 and a 17. Hope you like. Please feel free to comment etc. Thanks for looking Dick4 points
-
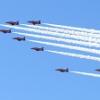
A few from today at RAF Waddington.4 points
-
This is my last completed build. The Tamiya kit with scratch details to correct some Tamiya ommisions, Miniart cobbles, ICM crew, and Trumpeter tracks. The tracks are back to front because I foolishly followed the instructions instead of my references. One day I will have to prise them off and fit them correctly! Its not heavily weathered and beaten up because I am old enough to remember when the only clear pics we got of Soviet military equipment was during the May Day Parade, when everything was BS'd to the max.4 points
-
Hello friends Back with another British aircraft, the Hurricane Mark I. This is the new Airfix kit, and what as surprise it was when i start working on it, a really good kit, recomended! I hope you like it, thank you for looking Best regards from Portugal Vitor Costa4 points
-
I pick up the Revell Bell H-13H 2n1 model 1/48 scale . To match the Huey Why I went with this model . The Revell H-13H. my only local hobby store had this one in stock . This model was a pain in the butt . Warped parts , lines that needed sanding out , injection marks every where and parts did not line up at all . But over all I stayed with it . It came out ok for my 2nd model . Thank you Rick More photos4 points
-
I was doing an RNZAF Mustang for an Aus/NZ GB, but couldn't decide which of the four squadrons to depict, so did all of them! The kits are all Airfix, 3 F-51s and a P-51 and the decals are by Ventura. NZ2413 is the odd one out from the P-51 box, as it was the only RNZAF Mustang to use the cuffed propellor, and the only one of the four in a painted HSS rather than factory painted/NMF finish (the models are a bit shinier/more distinctive than in the photos). These aircraft were operated by the RNZAF Territorials in the early 1950's and very well looked after, hence little to no weathering, with the checks being the provincial colours of each squadron. 1 Squadron (Auckland) 2 Squadron (Wellington) 3 Squadron (Canterbury) 4 Squadron (Otago) Thanks for looking4 points
-
Finally finished. Build thread here. http://www.britmodeller.com/forums/index.php?/topic/234956409-matchbox-westland-wessex-hu5-172/ The kit decals were crap, even with Microscale liquid decal film they cracked to pieces. So I cobbled together some spares & Modeldecal 99. It's not 100% accurate, but it does for me. Cheers J4 points
-
Personally, I think the Airfix Spitfires are very good given their price and ease of building. The; IX, I, I/II, XIX and 22 are the newer ones. I find they build up very quickly (from box to shelf in about 5 hours), they fall together very well as well. Admittedly, some of the panel lines are quite deep (I don't find this a problem as all you need is some wet and dry) there is also some missing detail in the wheel wells and cockpits. It's all well and good me giving my opinion, however, I think I'll post a couple pictures of my builds so you can make up your own mind First off, my Spitfire XXI conversion from the 22 and XIX Here's my Mk I (that I built in 4/5 hours) As well as a converted XI XIX I made a while ago An IX And another Hope this is useful - And I don't want to seem like I'm bragging and/or trying to steal this thread, Ben4 points
-
Mitch I can assist here. Spitfire Vb - old mould from roughly 1975. It is quite basic by todays standards, however from what I've read seems to be quite accurate in outline. Spitfire IX & XIX - new-ish tool from around 2008, however the panel lines are not as crisp as current Airfix moulds. Both are fairly similar with basic construction, no cockpit detail, open wheel wells but once again quite accurate. Spitfire 1a / 1/11 - released slightly after the above two kits and in line with more recent Airfix kits. The panel lines are sharp, but quite deep. I've seen many models built and once painted they look quite good. The Series 1 kit is your basic BoB era example, whilst the series 2 kit has options for early two bladed prop, early & late canopies and Mk.11 Coffman starter. There are also parts included to build a Mk.Va, but no mention is made about this. Cockpit detail is good with boxed in wheel wells. Spitfire 22 - the newest release Spit of the 1/72 collection. Panel lines slightly better than Mk1a, good cockpit detail and nice choice of decals. Believe wheels may be slightly off as there are Resin replacements available. Overall that's my take, however I'm sure that others will offer differing advice. They all build quite well and look the part. For the cheap cost, just go out and buy one and knock it up on a spare weekend. Hope this helps.. Dave4 points
-
THE NEPTUNE P2V-7/SP-2H IN SERVICE WITH THE ROYAL NETHERLANDS NAVY: NAS=Naval Air Station NAF=Naval Air facility RNLN=Royal Netherlands Navy MLD= Marine Luchtvaart Dienst (Naval Air Arm/ Royal Netherlands Navy) On the 21 off august 1961, it was decided by the Dutch Ministry of Defense that the Royal Netherlands Navy was to acquire 15 Lockheed Neptunes air frames type P2V-7B. These aircraft were to be numbered 200/214. The reason for this acquisition was a large conflict with Indonesia over the Dutch colony Papua New Guinea. To strengthen the presence of the Dutch armed Forces in the region, the choice fell on the Lockheed Neptune. These aircraft were to be armed in the nose section with four Hispano 20mm machine guns. Eventually eleven aircraft were flown from Lockheed Burbank to Naval Air station Biak in Netherlands New Guinea. The chosen route was: Burbank-NAS Alameda-NAS barbers Point-NAF Kwajalein to Biak, a flight from more than 6000 miles. They were to form Squadron 321. Four Neptunes (209-210-211-2120) were flown directly from the factory to the Netherlands for crew training and evaluation. Neptune registration number 200, crashed on the 11th of May 1962 at the airport of Mokmer, after fire in the starboard jet-engine. On landing, it lost all hydraulic pressure and ended in a ditch. It was written off. In august 1962, the conflict came to an end. In that same year the Neptunes flew back from NAS Biak via Tan-Son-Nhut-Katunayake-Karachi-Basra-Athens and finally to NAS Valkenburg. Only ten aircraft were to return. After the return to the Netherlands, the strength was fourteen aircraft. All were posted to the 320 squadron at NAS Valkenburg. Eventually, the machine guns in the nose were removed and replaced by the transparent nose section and after further anti submarine modifications renamed SP-2H. On the 23 of January 1965, Neptune (212) crashed in the North Sea. It was then decided to increase the squadron with four ex- French Navy Neptune aircraft. These were numbered 215/218. To note: Is that the 212 was “hijacked” by two aircraft mechanics. After take-off from the runway at Naval Air Station Valkenburg, the 212 crashed in the North Sea. Both mechanics lost their lives. The Navy lost a very precious airframe. After this incident, you were shot without any questions if you got near the parked Neptunes. Taking part in many military exercises and patrolling the oceans in the cold war period In 1982, the last operational Neptunes were phased out and replaced by the P-3 Lockheed Orion. For thirty years, this beautiful aircraft did sterling service for the RNLN.The specific sound of the Wright R-3350 18 cil, accompanied by the Westinghouse J34-WE jet engines were over. LONG RANGE MARITIME PATROL AIRCRAFT (LRMPA) THE COCKPIT ACCESS PANEL IN OPENED POSITION, FOR A BETTER VIEUW IN THE "OFFICE". NOTE ACCESS LADDER "THE OFFICE" THE EDUARD BOMB BAY. ALWAYS OPEN AFTER THE AIRCRAFT WAS SHUT DOWN. FRONTAL VIEUW OF THIS BEAUTIFUL AIRCRAFT. NETHERLANDS NAVY STENCILS AND THE ROUNDELS. (EXCELLENT DECALS IN THE REVELL BOX) IF ANY QUESTIONS ARISE, JUST SHOOT. FOR MORE PICTURES SEE " THE AIRLINERS NET " SEE ALSO THE GROUP BUILD OF THE NEPTUNES IN "WORK IN PROGRESS" REGARDS FROM THE NETHERLANDS, ORION.-4 points
-
sounds good to me. They can set fire to the rest for all I care.4 points
-
All done. I went with no ladder because it didn't really fit properly. Kit: 1/48 Airfix F1/F1A/F3 Boxing from a long time ago Decals: Aero(error)master and Barracuda Studios (Stencils) Aftermarket: Aires Cockpit - for the F2/F6. A waste of time because you can see anything Aires Exhausts - Drop fit, beautiful detail CMK Wheels and Undercarriage - another waste of time as my set had a lot of broken parts and a inaccuracies (like 2 left wheels) Two Mikes Blank - This proved more difficult to get a good finish upon then I expected. Still it looks good Eduard PE - Well worth the investment for this kit IMHO Hobby decal Pitot probe - again worth the investment Quickboost seat - Great detail , although I wonder about it's accuracy. Thankfully it fits in the Aires Tub because t doesn't fit in the stock kit Paints: Tamiya AS 12 decanted and sprayed through the airbrush. IIMHO the only solution for a BMF as it's so forgiving Various Alcald shades to tint the AS12 and pick out panels. Chrome was used for the nose ring. Tamiya Gloss Red, NATO Black and Mr Color Interior Green (nose cone) Tamiya Semi Gloss for the final coat. Onto the photos3 points
-
So at the minute I've been struck down with a bad back (recurring problem/nightmare) so have had some time off work (woo hoo) Since the only chair I have any degree of comfort in is the one next to the model area it was a good opportunity to go through the stash a bit. Rather than post individual threads I'll put them all in one. First up the Airfix Blenheim, last one in the shop and I couldn't resist, fit together like a dream with the only issue being around the join between the cockpit and the main body. Rather an interesting build the use of spars to build up the wheel bay rather than just crude mouldings on the wing was a good idea. However disaster struck joining the transparencies together and I got glue all down the glass. I taught the neighbours a few new swear words at that point. A gap in the cockpit/fuselage reminding me I need to buy some filler. Glue on the clear, not going to lie, I nearly cried. I can't wait for the fighter variant although I noticed most of the parts are already in the box. Next up, the Revell Sea Hurricane, I chose this scheme for one reason, it was based next door to where I'm going on holiday St Merryn. And finally the Revell 1:72 Heinkel, thought I'd do the smaller one before tackling the 1:32 hiding in the cupboard, disaster on this one as I can't find the transparency for the top so I'm calling this one as done as I can get it until I dig around behind the desk. Next up? Who knows, I have a 1:72 Lancaster 98% built but I got so sick of it the thought of going back to it isn't pleasant, I have a 1:72 Airfix Spitfire in the blue plastic and a ton of markings I can use, a Man in space collection and about 100 other kits. Or I wait until tomorrow and start the 1:32 Revell Spitfire my Dad got me for my Birthday. Thanks for looking.3 points
-
G'day Guys, This is the first time I've posted a model on this forum. I've just finished this as part of a group build over on LSP. It's a scratch built job using as a very loose base the old Revell Sea Venom. Turns out I really couldn't use much of the kit. It's been quite a learning curve, but I've really enjoyed it. Thanks for looking and please feel free to comment or ask any questions. Cheers, Craig3 points
-
This kit has a few firsts for me: First 1:48 Mustang (and only my 2nd 1:48 completed, if I complete it) First Accurate Miniatures build First civil aircraft It will be finished as the Insignia Red '46'. Cheers Deacon3 points
-
It's amazing what you can do with a magnifying loupe. Oh and don't drink for a week beforehand. Thanks. My eyes were blurry to start with So how do I organize myself with lots of bits, with a sprue filing system - The Atak zimmerit arrived from Poland, so I have started applying it - It really is fantastic stuff, highly recommended! It comes with two styles of resin mantle? which are very nice. I've been jumping around a bit on the build. Here is the main gun assembly. Some detail added to the top deck. But it not stuck down yet. The rear fan hatches can be opened. Underneath we have the fans and rads. now painted. The fuel tanks are actually hidden by this wooden board thingy. I'd like to know what that's about. I've done the engine compartment in primer red as alot of late tigers came out the factory like that. Not quite the last item of aftermarket that I will add to this tank, but these MG34 barrels will give me more detail. Next I'm going to finish applying the zimmerit to the hull and turret. Thanks for watching!3 points
-
It was recently mentioned in a thread on the new Airfix Spitfire VB that the SH and Tamiya early Merlin Spitfires both suffer from an inaccurate fuselage. This is my method to attempt a cure , I make no claims for 100% accuracy , but they are closer to prototype than before. The SH fuselage seems to be too short between the engine fire wall and the windscreen , but a simple cut would make the nose too long in relation to the wing leading edge , also the cockpit is too far forwards relative to the wing trailing edge. My solution can be seen in the photo , this method of cutting gives the correct overall length to the fuselage but maintains the correct relationship between the cockpit / wing trailing edge and wing leading edge / nose. The lower cockpit walls of the kit are added to strengthen the join and 80thou evergreen strip gives the extension. The eagle-eyed among you will probably notice that this is in fact a Seafire III fuselage , the same fix should work for all SH Spitfire/Seafires and the Tamiya Spitfire MkI. Andrew3 points
-
Have you thought about him getting a summer job at the local beauty parlour removing unwanted skin ?? All he would have to keep saying is......... exfoliate, exfoliate.........3 points
-
i agree with you mate,make a statement like that and you have to make sure it is what you are saying is true...problem is if the information they had in the design stage is regarded as being correct and the whole process of creating the moulds is based upon the original dimensions and anybody who querries it is told it is correct,then as far as the company is concerned it IS what they say it is.......bet you a pound to a penny it doesnt happen again though,every new realease will be checked and tripple checked...which can only be good for us!:-)3 points
-
Quick update from here; finally finished the decals and varnishing done. All that is left is to wash and weather the beast and we are done3 points
-
Thanks Guys. My Wife and I have decided that we will pay the money to Charity and I will keep it. It will be a permanent memory to Daisy and to the Charity.3 points
-
Um, Nigel, it's not my business of course but I think you might be over-selling the amazement-induction-capacity of British sparklers It could lead to disappointment, first for the local Texan girls and subsequently for you. Back OT, looking forward to seeing the Helicopter and truck on the helipad Cheers, Stew3 points
-
Cheers The nose wheel doors are done... Lots of cunning was used Some scrap card, a miniature peg and two pairs of tweezers (not pictured) were used. The card "block" stops the doors collapsing while the peg is clipped on. One pair of tweezers held the rear of each door steady while I used the other to "pull" the card out to make the bulge. (A dab of marker pen used to mark the spot) Once I was happy, I trimmed the doors to the correct length3 points
-
Nearly done, I just need to give it a matt finish and a wash and it should be there. In the meantime I have been sanding and filling wings/fuselage etc.3 points
-
No problem. Repeat after me: Nnnnneeeeeeeeeeee-ooooowwwwwwwwwwwwwwwwwwwwwwwhhhhhhhhhhh! Tac-a-tac-a-tac-a-tac!3 points
-
Here are some quick pics of the men firmly glued in place with some Araldite 5 min quick set. Most hands are somewhere near the wire some a little too high. To be honest the men ,bothe Revell and Italeri are a little on the tall side and i could have done with bending their legs but that was a bridge too far . I have not shown a pic of the pilots as they were C**P as Airfix had put no effeort into them infact they were more vestigial than some from the old boxing of the HP Halifaxof the 60's. They have been painted and secured and luckily only their heads will show . I like the way they have both hands on their laps even while entering the most crushial part of the mission .May be they are texting their girlfriends3 points
-
This is repost of this An-12BK-PPS model with better pictures outdoors after many year. I literally dusted off the model from my top shelf to take these pictures. OOB build with soviet markings. Hope you all like it.. Vivek2 points
-
I've been itching to build these since I bought them 18 months ago The box contains two beautifully moulded kits, offering several build options and decals for six aircraft. For a tiny kit it packs a lot of detail... Like the perfectly formed main gear doors! And choice of normal or Malcolm hood. The two aircraft I'm doing are... Rosey T. And Chuck Yeager's Glamourus Glen. I used one of the Sweet decal options for a Revell Micro Wings Mustang I built last year so I could use the Revell decals for this build.2 points
-
The lovely Accurate Minatures kit, and i am building it as the cover version 'Dirty Dora', a very weather beaten and worn Mitchell I have a couple of extras for it - Quickboost engines And Truedetails wheels Work starts with the Cockpit ( just for a change ), Sprayed dark green , with the back of the bulkhead interior green, and the bomb aimer's access tunnel aluminium Then painted and weathered down the instrument panel. Painted the instruments from the back, then the front black, leaving the instruments, then some of MIG's Clear in the dials. Used the provided decals for the belts, mainly as once it's closed up it will be almost impossible to see. Picked out some of the switches and throttle levers with artist's gouache paints. Next the bomb bay and navigator's position - assembled and glued in position, using the fuselage side to help align everything. Painted with Interior Green and then picked out the details, and an oil wash Finally for today, sprayed the inside of the bomb bay Alclad aluminium Peter2 points
-
My 1/72 scale 109 collection continues with the photo-recon G-8 coming next. This will involve some small modifications to the Fine Molds G-6 kit. I find this variant interesting since it appears to be a collection of parts from various other versions. It looks much like a typical 109 G-6, but with large wing bumps associated with the larger main wheels. However the only two photos that have surfaced indicate that it used the smaller 660 x 160 wheels. It lacks the lower gear covers and has a camera port under the rear fuselage. The color scheme is also interesting, with an extensive area of yellow on the nose and very light version of RLM 75 on the upper surfaces. The project begins with disassembly, cutting out the flaps and slats. I am using an older BarracudaCast interior. I added my own casting for the right sidewall and a Quickboost 30mm cannon breech cover. The parts were painted with (the much missed) PollyScale RLM 66, drybrushed and washed with oil paints. I also dirtied up the floor with Mig pigments. I've made the rear cockpit hatch from .005" card. It seems that all 109 G-8s and G-6 R2s had the battery moved forward to accommodate the camera. This necessitated a housing since it protruded further into the cockpit area. This piece came from a Fine Molds G-10 kit. The wheel well inserts come from a photo etched sheet from Eduard (73272). I annealed them over a candle flame and gently bent them using the body of a Bic lighter (perfect shape for this) in the palm of my hand. I tacked them in place using Micro LiquiTape, followed by superglue gel. The wingtip lights have been made from clear sprue. First it was cut to an angle matching the cutout in the wing.Then a small, shallow hole was drilled on the inside. This was painted the corresponding green and red. After wiping off the excess, I painted both the rear of the light and wing cutout with black acrylic paint. This is necessary to give depth to the light. Painting both mating surfaces insures that any mishaps when superglueing the lights will be minimized. After attaching, the sprue was shaped with a file, then refined with sanding sticks and finally a nail buffer. Finally, I applied a coat of Future to the wingtip. Also the wing slat covers have been glued to the wing leading edge. All that remains in these photos is to trim the lowed area and refine the edge with a sanding stick. Work progressed with the recon camera housing. Somewhere back in the caverns I have a resin part for this item. But with the caverns being what they are, I gave up after searching for an hour. I then realized that an accessory sprue included in a number of A-Model 109s contains this part. After checking with drawings it became evident that the part is significantly oversized. The camera port is actually a sheet metal base with a slightly smaller aerodynamic fairing on top. A-Model makes no distinction here. There is also a curved (water/oil?) deflecting strip around the camera port. This is all molded in a rather crude fashion. I decided to try to clean up the part as molded, but the further I went, the more obvious that a complete makeover would be necessary. Here's how I approached it: First, I cut a .005: plastic sheet base. I curved it as much as possible using a paintbrush handle and the palm of my hand. Then I taped it to the fuselage and glued it to the fuselage in small sections. There is not much left of the original part after sanding it to the correct dimensions. I enlarged the camera port to match a disk that could be made with a Waldron Punch & Die set. This will be used to make a lens from clear plastic after painting in complete. After trying a number of options for the deflecting channel, I decided to use .015" solder. It is easily bent and after shaping the curve, it could be flattened using a steel ruler. Actually, the original was made from "U" shaped strip, but my attempts to cut a groove in the solder were less than successful. Painting began with the first coat of RLM 76. I used Gunze Sangyo lacquers for the base coat due to their durability. Here is another shot of the camera port under a coat of paint. Here the painting is essentially complete,. This particular plane had a very light version of RLM 75, or perhaps RLM 77 as some sources claim. I like the contrast, which is one of the reasons I picked this plane to model. Gunze Sangyo acrylics, as usual. The masking was removed from the nose and the model has been gloss coated. I used Gunze Sangyo GX-100 with very satisfactory results. After thinning approximately 3 to 1 with Gunze leveling thinner, it sprayed very well and dried hard quickly. Decals have been applied. The number "8" was taken from Kits-World decal sheet KW172029, Luftwaffe Fighter Numbers. They performed beautifully, being thin and drawing down into panel lines very well. The radio access panel is a replacement, showing different camo pattern and a mismatched fuselage national marking. I made this by cutting a sheet of solid white decal to the exact shape. The corners were rounded with a sanding stick (obviously while still on the paper). This technique has many uses, including making the oval repair panel in the left wing root. I masked the area of the white cross segment and sprayed the camouflage. The red cross was larger than seen on most German aircraft, but I found one in the spares box. Next will come oil paint washes and general weathering. Comments welcome. Barry Numerick2 points
-
I'm not sure this qualifies as armour but this seems like the best place for this. This is the towed fuel pump to go with my GMC fuel tanker (RFI here) and Flying Banana (RFI here). Eventually I will make a diorama out of them all. Somehow I have to get the wires for the lights in my helicopter to the battery that will be under the base. This little pump will provide the means to do that, I hope. The details have still to be worked out. This is what I have: Obviously its a resin kit and the mouldings look pretty nice. The worst feature of this kit are the instructions which are terrible: The kit includes a little tanker which I won't be using so putting that to one side here are the fuel pump parts: The first job was to separate the parts from the flash and sort them out into parts I could identify on the instructions and those that were a holy mystery: I know those little things with two legs are for the fuel hose but I don't think I will be using them. I have no idea what the planks are for and there are three or four other parts I can't work out. I think it will be busy enough anyway. Starting with the easy stuff, this rod is meant to be the axle but is an obvious candidate for replacement with some brass rod: It measures at 1mm in diameter but I might use something smaller like 0.8mm. Anyway, there we are - now to start cleaning up the parts properly and get gluing. Bye for now, Nigel2 points
-
Note to self; keep trap shut in future! Martin2 points
-
Our good luck continues....We had a car crash today and ended up backwards in a field. The car skidded on a corner and spun. It was a mixture of wet , diesel on road and adverse camber. Police told us it was a blackspot. Car was amazingly OK. Front buper trim ripped off , Punctured the fuel tank and bent the rear hub stub axle i think (something i didnt notice until i was driving it home!). The AA fixed the fuel tank so we could get home. Luckily we are both ok , most importantly my wife is OK. Gotta laugh aint you.2 points
-
You are like some deranged MacGyver, sculpting airplanes from knitting needles and 1/700 submarines! I love this, will follow with great interest. Fingers crossed!2 points
-
Brief afternoon update. Painted the pilot - seemed to take ages, isn't my best paintwork ever and he was a pain to fit! Ended up cutting stuff off him and parts of the IP so he'd sit low enough not to foul the canopy. Won't bother with one of these in future! Then I glued the fuselage halves together. Just waiting for it to set at the moment. It'll need a bit of filler here and there. Kind regards, Stix2 points
-
No they didn't - also most of the Daks used by the British on the Normandy jump were in fact American, or at least wore American markings...... I was lucky enough to jump into Normandy during the 50th anniversary in 1994!! When you see the Band of Brothers episode when they jump in it brings it all home as to how hideous it was - people often focus on the beach assault but the Airborne operation on D Day happened 12 hours earlier....great stuff!2 points
-
I de-moulded the final drive housings. Although they're not perfect, they're good enough. When the resin is hard enough, I'll clean them up and attach them.2 points
-
Lots of progress made today. I'm hoping for the decals later tonight. Also legs and wheels possibly...if not tomorrow.2 points
-
G-usa, when I come and visit you I will bring along some English sparklers, they are most impressive. Please have some local girls on hand to be amazed.2 points
-
Rick, It is a beautiful model and I am in agreement with Nigel it is even more impressive that it is your second kit built. It looks great.2 points
-
--## UPDATE SIX ##-- Hey guys! been busy! all in around 15-ish hours total (minus gluing time) i have been adding body panels to the main body of the plane. once the panels have dried and are together, i have been filing the gaps between them to give everything a smooth surface. the majority of the body is now covered and ready for a coat of primer. i wont spray any of the model until the entire model is complete so i don't have colour matching issues. i am missing one sheet of aluminium and stencils from one of the issues, so i cannot cover the last part of the wing connected to the body. im trying my hardest to find one but this is proving to be a pain, so instead i am looking for any of the three issues with the sheet aluminium included, and keeping all of the cut stencils safe. where the first pieces of aluminium went onto the wing, the instructions said to drop it in place as far down as it would go, so the joining piece above will fit correctly... i did this and this has happened :/ not to worry as i am slowing filling it small part at a time to ensure a smooth finish. please note that the black paint is only there as its all i had on hand. (i was checking the model filler to see how it looks painted) also the exhaust pipes on the engines don't stick out of the engine body's as they should, so i might have to go back and open them up, remove the exhausts from the engines and connect them to scrap plasticard or something similar to make them promptitude from the engines properly. This is the main thing that's bothering me about this model. other than that, i am overall happy with the model and hope to finally get it complete within at least 4 months!! my original estimate was December 2013-May 2014... that was miles out O.O the remaining details that are to be added to the cockpit are all complete and awaiting installation. not 100% sure why, but i love the way the rear looks now its nearing completion! for some reason the left wing doesn't go in all the way, im still not sure why, i have tried shaving off some of the wood that slots into the body, with no luck, next im going to attempt to sand it slightly so its thinner, im thinking it may get thicker closer to the wing. so that's the update so far! sorry for not posting updates, i just forget to take photos in between stages. all questions and criticism are accepted as always! thanks for reading! -Lord2 points
-
That would be quite a spectacle, three burning F35's flying low over Rosyth! I know they are named after the P38 Lightning but I find it quite fitting that they are keeping the (EE) Lightning engine fire tradition alive too! Duncan B2 points
-
Bring back the harriers.2 points
-
The fuselage has been glued, filled, sanded & rescribed. I've also glued the wings together after popping in a bit of 10 thou as a shim at each wingtip.2 points
-
Still fighting the FOD cover, ignore the colour, it's also a lot darker than the pic, I just picked out a thick enamel as a primer, it also looks way way glossier on this photo, not sure why. But I still have some sanding to do. Still got my fingers crossed. I seem to have spent a lot longer than anticipated just on this cover for some reason, ahh well, no rush!! Good thing is the shape is OK, the fit is spot on, so I'm happy with that. Not done the final trimming yet though2 points
-
very nice... you can never do too many spitfires. im working through this lot...2 points


.thumb.JPG.3498f40362ff13ebfc4b2e45abbd545e.JPG)


This leaderboard is set to London/GMT+01:00