Leaderboard
Popular Content
Showing content with the highest reputation on 14/01/14 in all areas
-
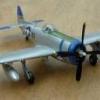
Hello all Here is my Meng´s Fiat G-91R4 of 702nd squadron ready for another mission against FRELIMO´s guerrilas positions in northen Mozambique in 1973 Only extras i used was Aeroclubs white metal MB4 ejection seat and metal gun barrels from Master(The ones for the P-47). Painted with Humbrol 196 and blue filter from MIG. Weathering with promodeller wash and oil paints.Bombs came from a Revell´s P-47D kit Had a lot of fun building this kit and looking forward to build another i or 2 more, of the Portuguese Air Force of course. Enjoy the photos. Stay tuned for another Gina soon... Regards and happy modelling FBorges7 points
-
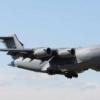
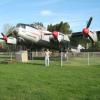
Hi, folks! Let me present you my latest model. It's the "Zwilling" - another creation of a gloomy German genius. Served exclusively for towing heavy glider Me-321 or two Gotha Go-242. Photos from the site here: http://scalemania.ru/forum/viewtopic.php?f=11&t=588&p=9600#p9600.7 points
-
This is the Italeri Tornado F.3 1/48 kit, No major build issues although it did fight me in a few areas, its straight out of the box except i've added wiring in and around the cockpit, around the undercarriage for brake hoses and tamiya tape for the wing seals behind the wings, as there is a huge gap there otherwise. Not the most overly detailed although so i keep hearing is more accurate in shape than the Hobby Boss ADV in 1/48 and the Italeri kit is a fraction of the price. went with the The Firebirds Display scheme from the year 2000, i actually have photos of the real thing and saw it many times at airshows from years ago, very striking paint work. The decals are from Model Alliance, very thin have to be careful with these ones minimal decal softener is needed. Home-made engine covers, they are normally Green but the photos i have of the aircraft they have Red covers as did most of 56 Squadron to go with the Sqaudron emblem i guess ...and i know display aircraft shouldnt really carry weapons but im a huge fan of the Tornado and theres something menacing about a fully loaded aircraft so i went with it, and also in one of my books its says that the aircraft had to be stripped of the scheme as it was needed for operational duty. In conclusion standard kit, went together well and another one to add to my RAF collection Thanks for looking, Stuart5 points
-
Hi everyone, I found a few photos taken last year after completing the lovely Airfix GR9, in the Cottesmore special scheme. There's nothing to really report about this kit other than you can pour glue in the box, shake and get a lovely Harrier. Much has been said about the depth of panel lines on Airfix's 1/72 kits. To be honest my opinion is that we already accept so many compromises on such a small scale that the depth of panels lines is less important than accurate outlines. On this kit in particular the undercarriage legs and wheels etc. are very fine and in scale and it looks and 'sits' like a Harrier should. The engineering and design on this model are first class and make for an easy build. I do get a bit stalled when folk complain that (for example) 'those panel lines are a bit deep on the new Airfix spitfire' forgetting that the kit costs less than a fiver! Airfix have an unusual position, unlike most they are making kits aimed at a broad range of modellers and skills, to design highly detailed yet easy to construct kits that end up at pocket money prices is something to be marvelled at. Don't forget Hasegawa are regularly re-releasing 30 year old toolings and asking us to pay £30-£40 for a 1/72 kit. Any way rant over, hope these photos meet approval!4 points
-
Doing some cleaning up this morning and pulled maintenance on my collection of 1/72 BAe Hawks. These have been built over a period of 10 years or so. In construction order, first the old Airfix Red Arrows Hawk, finished with brush painted Humbrol enamels (at the same time as the previously posted Red Arrows Gnat). Then the Italeri Mk 100 finished as the demonstrator, also brush painted with Humbrol enamels and with the kits supplied roundels replaced with spares. The Tamiya T1 - I think this is actually the Italeri plastic. The kit decals were the weirdest colours I have ever seen for low-viz RAF markings so I invested in Xtradecal sheet X031-72, which has kept me going ever since. This one is completed as 1992 display aircraft for 7FTS/63 Squadron RAF. Brush painted Tamiya acrylics. Fujimi kit completed as a T1A of 2TWU/151 Squadron RAF, July 1992. Brush painted Tamiya acrylics. The Italeri T-45 Goshawk completed straight out of the box. Tamiya rattle can for the white, brush painted Humbrol enamel for the red. The Italeri Mk 100 finished as a T2. This was my first go at converting a kit with a bit of scratch building (around the tail end). I was intending to put together some "fake" markings together from my decal spares collection, but just in time Airfix released their new Hawk T2/120 kit, so I used one set of markings from that. At some point I will work up courage to complete the donor kit as the Mk120 demonstrator. Brush painted Tamiya acrylics. And finally the new tool Airfix T1 finished making use of the decals from the Fujimi kit as a camouflaged machine from 63 Squadron. SNEB rocket pods are from the old tool Airfix Hawk. Brush painted Tamiya acrylics. Thats it for now, but I have another T1 under construction (stalled), the Mk120 and two more T1's in the stash - so watch this space Thanks for looking.3 points
-
BAe Hawk T.Mk.1 XX307 RAF Benevolent Fund, 208 Squadron ( R ) RAF Valley 2009 Build thread HERE3 points
-
Hi everyone Five years in the making just came to an end. I wanted to thank everyone for the great comments and the enormous support on this build. I was going to post many photos of the finished build but photobucket is full so I cant, its only allowing me one photo. Hows about that for bad timing!! More very soon Oliver3 points
-
Hey again, i didnt work on my hurri much lately, still waiting for decals so i was working on my other projects. Today i just mounted the hurri on its own legs (undercariage and wheel bay are quite OOB, added only few wires and used upgraded wheels from SMER´s hurricane). also i did paint whole kit with semi-gloss coat(wanted to try it, i think after the final decals ll be applied i might use matt coat anyway). expected a bit diferent result, its still quite glossy (from my view at least) i hope i ll get the decals before weekend and finish this baby finaly3 points
-
Hello, here is my recently completed Airfix Mustang IV made from the starter kit. It it took 2 weeks which is incredibly quick for me, it's a great kit with nice detail including a good cockpit with sidewall detail, flap and radiator options. I decided to have a go with Tamiya paints on this one, after painting the cockpit and interior parts such as wheel wells with citadel or Vallejo paints. I gave it the usual coat of klear before weathering with oils, then a coat of Tamiya clear with flat base mixed in. I decided to fill in the wing panels after doing a bit of research and finding out where was filled. I added some belts to the seat from tape, and replaced the aerial kit part which was mismoulded and brittle with plasticard. Here are some pics, hope you like it!3 points
-
3 points
-
A new box art, see Italeri's Facebook. Source: https://www.facebook.com/ItaleriModelKit#!/photo.php?fbid=605594319513192&set=a.455662807839678.102187.454765391262753&type=1&theater V.P.3 points
-
Evening all, a few months ago I started a thread looking at whether it was possible to convert HP's HMS Saber into an Aussie River class destroyer. Thanks to some advice from a couple of gents here I decided to scratch build. Started work Sunday night and with it being Teusday night now and back to work tommorrow here's what I got done. I'm using plans of HMS Ferret, a British I class destroyer which the Rivers were based on with some mods. I'm just comparing Ferrets plans and a side and top view of HMAS Parramatta and improvising the differrences. Above is the plans and templates glued to sheet styrene for the hull sections Templates all cut out and glued together for the hull while below is test fitting the deck below is the decks in place and ready for the first layer of outer skin. First layer down and sanded plus start of bridge structure And a couple as she is now. Its not perfect but I'm pretty happy with it so far. Thanks for looking and more to come soon Cheers Callum2 points
-
an older Draken model I upgraded with a pitot tube from Master, and new pics during the photo session of the little Saab 105 trainer in Austrian Air Force service till 2005. originally build for the Swedish Air Force as J-35 D model, they were upgraded among others with a F/J canopy to J-35Oe standard before being delivered in 1988. Additionally to their 2? 30mm ADEN cannons, they could be armed with 2 Aim-9P sidewinders purchased after the Yugoslav separation wars in the early 1990ies. Austrian Draken were upgraded with RWR and countermeasures from retired Danish examples. Visible in the enlarged fin top and the fairings on the engine nozzle area. Their designation changed to J-35Oe Mk II they were retired in 2005, being operated from 1988 without any serious accident.2 points
-
AZModel 1/72 Spitfire 322 Squadron H-51 Dutch Airforce as used in the Dutch Indies. Decals are Dutch Decal2 points
-
2 points
-
Hi all, Having just completed the Airfix 1/72nd scale new tool A8 and the Tamiya 1/72nd scale D9, I thought it was about time a gave my other 190's their chance in the display cabinets. I took the opportunity to take some photo's with them all together as they have not been out their respective boxes in the loft for quite a while. These are not all that recent but built from the Tamiya kits in 1/48th scale, just thought I would share them with you. Quite a nice exercise really as looking back at these I can certainly see where I have improved over the course of the last 5 years or so. They were all built from the box. Forgive the A8 (broke antenna wire) and D9(pitot missing) seems I have some repair work from the last show they attended. As always comments and feedback welcome. Thanks for looking Regards Rick G Tamiya Fw190 A8 Tamiya Fw190 D9 Tamiya Fw190 A32 points
-
I admire anyone who can do all that without taking the canopy masks off, I'd of given in long ago!!!!! Gorgeous2 points
-
Found an entry, revell 1:48 bf 109 g-10, picked it up on sale for 12$ canadian at the LHS2 points
-
The trouble is some people just have to have absolutes: greatest of all time, most important, "best". It was a wide ranging war fought with contributions from many nations and many different arms engaged in many DIFFERENT types of operation. Impossible to objectively single out one weapon system as being decisive, they all link together. After all, what use would any of the planes have been if the convoys hadn't brought the men and materials? The B17 was important, great even, but so was the Lancaster, so was the Liberator, so was the Mosquito and so was the Halifax (continue list until discouraged), all in their different ways. As far as bombing went, the 8th & 9th Air Forces made magnificent contributions and made terrible sacrifices, same for Bomber Command. I humbly take my hat off to all of them.2 points
-
That's 'cos it's taken him this long to crawl up the stairs from the kugelbahn...2 points
-
2 points
-
Ta Chaps. I probably can't remember what half the clickable bells n whistles do now.......I had enough trouble with the pre-start checks after a fortnight's leave - so no chance after 24 years. I can remember the feeling of sitting in the cockpit and thinking - right; what's next? Uumh? Never actually forgot - but needed the odd mental nudge to get going now and then. Ahh. It's a bit of a cheat really Mark. They're not really proper round. Here's the kit - not awfully sophisticated. After scribing the line with my the electric sewing machine needle (which has been brilliant for the job), I enlarged it to a trench with a Tamiya scriber so that I could get a half round knife blade in it vertically and side on - see what I mean? I scraped this blade along the full extent of hinge line so that it pared down the 'round' edge of the aileron at an angle whilst leaving the wing edge vertical. I then scraped a fine straight blade along the hingle line at a more acute angle to give the 'round' edge a couple of flat planes to mimic a properly round edge. It was obviously important to keep the blade at a constant angle during each scrape and to scrape along the full extent of the hinge line each time: I could probably have carried on scraping at different angles to make it more nearly round. But actually after just a couple of angles the impression was good enough. Simples. The Airfix plastic is a tad soft and so accepts this sort of treatment really well. Steve2 points
-
I have crayons too, they don't normally let me have sharp things! Selwyn (Signing in on the plumbers mafia network. late again! I can't understand it. "I have not been in the Mally Chief,.........Honest....!")2 points
-
Thanks for your comments! Nearly finished with the decals.Only a few left. Thanks for watching!2 points
-
I was a little worried that the budgies was a reference to swimwear, but thankfully I was mistaken. The Texan is looking great, the mask is a good idea my ham fisted attempt on the Proctor canopy showed its money and time well spent, if you can find the right one. Cheers Pat2 points
-
Unfortunately very true, but extremely dumb and shortsighted policy, RC and Plastic Kits are not in mutual competition, on the contrary . RoG is my favourite brand, I started my hobby business with them, from 2000-2008 they truely had best selection of kits for fair price. What amazes me that Company that still has best retail network in the world is of lately not able to have any continuity/consistency especially quality-accuracy wise . Dumping of Korean toolings for ones of lesser quality, Outsourcing CAD to cheap but dubious non quality enterprises, Paying huge sums for Star Wars/Trek Rights, than producing very poor Chinese toolings at the same time when eg.Hasbro,and others produce very good diecast replicas of the same subjects for app.same price. Big omissions accuracy wise Halifax-He 219-, kits that should have generated big sums-are not. I am just waiting for someone to tell me me that 90 percent of buyers do not care etc.., yes that was true before Internet Age, but today when even kids have smartphones with wi-fi that is not true. Other fact is that big perecentage of revenue comes from "hamsters" like many of us that buy large numbers of same boxing. and accuracy is not something taken lightly by our bunch. My fear is that Revell is slowely going Italeri way...although new Tornado/Gripen tools are proof of things still being done rightly.2 points
-
and they seem to have given up on both the star wars and star trek licences2 points
-
Sigh ........ as I and several others predicted when Revell USA purchased Revell Germany a couple of years back , it would be "the end of the golden weather " as far as new tooling would go ......... expect pretty much the Bland sort of announcements Revell USA has given us for the last 20 years to be pretty standard from here on in.... it will be the second year in a row , where I wont be buying any new kits off them..... end of an era really2 points
-
Just finished my Vindicator, so I am better than for the FAA GB. Happily today is a 25 hours Sunday. Patrick2 points
-
As my first entry here on Britmodeller, I would like to share some of my already finished models. Only an overfly of the last 5 years! Hope I did not overwhelming you with too much pictures. Pls feel free and delete some pictures, if necessary! PKZ-2 Eduard 1/48 Mainly scratchbuilt as the original model is sadly out of scale! Albatros D.III Eduard 1/48 One of the best biplane models I`d in my hands in the last years! Fantastic engineering, a pleasure to built! Heinkel He 51 B-2 Eduard 1/48 One of my oldest build models, but seldom seen Junkers Ju-87 B-2 Revell/Hasegawa 1/48 Inspired by original photos! The little Panzer I is a WSW resin kit! Avia S-199 Hobbycraft 1/48 Built three of them simultaneously! All three with the Aires detail set! A stupid agenda, will never do so! Supermarine Spitfire Mk XIV E Academy 1/48 A typical postwar Spit in BAAF colours. Equipment was obviously british! Cessna Birddog Model USA 1/48 A tricky kit but a must have for all friends of Reconnaisance aircrafts... EE Lightning T. Mk. 4, Airfix 1/48 One of my favourite themes, british trainer in postwar servce! Always a colourful pintsheme and fantastic aircrafts! Conversion with CMK detail set DeHavilland Vampire T.11, Hobbycraft 1/48 Inspired by pictures of an restoration in Duxford, I build this fictive restored wooden vamp! So mates, that`s for now. I will spend next weekend in Munich/ Oberschleißheim as an exhibitor of one of the finest model exhibitions in south Germany. After the returning I will post my Airacobra thread, if I do not have gambled my ticket here... Greetz Dirk1 point
-
Here's ZE167 in the display scheme and if you zoom in (click on the pic use the link below), I think you can just make out the name Jim Brown under the navigator. No weapons or tanks. http://farm4.staticflickr.com/3738/8972055017_d75c58fe08_o.jpg1 point
-
1 point
-
Well I hope it's soon, I have 2 Airfix ones in the stash with plans to convert them into a Mk IV and V. A decent Mk III would be nice from Italeri as I intend to make one to represent BK710 which was shot down over Holland. We've used a number of parts from this aircraft in our cockpit build and it would be a nice memorial to the crew who unfortunately all perished. John1 point
-
1 point
-
Veteran models do a lovely little Phalanx - I have 3 earmarked for my Ark. Lucky Model sold them to me, I think. Beautiful casting. White Ensign Models (WEM) do a very good phot-etch set called something like "modern RN", which has plenty of doors & hatches, and I think railings (I'm not at home to check my set). The railings might be a separate set. Radars? Well there's a great 1022 in the WEM Illustrious set, but that's a hell of a lot of money (and brass!) for a single radar if you're not doing the CVS. I you find anything to do with Sea Dart in that scale, let me know - I need one too!1 point
-
yes, nice museum, was there in 2012. Lots of people do Chino, but forget about Yanks which is a shame, because as you found out, its well worth a visit1 point
-
Finally some spare time to model a bit Abandoned my plan for doing masters of each part, since I thought it will be better fitting for one model of the time1 point
-
1 point
-
Well, in that case it won't matter how accurate the kit is! Oh, you mean before...1 point
-
1 point
-
Made a start over Christmas and New year with cutting out most of the vacume formed parts . This has taken a lot longer than i could have immagend. I first whent around all the sheets marking the parts with a Sharpie fine point marker so when sanding down i would be able to see where to remove the excess plastic . to get my teeth into assembling some vac parts i decided to make a start on the fritz X bomb, This is a small kit in itself as it takes around 28 parts to make , some of these are very small so sanding and cutting has to be done with much care . It took around 16 hours to get the Fritz near to completion . I still need to add some small guidance fins to it, I'm very pleased with how it has come out . This is a big bomb in 1/48th and will look good slung beneth the 217 . To make the final commitment to the conversion i cut the front off the fuselage sections Now there is no going back.1 point
-
Well progress slowed down once I had to go back to the day job after Christmas, so this is where it is now. It was primed with Halfords white plastic primer and then given a top coat of Appliance White. This was masked off for painting the wings. The engines were built up and painted in the meantime, along with the tailplanes. Next was another dose of masking to define the Corroguard areas of the wing box. And the 'big reveal' Its a short assembly job now to get the undercarriage and engines on, then the best bit can start - the decalling. Thanks for looking John1 point
-
The fairing is riveted on to the upper surface of the wing and does have a raised edge. It partially forms the roof of the gear well, the rest being formed by the structure of the well. It is identical on the FAW-21 and FAW53 as they are the same airframe (with different avionics fit) I don't have experience with the FAW-22 but going by the schedule of spare parts the wing should be the same. I believe the only difference may be in the carry through tubes that the wings bolt on to. The FAW-20 may have been different as its wing went through several major modifications (I shant bother to list them but I have the master mod index is any specific info is required) Regarding kits the CMR kit is the pick of the litter (not just because I get several mentions in the instructions) I supplied a lot of info for that kit and Petr Buchars attention to detail is second to none. The only very minor issue I found is the option of WZ-895 of 724 squadron RAN is noted as 1959, it should be 1982 as it is represented as it appeared in it RAN Historic Flight days. Petr kindly included 895 for me as I restored her. The Classic airframes kit has serious inaccuracies in the cockpit and more than a few pooches in the airframe. It can be made into a good kit with a lot of work. The Aeroclub vacs are superb as usual and include the correct detail changes to make a FAW-53. Matchboxes kit is old basic and still a bloody good kit, only issue, other than the lack of detail is the curvature of the gun bay doors. Dehavilland had to enlarge the engine bay to get the Ghost engine in, to do so they tapered the front lower engine cowl to match the larger diameter of the engine diffuser casing. Unfortunately Matchbox chose to put the taper on the aft edge of the gun bay doors. The Frog kit is still usable and dresses up well using some of the aftermarket meant for the Cyberhobby kit. The Cyberhobby kit is the work of Satan and should be avoided. This is me giving WZ-895 the welly way back in 1982 And a lot greyer version with my latest charge WZ-907 For the record Dannielle (Venomvixen) is my daughter, she's worked on most of my projects along side me.1 point
-
1 point
-
Hi again, Another previous build.. As always with Wingnuts, a lovely kit Thanks for looking Guy1 point
-
Finished in time for the IPMS Greece show! Cockpit and seats detailed a bit.Rudder repositioned,and antennas scratched. She took a gold award and a medal from modelclub.gr forum,for the best aircraft of the Latin American Group Build. A really big "Thank you" to Paulo for his help! Progress here1 point
-
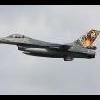
Hello, here is my new build, the Tamiya F-16C. Thanks for looking.1 point
-
1/48 Hasegawa USN A-4C converted to Argentine A-4C. And this is the aircraft depicted: http://www.airliners.net/photo/Argentina---Air/Douglas-A-4C-Skyhawk/1930498/L/1 point
-
Hi Stu, the belts are just painted masking tape, I lay some on sheet glass, paint and slice with a fresh blade. A good tip for masking tape is the TEVA brand, the yellow tape is similar to Tamiya, same gentle adhesion and a waxed top surface, good thing is a huge 50mm roll is around £5 from Amazon, Teva is a little thinner too, but very strong. I always thin paint to around the consistency of milk and spray a couple of thin layers, I keep a small hairdrier (no use to me anymore) next to the bench so I can start the Acrylic drying quickly. It stops dust gathering on the wet paint.I'm a big fan of the Airfix Mk1 Spitfire, a delightful kit.1 point
This leaderboard is set to London/GMT+01:00


