
Leaderboard
.thumb.jpg.d17ff607fc7e89ed057e63fcb6f2a888.jpg)


Popular Content
Showing content with the highest reputation on 18/08/13 in all areas
-
Hi Everyone, at last I`m calling it finished My attempt at Special Hobbys 1/48 Firefly, from the home fleet boxing but done as an aircraft of 1772 Sqn, British Pacific Fleet, Schofields, Australia Used a combination of the kit decals and some from the stash 98% OOB with just some antenna, seat belts and rear view mirror added I`m afraid I don`t know too much about the hybrid markings but I presume they were in the process of being changed to the theatre markings Nearly went in the bin at one point due to a Matt varnishing disaster which dried frosty white but managed to pull it back Hope you enjoy looking at, Cheers Russ3 points
-
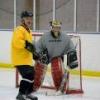
I'm a big fan of the Storch. Good work so far. I have to say, your friend on the left, could be of interest to Operation Yewtree!2 points
-
Been a busy week so I haven't had time for updates lately. The undercarriage is about 99% complete, so the wings can be closed up soon. Likely later today. After that, seams will be cleaned up and I can join the wing to the fuselage and starting the camo paintwork won't be far off! I used Tamiya XF-22 for the undercarriage, and it's lighter and looks less green in person than in the pics. These parts are a good example of one of the best parts of modelling - lots of work being completely hidden on the finished model! At least I took pics along the way to prove it's there, right? haha All of the parts: Some work starting to disappear... And now it's almost all completely invisible!2 points
-
Hi Guys, She is finished. Here is a picture of her. The rest will go into the gallery Cheers,2 points
-
Ok mates , and so it goes on to the next steps! Meanwhile I`ve added some minor details to improve tha aileron linkage and hydraulic with plastruct profiles. The exterior paint finish is done with 5 different metalic colours from Alclad and Testors range. After every airbrush session I`ve polished the entire surface with 6000, 8000 and 12000 micro mesh. That`s necessary to achieve a perfect smooth surface and avoid any orange skin. Underneath I made the complete paint job and weathering several day ago. But it needs a lot of micropainting and pin washing yet. At this stage of my project I prepared the base. To simulate a concrete runway surface, I`ve used modelling paste. I used the white one insteed the Terracotta colour. To achieve a rough and used surface several tools are necesary, like old metal brushes, engraving tools and various.2 points
-
Like the B-24 Liberator of the USAAF, the Halifax is often overlooked when considering the success of RAF Bomber Command in WWII. This is Revell's recent new-tool Halifax MkI/II in 1/72nd scale. I used Freightdog's improvement set to go some way towards correcting the engine shape issues, as well as a more accurate set of propellers, main wheels and H2S blister. This set is excellent, and the intakes simply slot into the front of the nacelles as a direct replacement of the kit parts without issue - no filler was needed at all. A new set of exhausts came from Quickboost, too. Paints were Xtracolour enamels (I think I got the mix wrong for the dark earth as it is very dark!) and it had a final matt varnish from a Humbrol rattle can. Decals were from Xtradecal. Tom1 point
-
1 point
-
Hi all The ambition with this build, was to do a rather weathered individual and I decided to do something similar to those AC with red/white bellies, since they look kind of cool. The top 3 base colours that went on the preshaded surfaces is Gunze H417, H422 and H423. For the exhaust emissions I tried Lifecolors Tensochrome "Smoke" for the first time. As for washes I normally use artist oils and WS but this time I used Promodellers "Dark Dirt". The chipping was done with a silver pencil from Derwent. As for the antennae (sp?) I used stretched sprue, also a first. I really enjoyed the mottling painting which I never done before as well. The decals are from different kind of kits, so this bird is far from historical correct. The seatbelts are from Eduard. Anyway here's the pics and I hope you enjoy watching them. Thanks for looking Cheers Göran1 point
-
Good afternoon, colleagues. Let me present to you my latest model. The model is made just "out of the box". Only one thing that I added - radiator bonnet made from photo-etched grid. Enjoy watching.1 point
-
This is HMS Protector flight Whirlwind HAR1 using the 1/72nd Italeri UH19A Rescue Chickasaw and Rotorcraft HAR 1 brass etch and white metal conversion, I substituted the winch supplied for one more suited to a HAR1. Also on checking the internet I think the Penguin decals on the nose should be facing each other rather than as supplied. Many Thanks, Willy1 point
-
Something I built a few years ago. The Eduard Bf108 and wearing techmod decals. I read somehwhere that the colour and IoM rally depicted by the decals are not quite right, but hey ho, I like the scheme and here is the model. Before I sell it!!! The vase is from an offcut of lamintae floor leftover! waste not want not!1 point
-
very nice love that scheme well done Glenn.1 point
-
So here we go again, kit #2 primed, and this time will be left overnight to harden. I somehow screwed the closed canopy up, so have had to go with the cleverly designed but rather clunky open version. Although I like this as a kit, it's certainly putting up a fight. I wonder what else it has in store for me?1 point
-
First kit I ever built also, the old Airfix Whirlwind! Cracking job there, looks really smart in the colour scheme. Cheers John1 point
-
Adding some pics of one I did in the 90s with the nose and intakes exactly as Airfix moulded them1 point
-
Very nice indeed.1 point
-
Today's work on the Corsair First added the wings and flaps Masked off the canopy with parafilm, then fitted with GS Hypo Primed with Alclad grey, and rubbed down Pre-shaded with black and ocean grey Sprayed the white The intermediate blue And finally the dark blue Peter1 point
-
Scheiße! Hope everyone & everything is ok Engine failure according to the article... Hopefully that corn field give it a nice soft landing?1 point
-
Verrry nice!! Where did you get the decals?1 point
-
Hi everyone! Well after three weeks of work, Tamiya's incredible 1/32 F4U-1 Corsair is finally done. Nothing in my working life matches the tension and eventual adrenalin rush of completing a huge project like this and though smaller models can be equally exciting, having this thing in front of me after the thick end of 100 hours work - almost 2/3s of that, painting and weathering - is a really satisfying feeling. I hope you like it! The full review will be in the September issue of TMMI, on sale August 15th. Spence1 point
-
I honestly don't know as I haven't built any other kits of this aircraft. All I know is the well documented engine issues with the Revell kit, hence the Freightdog conversion parts. Hi Woody, No it's the kit part, but I painted the mating surfaces black before joining it to the fuselage. This way it hides the thick plastic and makes it look a lot thinner than it actually is. Thanks Steve, And yes I agree - it certainly improves the look of the model without having to do anything too radical. I think the larger wheels from Freightdog and the better shaped props are really what makes the difference.1 point
-
It all looks to be a sensible break down, to me. I'm liking what I'm seeing. That would be lovely. I bought the F.1 kit with the intention of building something to look a bit like this. Help us Ogilvie wan Kenobi... you're our only hope.1 point
-
She's a real beauty.1 point
-
Top model! I really like it. Martin1 point
-
Finally I have got round to putting some of my photographs from this years show. I hope you like them. A400M Meteor MBB 339 Italian Typhoon Jordanian Falcons British Airways A380 A380 and Red Arrows1 point
-
Gents, I haven't posted for a few weeks so here's a catch up on various bits and pieces. Colchester Garrison show in July. They usually have a AH on static and a set piece with a Lynx or two. 16 AAB demo with a 9 Regiment Lynx. The other half of Wattisham also had to get in on the act. Departure time and with the layout different from previous years, we now had the light right up the back of the departing helo's! I'd gambled on the AH driver turning it straight away, and I got lucky. Wattisham has been busy with STANTA exercise traffic refuelling in the early evenings. Newly remarked police helo based at Wattisham. No longer the 'Suffolk' police helo, but reassigned to the National Police Air Service (which means it now has to cover Norfolk as well since their helo was axed due to budget cuts). Finally a few from Mildenhall, including finally catching up with the Osprey. I say 'the' Osprey as at the time of the pic it was the only one of the pair that had been serviceable since being delivered nearly two months previously. They have got both serviceable now. Usual Thursday 747 run. ] Gary1 point
-
Russ, Great job on the Firefly. Just goes to show, you don't need to spend mega-bucks on AM for a great result. I am also impressed by your hairy stick paint job! regards, Martin1 point
-
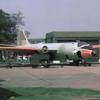
It looks a lot more like a Lightning, than it did before. Not a lot left of the original kit, there.1 point
-
Grey and dayglo? Don't remember that combo...... I've got me coat on Trevor Cracking job so far btw1 point
-
Thanks Pappy, I used Xtracolor X628 that I have had for years, FS34226 if memory serves. I also seem to remember seeing somewhere that "Russian Armour green" is a good match. http://www.ipmsstockholm.org/colorcharts/stuff_eng_colorcharts_soviet.htm This is a good site for references, and not just Russian/Soviet either... I applied the Begemot main decals last night and they have settled down nicely using Micro-Sol & Micro-Set with no adverse effects whatsoever.... Next is a large sheet of stencils and weapons markings that are going to test the old eyesight......... Smudge1 point
-
I lost track of this thread ,my apologies. Thanks for the comments. I should be back to building soon.1 point
-
I'm with Jennings; it's less about dimensions than about working with the space you've got. Any scratchbuilding, particularly in tiny scales, requires a certain amount of "eyeballing" to lay things out and make things fit, plus a good measure of persistence. When I did my Sea King interior for the 1/144 GB, I made a few bits that turned out slightly too large. I probably could have used them, but I didn't like the look, so I just had to remake them a bit smaller. As for hiding "the holes" visible looking through, a few well-placed bulkheads can do wonders. Unless you're doing a cutaway, you've usually got a little leeway to camouflage your lines of sight in interior spaces.1 point
-
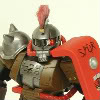
The solid shaped triangle sections? Looks to be just extra padding under the belt, sort of pressure point when the pilot is strapped in? For colour, I'd go somewhere between buff and khaki, with aluminum buckles - though not sure what metal was used here. regards, Jack1 point
-
Excellent build and finish. I'm intrigued by the 'rag-bag' markings. I've not seen that combo before. It must have been captured between visits to the paint shop! Trevor1 point
-
Superb! Regards Pete1 point
-
Looks fantastic mate1 point
-
I've ordered a few times from Modelsua, with no problems at all. Service, every time, has been outstanding.1 point
-
I am not really a Red Arrows fan but the photo is nice.the airliner is nicely captured in your photos. Good picture.1 point
-
She looks like she could do with a good dusting!1 point
-
A load of spot-on pictures there Iain - thanks.1 point
-
Iain I did say a knighthood for the Lightning rectification work but show us how to do this as well and I guess we skip the knighthood and go straight to the Peerage. Lord Iain of Airfix perhaps Seriously watching with interest and learning as always as I have 2 J's in the stash in the hope that one day someone can show me how to do it1 point
-
That's just what my Missus said!..............Smudge1 point
-
Thank you all It is a job that will cost me a long time yet. But I'll have to rely on patience to be able to maintain quality in the details Time to relax a bit1 point
-
I for one couldn't give a toss whether the bombs are included or not, I suspect I'm not the only one, I'd expect the majority of modellers would model it with the bomb-doors shut so as far as I'm concerned Airfix's approach is spot on! It would be different if the bombs were carried externally. Which just goes to show we're all different, with differing priorities/leanings. So if we ignore the missing bombs (like I'm going to), if the only thing that's wrong is the missing trim wheel - which I suspect only the Lanc' aficionado would be bothered by, it seems that Airfix have done a good job! We've got a Lanc II that can be made SFTB after all these years of waiting - I for one am a happy bunny! Wez - taking a different perspective on the whole bomb thing.1 point
-
The basic technique is not so very different from using a 4" paintbrush on your living-room door (I know this sounds unlikely, but trust me.) Do not bend your wrist, but keep your arm stiff, from the elbow; this will stop you waving the brush in an arc, when you should endeavour to spray same-width lines, keeping the brush the same distance from your surface at all times. (This is absolutely vital.) Get some cheap shiny cardboard, at first, so that you can easily see the results. The first "line" that you spray will actually consist of three stripes, with a centre line of solid colour, and two (one either side) which will gradually fade to nothing at the edges. Spray your second line "to the wet," in other words, position the spray so that the wet centre goes over one of the preceding feathered lines, then cover the whole sheet. Wait for it to dry, then check the results; any finish that looks like lines of streaks means that you sprayed them too far apart. Start off with the paint of your choice, plus the manufacturer's recommended thinners (time enough to experiment with cheaper alternatives when you're proficient.) The ideal consistency is like milk, but you'll need to work that out for yourself; if I'm using matt paint, from a tinlet, I usually add about 50% thinners, for gloss it's around 50/50 mix. If you can, get hold of some see-through containers, like the pre-historic 35mm film cassette containers (remember them?) Mix your paint, fit the lid, then swish the container horizontally, so that the paint climbs up the wall, then watch its behaviour. If it slides slowly down, leaving a thin film of colour on the sides, your mix is about right; if it just clings to the wall, it's too thick, and, if it drops straight down, leaving virtually no residue, it's too thin. Ignore anyone who tells you to start thinking in precise %age mixes, because the proportions will depend on your ambient temperature; in winter paint is thicker than in summer, so will need slightly more thinners. (Same applies to spraying in a garage versus your living-room.) The only way is to keep trying (and keep asking,) until you gain experience and confidence. Edgar1 point
-
Coming on nicely, have to admit envious of your work station. Loads of natural light and a loads of space!!!1 point
-
Okay, ignore me as I've just found some plans here in 1/25, for the princely sum of £12.50 & £1.95 delivery....looks like i'll be breaking out the Balsa again! http://www.myhobbystore.com/1839/Colyer-RAF--Rescue---Launch--MM1320.html Cheers Col'1 point
-
Very nice build Russ, especially the cranes! If you want another pair of aircraft you can have mine, just PM me. I did notice that Tamiya did not include any U.S. aircraft with their Yamato!! Jockster.1 point
-
Did manage to finish this piece. Good to see the forum clear of the troubles.1 point


.thumb.JPG.3498f40362ff13ebfc4b2e45abbd545e.JPG)


.thumb.jpg.76f12b87ce9ca9929c9aabdcf8f9d2dd.jpg)


This leaderboard is set to London/GMT+01:00