Leaderboard
Popular Content
Showing content with the highest reputation on 06/05/13 in all areas
-
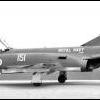
British Phantom FGR.2. Hasegawa kit. -Aires cockpit and exhausts -Aires wheels -Xtradecal6 points
-
Okay, the easy bit is done.. Next up is the base.. Anyway, here's the tired old girl.. And, to remind us how big/small this thing actually is..4 points
-
Hi everyone, here`s my first ( and most recent) completion from my haul from the Hinckley Show in March. Tamiyas 1/48 Bristol Beaufighter VI completed as an Australian built Mk21 Representing an aircraft of No 93 Sqn RAAF known as the `Green Ghosts` Apart from the decals all the parts were in the box, only extra work was deletion of two wing guns, some antenna, seat belts and a small fillet ahead of the observers station the decals were from an old Eagle Strike set also I thought I`d show you an earlier build This time a Mk X, actually done from the TFX boxing Done as an SEAC aircraft of no particular airframe or squadron but inspired from a pic` of a 22 Sqn, RAF aircraft Markings from the spares stash and the kit decals Only real work done was deleting the guns and ejector shutes and fixing a camera housing to the nose Hope you enjoy them both.4 points
-
Well, after a long and protracted 3 year build the Lancaster is finally done. This is by far and away the hardest Tamiya kit I have built. I added Eduard Etch in the cockpit, Belcher Bits resin engines, Paragon tyres and some scratch builing in the cockpit area. The guns are from Flightpath. Hope you like her. I present the Picadilly Princess, a Mk III, of 424 Tiger Squadron RCAF, March 1945. It is painted using a mix of Tamiya, Gunze and Vallejo acrylics. [/url] Alan.3 points
-
Hello, Finally finished my Eduard Hellcat. Built totally out of the box with the exception of new gun barrels [drilled plastic rod] and brake lines. Painted and weathered using Tamiya acrylics mixed by eye. I have achieved a first with this model - an aerial wire! Hope you like the pics and any comments are welcome! Thanks for looking Matt3 points
-
This is my first double ship display,enjoy the photo,s,if could get photobucket to work Grrrrrrrr Link for build http://www.britmodeller.com/forums/index.php?/topic/234930347-hms-ocean-orange-hobby-resinhms-dragon-type-45-dragon-1700/ [/url]3 points
-
WESTLAND LYNX HAS 2 702 NAS, HMS Avenger Flight, Yeovilton 1979 This is the Fujimi 1/72 kit with a few alterations, the main ones being a new tail rotor drive shaft cover to give a more bulked-out look compared with the kit, reshaped fin (the kit gives the Army style fin) and reshaped exhaust area. I left the main cabin empty but worked on the cockpit a bit. The kit doesn't supply the pilot's collective for some reason even though the other 3 sticks / levers are there so that had to be added. I also repositioned the cyclic sticks nearer to the seats to give room for the instrument panel. I added the Seaspray radar display on the observer's (post) side, but the rest of the instrument panel came from Modeldecal's sheet. I really like the original Oxford Blue scheme. I've had a tin of Xtracolour Oxford Blue for more years than I care to think about, but it still sprayed OK - took a while to dry though! The old Modeldecals performed well as usual, and a final coat of Humbrol satin varnish gave it that semi-gloss look of the early Navy Lynx. Nice to have some real warm sunshine to photograph it in after a long grey winter. Chris3 points
-
3 points
-
Thought I would post some pictures of my GR9. It's not perfect by any means but I am quite pleased with it. A great aircraft, greatly missed.3 points
-
Wings on nd test fitted the exhaust. I tested microsol nd set on spre with lcld - it was fine... going to alclad the UC doors and tail plane next...3 points
-
Hello The Supermarine Scimitar of Dynavector is my first Vacu-kit and temporarily the last. Built out of the box, Pavla Resin ejection seat and colors from Gunze. Thank you for looking and regards Martin2 points
-
Hi mates, here is my latest project, the Spitfire Mk. I as seen in summer of 1938. This started out as an out-of-the-box build, but of course that didn't last long. Project: Supermarine Spitfire Mk. I Kit: Airfix Supermarine Spitfire Mk. I/IIa (kit number A02010) Scale: 1:72 (The One True Scale) Decals: From the kit, representing 19(F) Squadron at Duxford in August of 1938 Photoetch: Eduard Interior Set No. SS400 Vacuform: Falcon Spitfire Canopy Set Paint: Gunze H72 Dark Earth, H73 Dark Green, H309 FS34079, H47 Red Brown, H90 Clear Red, H91 Clear Yellow, H93 Clear Blue, H94 Clear Green; Tamiya XF-69 NATO Black; Testors 2062 RAF Interior Green,1149 Flat Black, 1168 Flat White; Alclad 101 Aluminum, 104 Pale Burnt Metal, 115 Stainless Steel, 314 Klear Kote Flat Weathering: Some post shading to simulate paint fading, but generally not much weathering as the aircraft was new during this time period. I applied a burnt umber panel line wash to the camouflaged areas, light gray to the white underside, and black to the night underside. Improvements/Corrections Applied the Eduard PE set to the cockpit. Cut open the kit canopy, and used the windscreen and rear canopy. For the sliding canopy, I used a section of a Falcon vacuform. Camouflage pattern was hand masked (not a template). Shortened the HF mast to represent correct height of 68cm. Added antenna with 0.005" diameter Nitinol wire. Build thread: Link All told, I liked this kit a lot. Only a couple of points of discussion during the build, one of course was the panel lines. I partially filled them with Alclad grey primer, and I think that helped a lot. It's not so much that they're too wide, it's that they're very deep. Which in some respects is good, as you won't lose them during sanding. The panel line wash that I applied made them stand out a bit more, but I think it adds some interest. More discussion in the build thread... The other point was the markings, specifically the wing roundels. I could find no photos that show WZ-T with the roundel placement shown by Airfix. The directive in place at that time specified upper wing roundels on both wings, and most photos (but not all) of 19 Squadron Spitfires at that time show both. I chose to model WZ-T that way, partly to be in compliance with the directive, and partly to appease my sense that Spitfires should have roundels on both wings. Again, more discussion in the build thread... So on with the pictures! EDIT - I really should have used a different seat. This one is about 5 scale inches thick! Enjoy the photos! It's a great little kit and I had a great time building it. It took longer than it should have, but the project was interrupted by my ninth back surgery. It is so much fun getting old! Cheers, Bill2 points
-
Hello all, Here is my attempt at the Twin Seater Typhoon. All comments welcome. Thanks for looking2 points
-
Hi, this is Teemodeller. For those who don't remember, I'm the 13 year old modeller who some of you jhave been giving advice to. Anyway,these are my latest builds. The first is thye Airfix Gnat I have been talking about for a while, but have never got around to posting the pictures. The second is the Revell Spitfire Vc. Both builds went together very well, with no fit issues etc, etc. The only thing I'm worried about is the orange paint on the Gnat, I'm not sure if I put enough paint on. Oh well. The aerial on the Spitfire was done with stretched sprue. Anyway here are the model;s. Please criticise openly and honetsly. Thanks!2 points
-
My first Armour build I decided to try something quite cheep and easy to build to try out some weathering techniques which are new to me. I choose the Tamiya Panzer KAMPFWAGEN II which I picked up for a fair price and ended up with something I'm quite happy with. After finishing I then decided it needed something to sit on , two days later. More Armour ? Yes I think so Thanks for looking Martin2 points
-
Finished this a couple of weeks ago. Straight from the box except for as few additional details added to the cockpit and I filled in all of the panel lines with milliput. I seem to have had a lot more fit problems with this build than others appear to have done, the top wing was dictinctly warped and took alot of twisting and cutting to get everything lined up to my satisfaction. Paint is Aluminium Alclad and International Orange from the Xtracolor range. There is certainly some very nice detail in the kit and makes a nice pair with the previously released Gnat. The single seat Vampire is a rescribed Heller kit with markings from a Euro decals sheet. Andrew2 points
-
You are pretty limited for the G-2, if you were to expand it to a G-4 then you have a couple more options. The captured Russian and Swiss machines are definitely G-4, the Croatian machine, take your best guess. There are pictures around of at least 1 G-2 in British markings and the Hungarian machine is probably a G-4, but there are no clear pictures of the markings, so it could have been used in standard Luftwaffe markings, so the profile and decals should be considered a bit of a guess.2 points
-
I've done the wings, inside of the UC doors and the red line round the tail of the fuselage. Doesn't look much but it took me two hours! Going to do the black base for the rudder, tailplane, doors etc tomorrow the the UC and wheels. I'll take some pics of the wings when they re dry.... more soon!....Hope you like it2 points
-
This is the ancient Aurora kit, re-issued by Monogram in the 90s. It's actually pretty good plastic, with plenty of detail to work with. The opening doors, bonnet and boot bring their own issues, but the end result is rather nice compared to today's buttoned-up kerbside kits with aerodynamic under trays. As you can see, there's a fair bit of work to fine-tune the kit into a more accurate representation of the original classic, which is a truly beautiful, and very purposeful looking GT car. The windscreen is still not right -- it should be more upright, and the base is much more semi-circular, not the large rectangular cut-out Aurora gave us. Personally, I think all the shape issues in this area come from placing the firewall to make room for the operating door hinges, which mean that it's too far forward. The engine is nice, and a bit of time with wiring pays big dividends. Many thanks to Skip Jordan who has been nudging me to give this a try for a couple of years, provided invaluable reference resources, and acted as chief cheerleader along the way. I'm now going to go away and build something from a state of the art kit, out of the box, before I even THINK about tackling the Singer 911 kit-bash... bestest, M.1 point
-
Been building this one for a few months but due to time constraints I have had no time to upload any progress photos. Here instead are a few photos of the finished model.1 point
-
After seeing Fuad's and Fernando's excellent models, I thought I might share my effort that I built about 6 years ago. It is the same Italeri 1/72 oob and Tamiaya paints. Though not up to the standard set by the others, it was a pleasure to build and good airbrush exercise.1 point
-
Here is my Airfix 1/48 Canberra PR9 After building this one all I can say is I am glad it was cheap... The cockpit/nose area was a nightmare, the instructions were somewhat vague for many of the version specific bits and pieces and the illustration for the decals, while lovely, was a bit confusing. The decal sheet was a bit confusing too... Most unhelpful was that the panel lines on the aeroplane bore no relation to those on the picture so there was a modicum of guesswork and judgement involved. Ultimately quite happy with how it turned out though.1 point
-
A bit more progress over the weekend. Still lots to do but she is starting to come alive now. John1 point
-
Looks completely finished to me, I don't see anything missing... Finally got an airbrush! The camo scheme isn't that historically accurate, but I think it looks nice.1 point
-
1 point
-
1 point
-
Hello fellow britmodellers, Here are some pictures of my Airfix Lynx, built as a Mk 90 of the Royal Danish navy, while on Anti piracy operations in the carribean during 2007. This build started around 12 months ago, but ended up being left half built for that time, until very recently when i thought it deserved to be finished. I've always really liked the Lynx, and i couldnt resist the huge 50.cal gun on the side door, making this little helicopter look very mean indeed. On the other side is a hoist for lifting on the pirates they shoot. I also wanted to do something different , so the danish Lynx in its gloss blue really caught my eye. So on with the pics......... Sorry for the crappy photos, i'll take more in better light tomorrow. Thanks for looking, martin1 point
-
'Phew', nice job Angus. Glad you have the GPMG in the right colour(joke) Nice town look that is1 point
-
1 point
-
Great build, better than anythiing I can do. Colourwise I much prefer the blue.1 point
-
Interesting thread. The one thing that comes to mind is that aircraft are a lot dirtier than you think in panel lines etc (I fly every week with BA and other airlines and get to see a lot of planes) and this is on airliners. The key point which I accept is that at a model scale distance - particularly 1/72nd and 1/48th it is very unlikely you would see it. At the end of the day modelling is an expression of art - and each of us makes a personal judgement on what we like. Personally I have never pre-shaded and when I post shade I try my best to not be linear. Having said all of that I have seen some beautiful pre-shaded models where it might not be the most realistic but it still looked like a wonderful piece of art. Regards,1 point
-
And the almost finished lading gear (just need to touch up those tires a bit) that's all for now Thanks again for stopping in MH1 point
-
This is my version of the AZmodel 1/72 Spitfire FR IXc. I have added the camera hatches by using some small pieces of plastic card. This was the only FR IXc in service with the Netherlands Airforce and later on it was converted to a normal Mk IXc. Decals come from the spare box and the paint is from Xtracolor. I tried to give the kit a weathered lood by mixing the paint during spraying. The AZmodel is one of the best Spitfires in 1/72 I have ever build.1 point
-
Just to clarify (as you weren't to know), the topic starter means in 1/72 not 1/48 like the Bf110F kit. Interesting thread though. I'll stick to making my G-2 as a Luftwaffe one with BK 3.7 gun. thanks Mike1 point
-
Have to admit to be growing a bit sceptical about mock-ups and CAD drawings. Remember the flurry of pics about Kitty Hawk's Mirage F-1 family ? The F-1B has arrived but the single seater seems to have disappeared off the radar. (Having said that, I'm not really sure if the F-1B has arrived because it doesn't seem to be readily available in the UK at present - Big H are still advertising it as due in January 2013 !) The JAS-39 seems to be on hold too, and then out of the blue, a 1/48 Foxbat appears with a planned release date of May '13 (subsequently postponed to July according to one web-site). I can't help wondering if we'll be lucky enough to see these kits in the near future ? ...and then there's the GWH Mig-29. We know it exists because we've seen in-box reviews, and I'd love to have one, but they even seem to be scarce in the Far East these days. It's not just the stuff with wings either. I've had the Trumpeter BTR-80 APC on my watching list since 24 August 2011 and it's still only listed for release sometime in 2013. Sorry for appearing pessimistic, but a new Bucc in 1/48 and loaded with so much detail ??? Hope I'm wrong........1 point
-
Hi, here's an old kit that I have managed to knock together. Only improvements were a little scratch building in the cockpit (can't be seen!) and a resin seat. Not a great kit but a great subject from my personal favourite era. Thanks for looking. FF1 point
-
1 point
-
I have friend, which make models, but he is very shy. He asked me to that I put here photo of model and you vote his model. Fw-190D-9.1 point
-
1 point
-
If you are hinting at my comments, I was not nit picking, just pointing out something that is glaringly obvious to me and something that the builder of this superbly finished model may not be aware of. I was just trying to give a little constructive criticism.1 point
-
Those are a bit smart Russ, I like em both equally but there is something about the aussie ones with the twin .50s in each wing that really thrill, that is firepower double plus in my book & you've caught it so well, love the SEAC scheme too though. Steve.1 point
-
1 point
-
1 point
-
Whoa! Stop! DO NOT PAINT de-icing boots! The Handley-Page Halifax did not have rubber de-icing boots fitted to the wing leading edges. Chris P.S. I've gone back and re-read your posting and realized that you were talking about the yellow Kil-Frost paste that was applied to the leading edges of RAF night bombers. This could be painted by hand, as it was on the real full-sized aircraft. Me1 point
-
Got my new transfers. It's the closest I could find to the aircraft I'm trying to model... I think it should look okay. I've been spraying primer on the undercarriage doors, landing gear, flaps etc. I've got all the paint now so will spray the topside of the wings tomorrow. I was debating whether to pre-shade the wings, but looking at the photo's I have I don't think I will. I may just give then an acryillic wash... I'll see how it goes.1 point
-
Hello there.... I use cheapo earphones from the 'Poundshop' if you have such a place. 99p a pair! They are braided inside with a clear silicone type outer sleeve which pulls off easily. I usually buy 5 pairs at a time which gives me around 25 feet of braided hose, and another 25 feet of clear tube which I also use - see the water pipes at the front of the engine. The braided part is a bit too chrome, but I can live with that. Roy.1 point
-
I was more worried about the mid stone TBH You know what I'm thinking? - the RAF should revert to this roundel style full stop. Small style on the current front line fleet - they would look nifty. And as next years WW1 centenary comes round - who's for a Tucano in "clear doped linen" or PC10 ( or even PC12) with those natty white Sqn geometric ID markings...? I have been drinking mind. Jonners1 point
-
Just checked and it's about 2mm too short according to Olympic standards, and the grain pattern is too heavy, as such, unbuildable!1 point
-
Please add the 373rd FW to that exclusive list as well Tim1 point
-
Thanks for the positive comments gents, much appreciated! Yes I agree the early De Havillands are lovely and I also have an Aeroclub DH89 half built and also I have a resin version from Kiwi Models (OOP) which is also nice. I have managed to find some time and do a bit more to the Dragon. First is the master canopy and now plan to make a vacuum form machine and make some clear copies. Gloss colour coats are on and some decalling (also masked and sprayed some of the markings) Finally a quick test fit. Because of the complex nature of the aircraft (multiple struts, biplane etc.) I plan to build the model as a series of sub assemblies and fit, fill, patch and paint the joins st the end. Cheers and regards PJ Western Australia1 point
This leaderboard is set to London/GMT+01:00


.thumb.jpg.d17ff607fc7e89ed057e63fcb6f2a888.jpg)

