Leaderboard
Popular Content
Showing content with the highest reputation on 09/01/13 in all areas
-
Hi, Not sure if there was an Aircraft Vignette section? Anyway, I `messed` up an Airfix 1/72 FW190 a while back, so instead of throwing it out, I decided it would be an ideal donor to my first vignette. Also my first practice at rust technique. Rust was basically loads of liquid poly all over the model, then stippled with rough brush, which created the bubbling and rough texture. Then painted brown and highlighted with red and yellow etc. Decals had already been put down, and then roughed up and scratched away etc. Wall is polystyrene painted grey, and base is covered in dried moss, and lots of PVA to get it to set. Some random stones are CA on. I call this "Target Practice"...basically a wreck thats been used over the years for pot shots for bored Dutch farmers Anyway let me know what you think...3 points
-
Hi all, Just wanted to share my two latest completed projects. The first is the Airfix 1:48 scale Supermarine Spitfire VIII of 'A' flight, No.152 (Hyderabad) Sqn Meiktila, RAF SEAC, Burma, May 1945. This was a lovely model to build and the finished scheme is quite attractive and different from the normal Spit colours. and just a normal shot. The second is a 1:72 Scale Revell offering of a Mk Vb of 234 Sqn flown by P/O Axel A. Svendsen from RAF Tangmere in 1942. Good little kit which I was going to turn into a Russian MkV but at the last moment went with the OOB decals. I will be posting some more completed Spitfire's soon, an Airfix PR XIX and the F.Mk 22 which are nearly completed. Thanks for looking. Tommy3 points
-
Old ESCI kit packed by Italeri. Still not bad IMHO. I added Pavla cockpit and AML resin exhausts.2 points
-
hello! here is my latest build! work in progress : http://www.arcforums...howtopic=1411312 points
-
Hi all, Some pictures of my two SMB2. The build pictures are here: http://users.skynet.be/fb990055/SMB2_12-ZQ.htm and here : http://users.skynet.be/fb990055/SMB2_12-YJ.htm Cheers Pierre.2 points
-
Hello friends. It was going time without posting anything in this nice forum Today I show you my last model, an A-10 Thunderbolt from Academy in 1/72 scale. It is constructed directly from the box, and I only limited myself to looking for a decals in Hannant's. I hope that you like it. I liked much the scheme of painting. It seems to me to be different. Good. Regards from Spain Uploaded with ImageShack.us Uploaded with ImageShack.us Uploaded with ImageShack.us Uploaded with ImageShack.us Uploaded with ImageShack.us Uploaded with ImageShack.us Uploaded with ImageShack.us Uploaded with ImageShack.us Uploaded with ImageShack.us2 points
-
Hi everyone, here`s some pic`s of my second Testors 1/48 Skymaster that I`ve just finished Done to represent an aircraft of the 14 Special Operations Wing, Nha Trang Airbase S, Vietnam Which was used for Psycological warfare missions such as Broadcasting and leaflet drops Sometimes known as `the bullsh*t bomber` ( I did google it and some pic`s came up ) Apart from seats, glare shields by landing lights and aerials every thing was in the box hope you enjoy looking at, Cheers2 points
-
Silly me, I thought this would be an easy OOB build! The kit is Hasegawa's special "NASA" boxing of the 1/72 F-111E, with decals for the two aircraft involved in NASA/USAF's Advanced Fighter Technology Integration programme. The problem is the kit doesn't include the highly modified Mission Adaptive Wing needed to build the second aircraft depicted on the decal sheet! So, a pair of scratch-built wings later and a little cockpit help from Verlinden, here's Hasegawa's AFTI testbed in 1/72nd! I managed to catch a glimpse of the actual aircraft--which is still around, though a little worse for wear out at Edwards AFB... Hope you enjoy...2 points
-
Hiya Folks, As there was not enough room in the biplanes thread, here are the Swordfish done separately! Swordfish; Airfix 1/72nd scale kit; Frog/Novo 72nd scale kit; Matchbox/Revell 1/72nd scale kit; Tamiya 1/48th scale kit; Trumpeter 1/32nd scale kit; There are more models for other threads if anybody is still interested, early war fighters, American fighters, second line etc, not to mention RAF, RAAF, RNZAF...or are you bored by now? All the best Tony O2 points
-
This is my first build of 2013. It is the old 1/48 scale Monogram kit which had the South Vietnamese decals included. The decals had suffered terribly with age and were a project in themselves but all in all I was quite happy with the result. This A-37 depicts one from the 520th FS, Binh Thuy Air Base, Vietnam.2 points
-
2 points
-
Supermarine Attacker F.1 1:48 Trumpeter The Attacker was Britain's first jet fighter to fly with Fleet Air Arm in carrier operations, and was very much first generation, sharing much of the laminar wing design of the poorly received and short-lived Seafang (Spiteful in RAF service). It was also a tail-dragger, one of the last jets to use that configuration with twin main-wheels under the wings and small tail-wheel under the rear of the fuselage. While this served prop driven aircraft well and kept their props from striking the ground, the jet didn't have this requirement, and the consequential lack of vision from the cockpit over the nose was a real impediment, especially in carrier operations. The RAF rejected the Attacker because it didn't bring anything new to the party, but a navalised version was sold to the Admiralty, although its service life was incredibly short, lasting only three years of front-line service, during which it saw no action. The tail down stance, poor aerodynamics and handling, plus the rapid advance of jet aviation at the time saw it replaced by the Sea Hawk in active service, lingering on until 1957 in Royal Naval Volunteer Service before it was retired completely. Pakistan flew 36 land based aircraft designated Type 538 from 1953 until 1956 when they moved over to F-86 Sabres. The F.1 was the fighter variant, but there were also 11 FB.1 Fighter Bombers that were simply modified as they rolled off the production line to carry rockets and bombs. A later version, the FB.2 was upgraded with newer more powerful version of the Nene engine to give it more speed. A surprising 84 of this variant were built. The Kit The kit represents the initial F.1 variant, and is a welcome release, as previously the only kits in this scale were the competent Falcon vacformed kit and the now defunct Classic Airframes kit. Both could be tricky to build for the inexperienced modeller, and this new injection moulded kit should be pretty simple to build by comparison. It arrives in a standard fighter-sized box with a rather impressionistic painting of an Attacker flying over broken cloud. Inside are three sprues of mid-grey styrene in individual bags, plus a foam wrapped clear sprue in a card "corral", a small sheet of Photo-Etch (PE) parts, a medium sized decal sheet in its own bag, and the instruction booklet, which is landscape A4, and has the paint and decal instructions slipped into the middle. The sprues are well detailed, and have lost of raised and recessed detail moulded into the parts, with a sensible parts breakdown that should make construction straight forward. The inclusion of a set of PE seatbelts is a nice addition, although a few extra parts would have been nice. Shapewise, the parts match the CA kit pretty well, but as I don't have a Falcon kit in the stash, I can't compare with that. The wings of the Trumpeter kit are fractionally smaller in chord, as are the tail surfaces, and the engine intakes start slightly further back on the fuselage, but everything else seems to be "as close as makes no difference" as my dad is prone to saying. Construction starts unusually with the wings, which can be cut to fold the tips for stowage below decks. The lower half of the wing is a single length, including the underside of the fuselage, so seams will need to be filled at the front and rear of this section. The upside is that setting the dihedral of the wing will be a breeze. The gear bays are supplied as single tubs, and have some nice rib detail moulded in. There are a few odds and ends missing from the bays around the gear leg attachment area, but these can easily be added from photos if you're minded to. The upper wings are separate parts, and once installed leave a gap in the centre for the fuselage to be dropped. The cannons are moulded into the lower halve of the wings, with a pair of half-circular cut-outs in the top parts which is an improvement on the old CA kit's resin inserts. The current trend of installing the wheels during the major construction continues with this kit, and the detail is good, having separate oleo-struts, linkages for the gear bay doors, and two parts for the bay doors. The wheels are also nicely detailed, and are moulded in front and rear halves, with the seam hidden by the circumferential tread of the tyres. The wheels are ever-so-slightly smaller than the CA kit, but draw your own conclusions as to who is right there, as I'm not going to venture a guess! The flaps on the wings are separate parts built up from top and bottom halves, and these are glued into corresponding slots on the rear of the wing, split by a small hinge bearing section of wing that extends to the trailing edge. These can be posed at any angle you choose, but check your references to make sure that you do so to the aircraft's permitted range of movement. If you elected for the folded wing-tips, a pair of inserts and an L-shaped hinge are supplied for you to add to the cut wings to set them at the correct angle. The cockpit of the Attacker is a cramped and simple affair, with small side-consoles, a rail for the ejector seat on the rear bulkhead, and a curved instrument panel. The tub is quite nicely appointed, with some instruments and throttle quadrants present, but the throttle levels themselves are absent, making me wonder if they were originally scheduled for the PE fret, but were forgotten about somehow. They can be added using scrap PE and a blob of white-glue for the knob on the end if you see fit, but there won't be much visible once completed. The insides of the fuselage have some ribbing detail present which probably won't be seen either, but it is good that they have added it. A pair of rudder pedals are added to the front of the tub, and a control column just forward of the seat, with a simple black and white decal for the instruments on the main panel. The seat itself is comprised of an L-shaped cushion section, side panels, rear panel with the head-box added from four separate parts, and a set of PE seatbelt straps for the pilot. The Attacker was fitted with a Mark.2 Martin Baker manufactured ejection seat, and this had a slight convex curve to the top of the thigh-guards which isn't present on the kit parts. This can be remedied by a little careful sanding of the parts before gluing together, making reference to one of the many dedicated ejection seat sites out there, so shouldn't be an issue to the informed modeller with a sanding stick. The tail wheel fits into a small box of a bay which is devoid of detail, but hardly likely to be seen anyway. To give the wheel some strength, a flat mounting point is provided, which attaches to the front wall of the bay box. The angled exhaust pipe is supplied as a one-piece part to which a circular fan part representing the rear of the engine is attached. The three assemblies can then be sandwiched between the fuselage halves, with the cockpit coaming added at the same time. A pair of prominent circular intakes are added to the upper fuselage toward the tail, and these are supplied as slide-moulded parts with recessed intakes, which is good to see. The main intakes comprise of a splitter plate and the intake lip itself, one on each side of the fuselage. Both are well detailed with the auxiliary intakes on top of the intakes, and the splitter plates having the support vanes moulded into the back of them, setting the plate away from the fuselage sides. The wings can then be added to the completed fuselage and the seams filled and polished. The canopy is supplied as a two-part assembly, and is crystal clear with very little distortion present. A dip in Klear/Alclad Aqua Klear will improve the clarity further, and the separate windscreen allows the canopy to be posed open or closed as you see fit. The tail-hook, tail wheel doors and the strange instruments on the nose (which are supplied as PE parts) are the last of the mandatory parts, after which only the huge belly tank can be added as an option. This fixes to the underside of the aircraft between the wings, and will hide an awful lot of the fuselage to wing seam, so will be pretty tempting if you're not a fan of sanding and filling. It makes an unusual aircraft look downright strange to me, so could well be a candidate for fitting, just for the hell of it. In British service there is only one scheme, and that is FAA Extra Dark Sea Grey (EDSG) over Sky, with a high demarcation line that cuts through the tail plane line. The rudder is also painted sky, and the nose has a curved demarcation, which will be fun to mask! The usual post-war roundels with the white central ring reinstated are present on the fuselage and the wing tips, and large serials under the wing are also the order of the day. From the box, one of two schemes can be modelled, in the colour scheme above, with the following aircraft: WA496 coded 101, tail code J WP493, coded 106, tail code J Decals are well printed and have good colour density, but I can't help thinking that the red spots on the roundels are ever-so-slightly off-centre. If you agree, you'll need 6 16.5mm roundels to replace them, which although a bit of a pain isn't the end of the world. Conclusion There will be a lot of modellers that are very pleased to see a mainstream injection moulded kit of this important but short-lived early British jet, even though it was a bit poor in reality. It looks to me at least like a pretty good job has been done of it from perusing the sprues. A little more detail in the wheel wells and it should look great with some careful painting. Trumpeter are to be praised for filling in some quite remote nooks of British post-war aviation, as their catalogue expands every year to include some oddities that we'd never expected to appear in injection moulding. Highly recommended. Review sample courtesy of1 point
-
Hi Everyone This is my first GB on britmodeller, so I'm interested to see how it go. I've had this kit for almost 15 years, so I think it's about time I build it. I'm going to finish it in JASDF 50th Anniversary of JASDF 305th TFS Hyakuri Air Base marketings. I'm also thinking of replacing the engines and maybe get a new cockpit. Anyway look forward to seeing everyone's F-15. Regards Ken1 point
-
Continuing with pictures from our late 2012 US tour, here are a selection of shots taken at Davis Monthan AFB featuring the on base Warrior Park together with some of the based residents. I am fortunate in being a DoD passholder to be allowed base access as few of the preserved aircraft can be viewed from outside. The landing shots were all obtained however, from the Pima Museum car park. DM (and the Boneyard covered elsewhere) is a fascinating treasure trove of miltary aviation and I can't rate it too highly. It is well worth a visit if you are in the area. On with the show. Lockheed U-2C 56-6716 C-130A 56-0493 ex of the 162nd FG Arizona ANG OV-1OA 66-13560/NF marked 602 TAIRCW CH-3E 65-12799 wearing spurious serial 65-5692 Cessna O-1A Bird Dog 51-12670 F-4N 150639 painted to represent USAF F-4D 65-0639/FY GA-7D 68-8229 wearing serial 71-0358/DM and the markings of the DM based 355th TFW F-105D 61-0159 wearing serial 62-0284/RM and named 'Mary Kay'. The 355th FW at DM is the last active duty A-10 wing in the USAF. A-10C 78-0712/DM od the 358th FS 'Lobos' A-10C 81-0958/WA. Although assigned to the 57th Wg 66 WPS at Nellis, the squadron's aircraft are often detached to the 355th FW on trials and tactics work. Another DM based unit is the 563rd RQG, a unit to whom this HH-60G 90-26312 is thought to be assigned. Thanks for looking. C&C always welcome. Mark1 point
-
Happy new year to everyone! I felt I needed a bit of modeling therapy, so I started this as a quick, almost OOB build a few weeks ago to try to get my mojo back. It still needs a few fiddly bits like the landing gear and antenna, but I figure it'll be done in another week or so. It's a nice kit; not quite as refined as Tamiya/Hasegawa, but very good nonetheless. It required dry fitting and tweaking to get things just so, but very little filler was needed. Some folks have complained that the panel lines are a touch overdone, something with which I kinda agree. Before starting any assembly, I gave the fuselage and wings a heavy coat of Alclad "Black Primer and Microfiller" and then sanded everything back to the bare plastic, being careful not to obliterate any of the fine raised detail scattered about the model. This had the effect of smoothing the slightly rough surface texture and rendering the panel lines somewhat finer. The other thing I just had to address were the way-too-deep Dzus fasteners around the engine. I drilled them all out, plugged the holes with stretched sprue, sanded them all flush and redid them with a beading tool. This is the first time I've tried AK Interactive "Engine Oil" for the streaking on the belly. I'm quite pleased with how it turned out: The other must-do on this kit is to thin the wing trailing edges which were almost 1mm thick with the flaps raised. Elbow grease plus 400 grit wet & dry sandpaper sorted it out. Gunze Mr. Color 23 Dark Green and Tamiya XF82 Ocean Grey over Tamiya XF83 Med. Sea Grey. I used Montex Masks for the main markings and the kit decals for the stencils. Both products were excellent. Other minor tweaks included, sanding the propeller blades thinner, adding Master brass canon barrels, replacing the radiator outlet flap with 0.010" styrene, drilling out the exhaust stubs and fabricating the little scoop on the top of the engine cowl from sheet aluminum. Cheers, Tony Bell1 point
-
My "Last Of the Year" build is Finished, Thanks all, a Hapy new Year... here goes my 1/72 Meng Models G-91R Ginah WIP here: http://kitmaniac.com...g-91y-finished/ Hope you enjoy Cheers1 point
-
This was a (relatively) quick build for me. It had been a while since I managed to get something into the display cabinet, so I deliberately kept the extras to a minimum. It was an enjoyable build; enough detail that I didn't feel the need for heaps of aftermarket, but with sufficient minor challenges to keep me on my modelling toes. Some things that I did, over & above OOB: - Before anything else, I gave the fuselage & wings a heavy coat of Alclad "Black Primer and Microfiller" and sanded it back to the bare plastic in order to smooth the slightly rough surface texture and render the panel lines somewhat finer. - Sanded down the stretched fabric effect on the rudder and elevators to tone it down a bit. - Drilled the engine cowl Dzus fasteners out, plugged the holes with stretched sprue, sanded them all flush and redid them with a beading tool. - Replaced the kit canon barrels with Master turned brass barrels. - Replaced the kit wheels with Tamiya wheels from the spares box and added the gear locking rod from brass wire. - Sanded the prop blades thinner, filled and rescribed the spinner panel line. - Sanded the wing/aileron trailing edges (much) thinner - Drilled out the exhaust stubs - Replaced the pitot tube with steel hypo tubing - Pinned the antenna mast with steel wire for strength - Scribed the circular access hatch at the front of the port engine bulge. - Radiator outlet flap replaced with 0.010" styrene - Fabricated the little scoop on top of the engine cowl from aluminum sheet. - Filled and rescribed the panel lines around the tail wheel (the kit panel lines represent the non-retractable tail wheel) Paints were Gunze Mr. Color 23 Dark Green and Tamiya XF82 Ocean Grey over Tamiya XF83 Med. Sea Grey. I used Montex Masks for the main markings and the kit decals for the stencils. I kept the weathering understated, with MiG Neutral Wash in the panel lines around the engine, some airbrushed grey-brown grime here & there, and paint chipping using a Prismacolor silver coloured pencil. The exhausts were painted flat black, dusted with several shades of brown chalk pastel dust and airbrushed with heavily thinned tan for the lead deposits. Anyway, on to the pictures: Constructive criticism and questions are most welcome. Cheers, Tony1 point
-
Here's one from earlier, Trumpeter's 1/72nd F100C, complete with kit squadron markings, and Xtradecal decs for national markings, had to 'cos kit dec's were wrong blue... Very nice kit, easy to assemble, looks the part. First natural metal finish in ages, used alclad...... Hope you like..... Dave1 point
-
Well FINALLY finished the Sturmovik! In the end I was rushing as I was losing the interest and just wanted it off the bench! Basically a trial for a selection of Vallejo paints which i now love They seemed to go on so much easier... Anyway, other than modifiying the exhausts, padding out cockpit with seats, and seatbelts, and drilling out vents near prop, I updated the underside vent to make it look a little more realistic, scratch built undercarriage doors as OOB ones were diabolical, and used a bit of stretched sprue for aerial for first time(not very well by the looks of it!). Canopy was the only thing that I lost the will with, and `almost` ruined it, but managed to salvage it okay and it turned out fine in the end. Decided to go for a random colour scheme so probably not historically accurate , but hey ho.1 point
-
Another 1/144 entry! I don't know how you guys build these little things!! Dave1 point
-
That naked lady?! Filth, I tell you... Nothing more than base pornography, aimed at titillating the jaded predilections of shed-bound modellers world wide... Harrumph... Objectification of the female form... Acres of flesh... 1/32 scale Lancaster... Whine...1 point
-
1 point
-
Love it dude, also I love the hud in it!! Very cool. I got two of these to make myself actually haven't got a clue as to what tho yet. Impressive paint work too. Kind Regards, Dazz1 point
-
What you may find helpful is the recent Early Post-War British Airliners magazine published in the Aeroplane Collection Archive series and available for £7.95 at your local branch of W H Smiths. 3 pages on the Avro XIX, including a view down the cabin of what looks like the first prototype G-AGPG (conversion from Anson XII), a view in through the side door and a view of the flight deck. All are good clear shots. No cutaway unfortunately. Other types covered are Lancastrian, Stirling, York, Dove, Marathon, Hermes, Heron, Concordia, Brabazon, Viking, Halton, Consul, Tudor, Bristol Freighter and Ambassador.1 point
-
1 point
-
Describing models finished with cockpit decals as "desktop models" (post 13) sounds to me like knocking. This whole discussion is a can of worms better left closed. You like cockpit transparencies, I like decals. Let's agree to differ but please don't insult my work by references to "desktop models" "travel agents' models" or the like. Some modern cockpit decals can give a more convincing result than actual transparencies - check this out if you don't believe me: http://www.authentic-airliners.de/accessories/1 point
-
Very neat build indeed! And as you say, the scheme is interesting. Good work! Kind regards, Joachim1 point
-
Let's Cut to the Chase, In The End you don't get Something for Nothing and there may be Tears, but I'm no Fly By Night poster and I'm doing the Best I Can, so if everyone's In the Mood, let's try and bring this thread Closer to the Heart of the original topic. And please no Witch Hunt, even if The Enemy Within sometimes lack Grace Under Pressure.1 point
-
Cristmas pppffft. i thought "two weeks off, excellent, all that free time to get some serious moddeling done" what got done - diddly squat!!! cheers swmbo1 point
-
1 point
-
Monty, Monty, Monty... Anymore and we'll have the Full Monty!... WAG's get your tickets now!! I posted in Monty Python's thread before you had made this thinking he was you! Same name, same preference for 1/32 and same wit! Best of luck to you both with these large scale kits, I'm sure they'll both be great.1 point
-
Another modeller who made a living out of making accurate Thunderbirds models is Martin Bower. MartinBowersModelWorld has several Century 21 models that are 100% accurate based on drawings he obtained or draughted himself from measuring the original. Having had several conversations with him about the real studio hero models, be aware that more than one model was used by the studio, several changes were made to TB2 for example. There are also several Japanese based model books on the TB's and exploded diagrams originally from the TV21 comic are easily found. This is from Amazon...Thunderbirds Manual (Agents' Technical Manual) for instance. The Japanese versions (try Hobby Link Japan) are usually far more accurate.1 point
-
Cheers! The prop is my own cheat purists may not approve of. My own view is that prop laminations are not always visible on old photos, B/W film plays tricks and different dyes and stains were used and some props were- shock- painted! So; 1. coat of a sandy buff colour of your choice. 2. future. 3. A small dollop of W&N acrylic oil water soluble burnt sienna on a tissue 4. dot some around sparingly. 5 dry brush it around outwards from hub with a stiff 3-4 mm brush to your satisfaction. 6. walk away. 7. walk away again. 8 .spray Gunze clear orange on it. 7 .walk away. 8. future. 9 .decal 10 .future 11 .brush paint the hub carefully with alclad steel or gunmetal- its easy and takes seconds as it dries instantly 12 .dry brush boltgun metal on the hub total job 3 nights!1 point
-
Looks nice Russ are you thinking about putting it in a diorama because if you made it so it was flying and dropping leaflets it might be the most unique diorama ever1 point
-
I like that a lot Russ, I`ve never seen that scheme on the O-2 before but it looks great, very different. I`ve got one planned to build as a Rhodesian one but I need to find some gun pods for the roof! All the best Tony O1 point
-
1 point
-
1 point
-
Yes pete it does look good in silver but who needs Red Stars when you can have XH898/GHB of 228 OCU with the 11 Squadron Eagles on the tail!!!! That will be my first before I abandon them for the Scimitar (note the subtle hint there) Richard1 point
-
1 point
-
Think I might have solved all of this............................. When I next go to the local model shop, I will have a crucifix and a string of garlic round my neck and carry a wooden stake. That way I ain't taking no poo-poo from them Trumpy Vampires. Sorted !!!1 point
-
Mate your skills are really shining. I always say if you can do it, then do it! (if you get wot I mean?). Sod the purists/rivet counters. It's your model and you can damn well do what you like to it. Keep 'em coming pal.1 point
-
I've used the scrap plastic on the inside and the tape on the outside methods. My favourite technique these days is to roll up a snake of Milliput, push it through the windows from behind and trim it flush with the outside with a hobby knife. It's fairly quick, simple, and needs minimal cleanup, since a wet finger smooths it down easily1 point
-
1/72 Zvezda Bf109F with Xtradecal markings Lt Hermann Neuhoff, III/JG53, Sicily, March 1942 build thread1 point
-
Not as many as usual, they all took quite a while this year. All 1/48th First up - Tarangus's much anticipated Lansen. Started in Jan, finished in August! Next Aeroclub's Demonic 'awker. A lovely model. With Pheon's excellent decals. Continuing the theme...a slightly bigger, noisier and faster Demon from Hobbyboss, using Furball's lovely decal sheet The final completed one for the year, with a sting in the tail. Classic Airframes Sea Hornet with the fuselage lengthened and the wheel wells moved to the correct location. All good fun. Cheers Jonners1 point
-
1 point
-
1 point
-
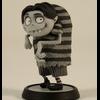
These are my modelling highlights of the year, not nearly as much done as I had hoped but family, a boat and a full time job severely limit my time building. However, scored a few firsts, rivetting, figure painting (to a reasonable standard anyway), plus some others I've forgotten! 1. Actually built latter half of 2011 but finished in Jan 2012. Tamiya 1/32 P-51D. I was chuffed with it despite the absolute slagging it recieved at SMW because of the weathered wings and un-filled rivets but I had depicted it at the height of the Battle of the Bulge while stationed at a very groggy forward operating base, but hey ho. An intense build, not great fun as it was my first major NMF build, plus it was for a mag, so more pressure. 2. I painted a figure for it, looks nothing like Meyer but beautifully sculpted and cast byUltra-cast. 3. A work job, 1/20 scale BA A319 in a special Olympics scheme, "The Dove". 4. Tamiya 1/48 Fw190A-8, Aires pit and U/C bay, also rivetted it. Really enjoyed building this one, lots of fun and hopefully the sort of model I'll build from now on, not insane detailing, just fun and built relatively quickly. Actually built for the Fw190 Group build here on BM, another first. 5. A set of Frankenweenies, prototypes for a toy company another interesting work job. I didn't paint the dogs, but I did the rest, Edgar the hunchback is my favourite incase you hadn't guessed by my avatar! 6. 1/32 Cybermodeller Bf109E-4 in Adolf Gallands markings. Pretty much OOB plus I rivetted it. My goals this coming year are to concentrate on avoiding spending too much time getting bogged down with detailing and concentrate on building models more akin to my 1/48 Fw190 rather than the massive projects that were the 1/32 P-51 and 109. That way I can consolidate my finishing experience which for me personally is the most interesting and crucial part. Cheers all and a happy new year.1 point
-
The reaction would probably be something like... "Jeez, a cockpit". Most kits I made from the 70's (Airfix 72nd) had just the pilot sitting on a peg.1 point
-
I wasn't even aware that we're required to sign our name after each comment. Not something I've come across on other sites and that's the first I've heard of it on here seeing as our names are on the top of the comment anyway ????? Anyway it's easy to think people are being racist when they start talking about Chinese companies copying things but I don't think most people are being racist. As I've said Chinese companies do copy some things and there's no doubt about that and there's not always anything wrong with that seeing as they have to get their references from somewhere. As long as what they get references from are accurate I don't really care and I also don't care where the kits are made as long as they're good either. Sea Venom1 point
-
The problem is chaps, that if a manufacturer has "Previous" for releasing models that are suspect shape-wise, then its not surprising modellers tend to look for them in new releases, or pics thereof. There is a very simple solution to this for manufacturers - do you R&D properly and get the shapes right. I believe its whats called learning from your mistakes. GWH did with their late P-61 releases - and kudos to them for that. Kittyhawk look like they are doing proper R&D anyway - so there's real hope there ( USN fans will be very happy...) I agree its not the best way to do it - we should wait till we have plastic in hand, but one has to live in the world where we are, not an idealised one. Trumpeter and HobbyBoss do get it in the neck from the "Chicoms copy everything" crowd, but to my mind thats more a case of socio-political/economic jealousy and anger ( thats a polite metaphor for racism BTW) The bottom line is - if you do shoddy research and release a model thats "out" shape wise - a certain section of your customer base will not be pleased, and wont mind saying so. Alas, what's plainly obvious is that Trumpeter don't care in the least. I guess the majority of buyers are not that concerned and/or knowledgable. I hope its OK when it hits the shelves - but I think the photo shows you what you'll get: so its out with the saw and sanding sticks again, if you dont want to spend the cash on Ali's excellent resin. Cheers Jonners1 point
This leaderboard is set to London/GMT+01:00






.thumb.jpg.d17ff607fc7e89ed057e63fcb6f2a888.jpg)
